
RDX L4-2.3L Turbo (2008)
Crankshaft: Service and Repair
Crankshaft Installation
Crankshaft Installation
Special Tools Required
^
Driver 07749-0010000
^
Oil seal driver attachment, 96 mm 07ZAD-PNAA100
1. Check the connecting rod bearing clearance with plastigage.
2. Check the main bearing clearance with plastigage.
3. Install the bearing halves in the engine block and connecting rods.
4. Apply a coat of new engine oil to the main bearings and rod bearings.
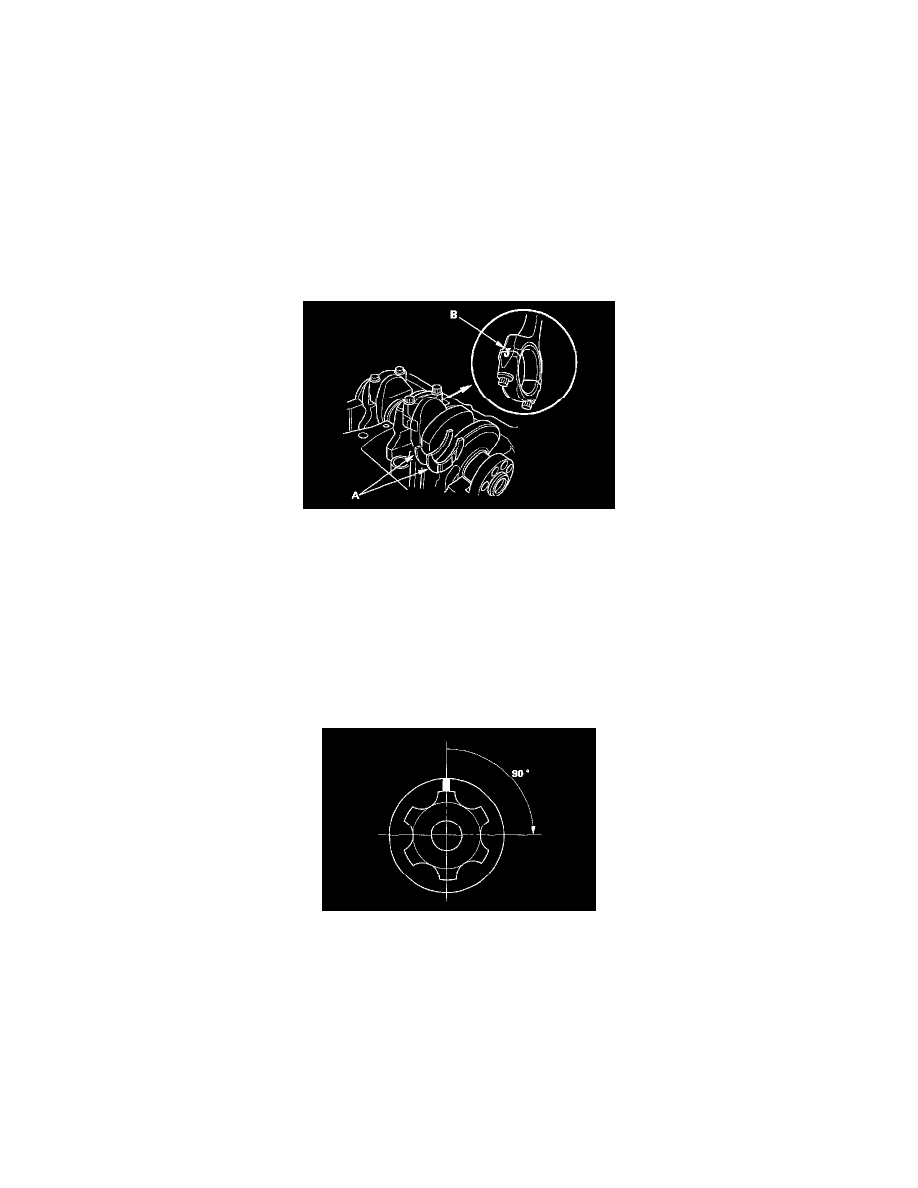
5. Hold the crankshaft so that rod journal No. 2 and rod journal No. 3 are straight up, and lower the crankshaft into the block.
6. Apply new engine oil to the thrust washer surfaces. Install the thrust washers (A) in the No. 4 journal of the engine block.
7. Inspect the connecting rod bolts.
8. Apply engine oil to the threads of the connecting rod bolts.
9. Seat the rod journals into connecting rod No. 1 and connecting rod No. 4. Line up the mark (B) on the connecting rod and cap, then install the caps
and bolts finger-tight.
10. Seat the journals into connecting rod No. 2 and connecting rod No. 3. Line up the mark on the connecting rod and cap, then install the caps and
bolts finger-tight.
11. Tighten the connecting rod bolts to 29 N-m (3.0 kgf-m, 22 lbf-ft).
12. Tighten the connecting rod bolts an additional 90°
NOTE: Remove the connecting rod bolt if you tightened it beyond the specified angle, and go back to step 7 of the procedure. Do not loosen it
back to the specified angle.
13. Remove all of the old liquid gasket from the lower block mating surfaces, bolts, and bolt holes.
14. Clean, and dry the lower block mating surfaces.
15. Apply liquid gasket, P/N 08717-0004, 08718-0001, 08718-0003, or 08718-0009, evenly to the engine block mating surface of the lower block.
Install the component within 5 minutes of applying the liquid gasket.
NOTE:
^
If you apply liquid gasket P/N 08718-0012, the component must be installed within 4 minutes.
^
If too much time has passed after applying the liquid gasket, remove the old liquid gasket and residue, then reapply new liquid gasket.