
RDX AWD L4-2.3L Turbo (2010)
Evaporative Check Valve: Service and Repair
Non-return Valve A/B Inspection/Replacement
Special Tools Required
-
Vacuum Pump/Gauge, 0-30 inHg Snap-on YA4000A or equivalent, commercially available
Inspection
1. Remove the non-return valve.
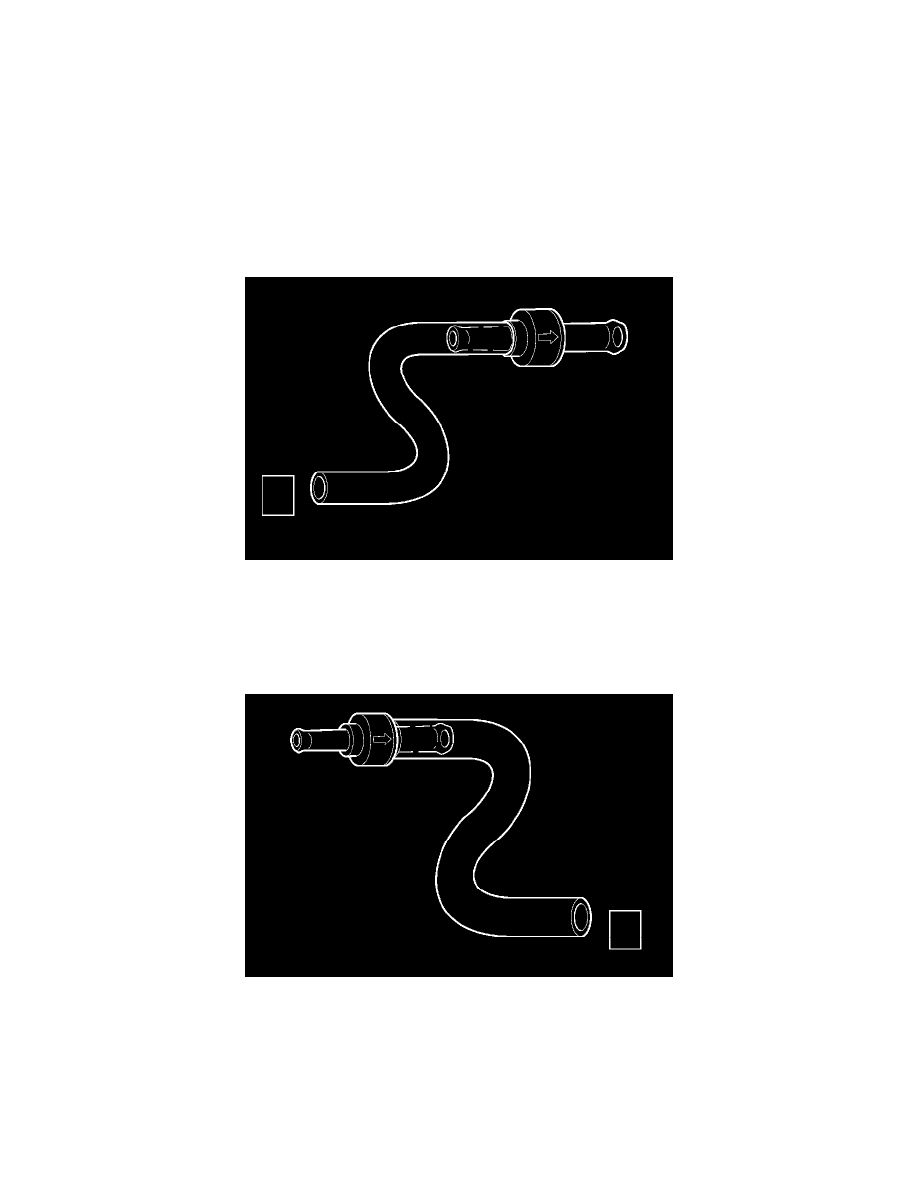
2. Connect the vacuum pump/gauge, 0-30 inHg, to the non-return valve as shown. Note the direction of the arrow on the valve.
3. Apply vacuum to the valve.
-
If it holds vacuum, go to step 4.
-
If it does not hold the vacuum, replace the non-return valve.
4. Connect the vacuum pump/gauge, 0-30 inHg, to the non-return valve as shown. Note the direction of the arrow on the valve.
5. Apply vacuum to the valve.
-
If it holds vacuum, replace the non-return valve.
-
If it does not hold the vacuum, the non-return valve is OK.
Non-Return Valve A Replacement
1. Remove the charge air cooler cover See: Fuel Delivery and Air Induction/Turbocharger/Intercooler/Service and Repair.