
RDX AWD L4-2.3L Turbo (2010)
-
If the side airbag lid is secured with tape, remove the tape.
-
Do not open the lid of the side airbag cover.
-
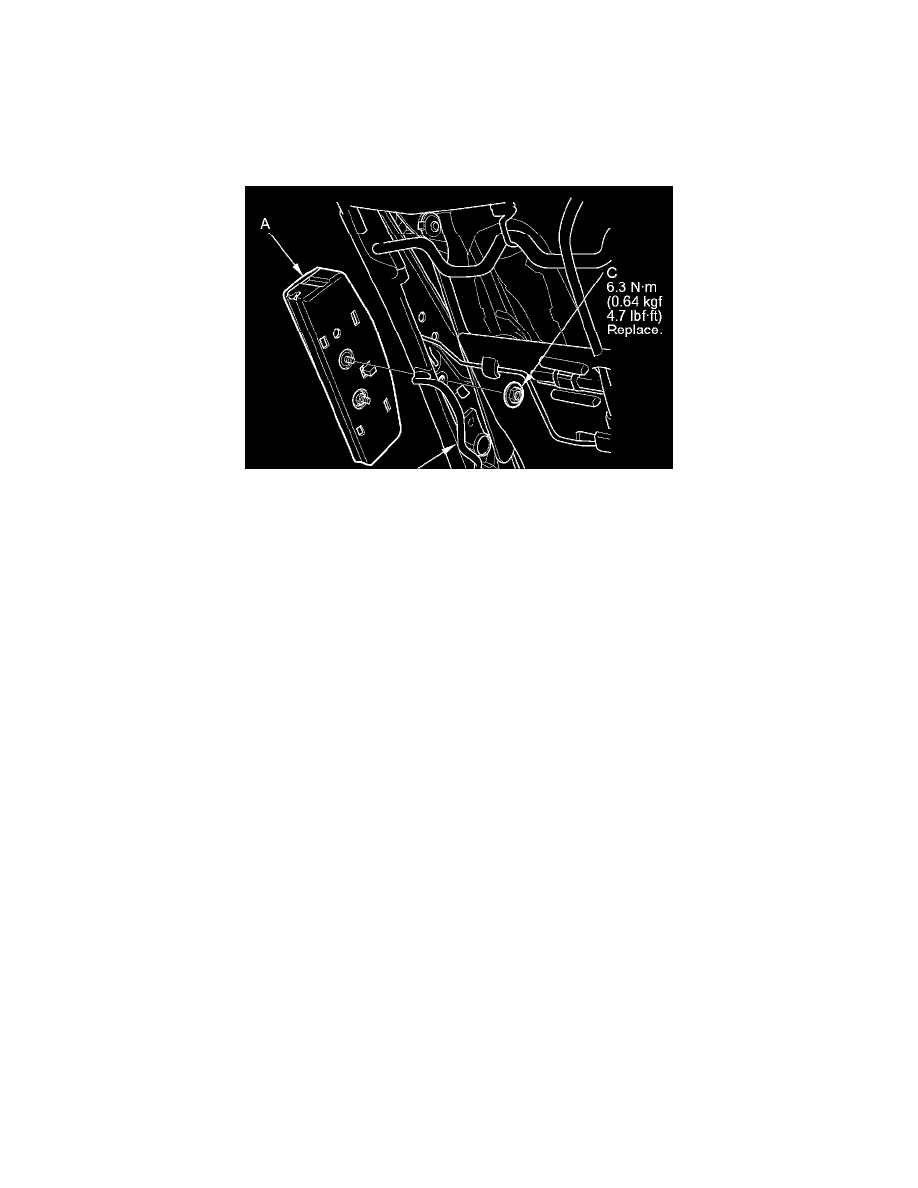
Use new mounting nut tightened to the specified torque.
-
Make sure that the seat-back cover/pad is installed properly. Improper installation may prevent proper deployment.
-
Be sure to install the harness so that it is not pinched or interfering with other parts.
1. Place the side airbag (A) on the seat-back frame (B). Tighten the side airbag mounting nut (C).
2. Install the seat-back cover in the reverse order of removal See: Body and Frame/Seats/Seat Cover/Service and Repair/Front Seat-back Cover/Pad
Replacement.
3. Install the front seat See: Body and Frame/Seats/Service and Repair/Front Seat Removal/Installation, then connect the SRS wire harness 2P
connector.
4. Do the battery terminal reconnection procedure See: Starting and Charging/Battery/Service and Repair/Procedures.
5. Clear any DTCs with the HDS See: Testing and Inspection/Reading and Clearing Diagnostic Trouble Codes.
6. Move the front seat and the seat-back through their full ranges of movement, making sure the harness are not pinched or interfering with other
parts.
7. After installing the side airbag, confirm proper system operation: Turn the ignition switch to ON (II), and check that the SRS indicator comes on
for about 6 seconds and then go off.