
RL V6-3.5L (2007)
Control Arm: Service and Repair
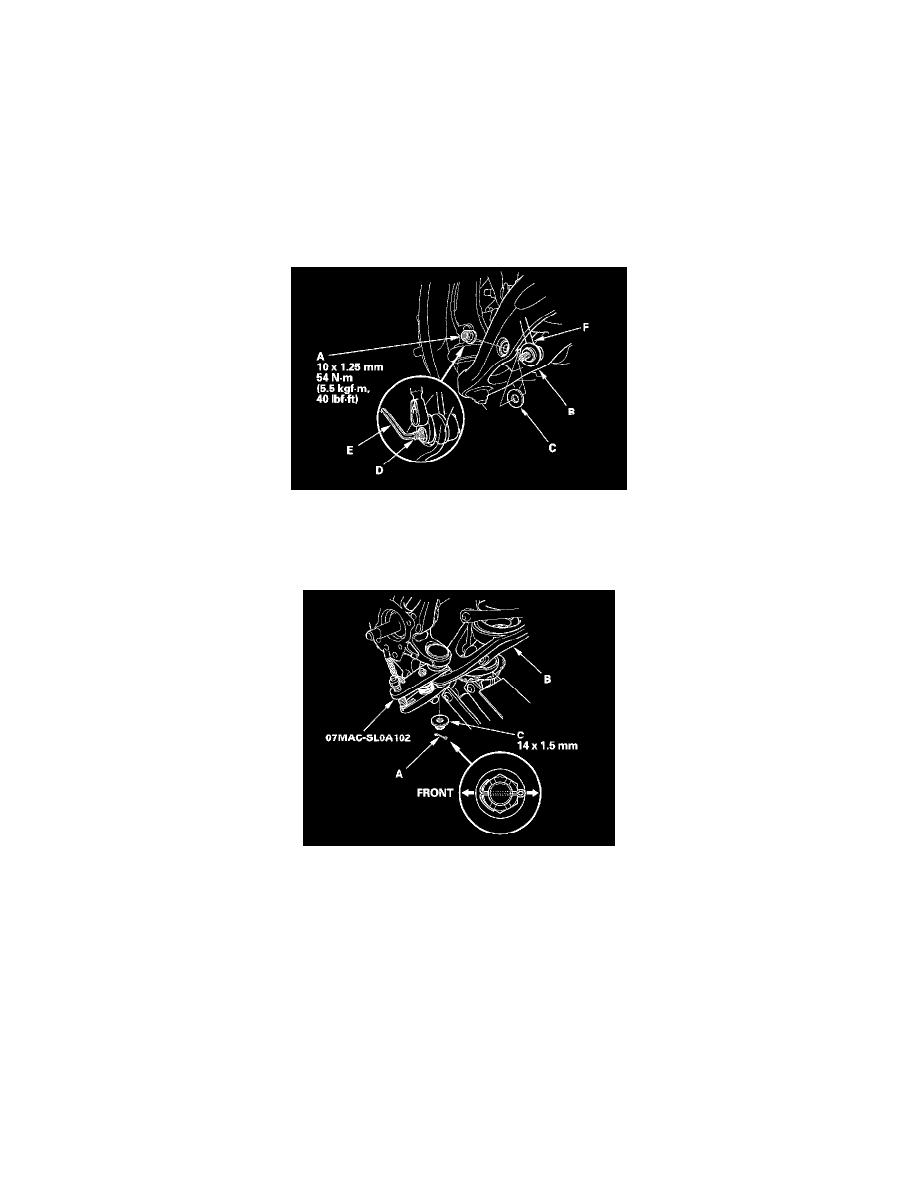
Lower Arm B Removal & Installation
Lower Arm B Removal and Installation
Special Tools Required
Ball joint remover, 32 mm 07MAC-SL0A102
Removal
1. Raise the rear of the vehicle, and support it with safety stands in the proper locations.
2. Remove the rear wheel.
3. Remove the self-locking nut (A) and the washer (C) while holding the joint pin (D) with a hex wrench (E), and disconnect the stabilizer link (F)
from lower arm B.
4. Place a floor jack at the connecting point of lower arm B and the stabilizer link.
5. Remove the cotter pin (A) from the lower arm B ball joint, and loosen the nut (C).
NOTE: During installation, insert the new cotter pin into the ball joint pin hole from the rear to the front of vehicle, and bend its end as shown.
6. Disconnect the lower arm ball joint from the knuckle using the special tool.
7. Lower the floor jack gradually.
8. Remove the spring (A), spring mounting cushion (C), and lower spring seat (D).