RL V6-3.7L (2009)

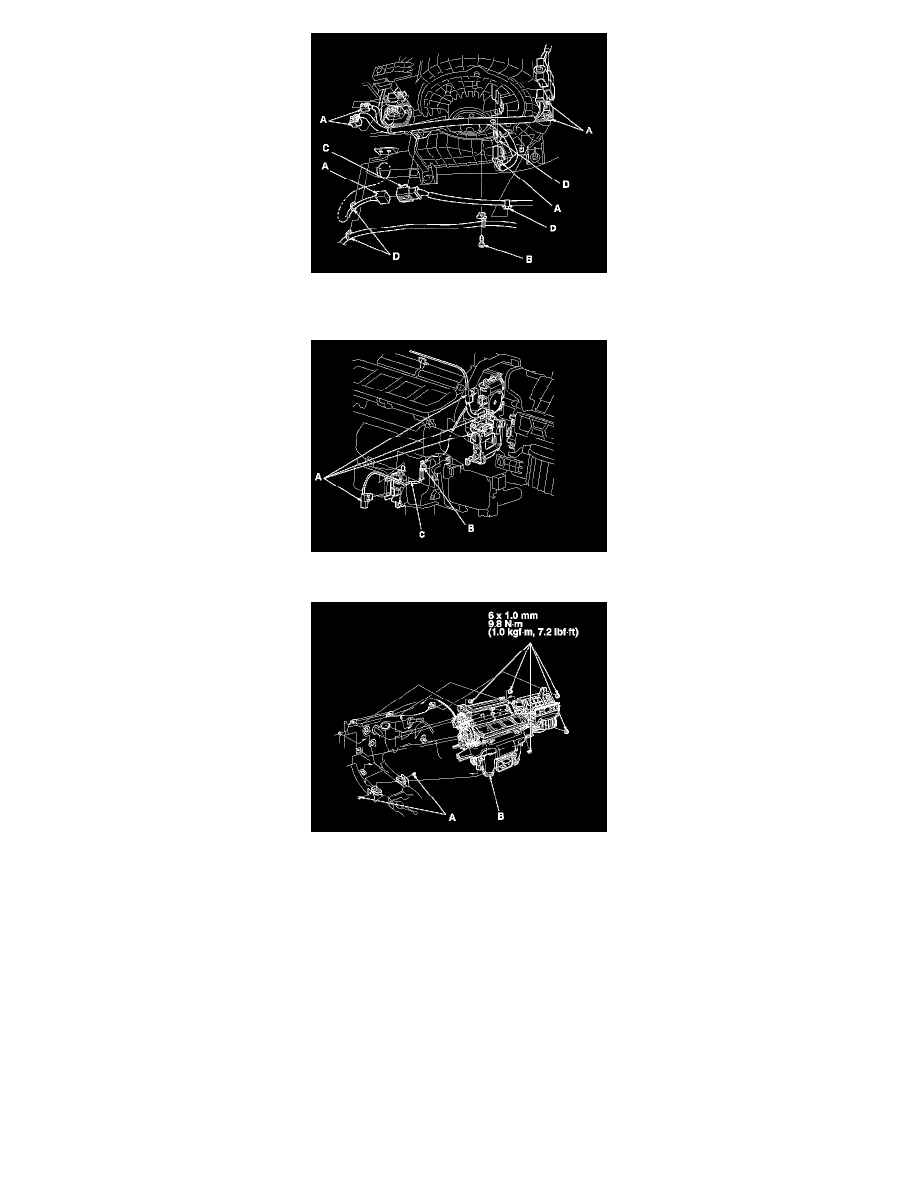
11. Disconnect the connectors (A) from the recirculation control motor, the passenger's cool vent control motor, the passenger's air mix control motor,
and the rear vent control motor, and then remove the wire harness clip (B) and the wire harness (C).
12. Remove the clips (A), the mounting nuts, and the blower-heater unit (B).
13. Remove the self-tapping screws and the passenger's heater duct (A), then remove the expansion valve cover (B), the bolts, and the expansion valve
(C). Remove the self-tapping screws, the joint duct (D), and the heater core cover (E). Remove the self-tapping screws, the heater pipe brackets
(F), and the grommets (G), then carefully pull out the heater core (H).
14. Install the heater core and the evaporator core in the reverse order of removal.
15. Install the heater unit in the reverse order of removal, and note these items:
-
Do not interchange the inlet and the outlet heater hoses, and install the hose clamps securely.
-
Refill the cooling system with engine coolant. See: Engine, Cooling and Exhaust/Cooling System/Coolant/Service and Repair
-
Adjust the heater valve cable. See: Heater Control Valve/Heater Control Valve Cable/Adjustments
-
Make sure that there is no coolant leakage.
-
Make sure that there is no air leakage.
