
RSX L4-2.0L (2005)
Trim Panel: Service and Repair
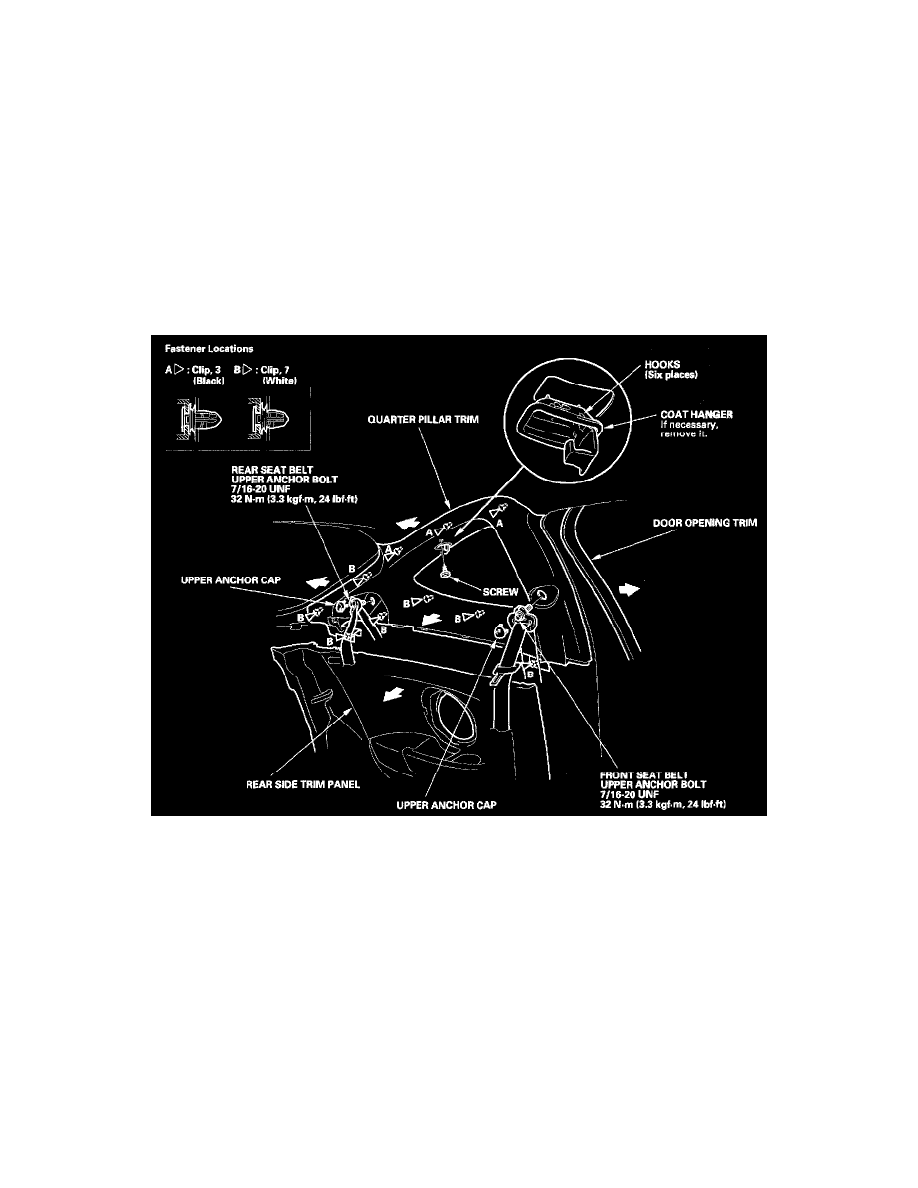
Trim Removal/Installation - Quarter Pillar Area
Trim Removal/Installation - Quarter Pillar Area
Special Tools Required
KTC trim tool set SOJATP2014
NOTE:
-
Put on gloves to protect your hands.
-
Use the appropriate tool from the KTC trim tool set to avoid damage when prying components.
-
Take care not to bend or scratch the trim and panels.
1. Remove the trim as shown:
-
To remove the quarter pillar trim, remove the upper portion of the rear side trim panel as necessary.
-
To remove the right quarter pillar trim, disconnect the cargo area light connector.
2. Install the trim in the reverse order of removal, and note these items:
-
Replace any damaged or stress-whitenings clips.
-
Apply liquid thread lock to the anchor bolts before installation.
-
When installing the rear side trim panel, make sure there are no pinches in the belt.
-
Before installing the anchor bolts, make sure there are no twists or kinks in the belts.
-
Push the clips into place securely.