
RSX L4-2.0L (2005)
Trim Panel: Service and Repair
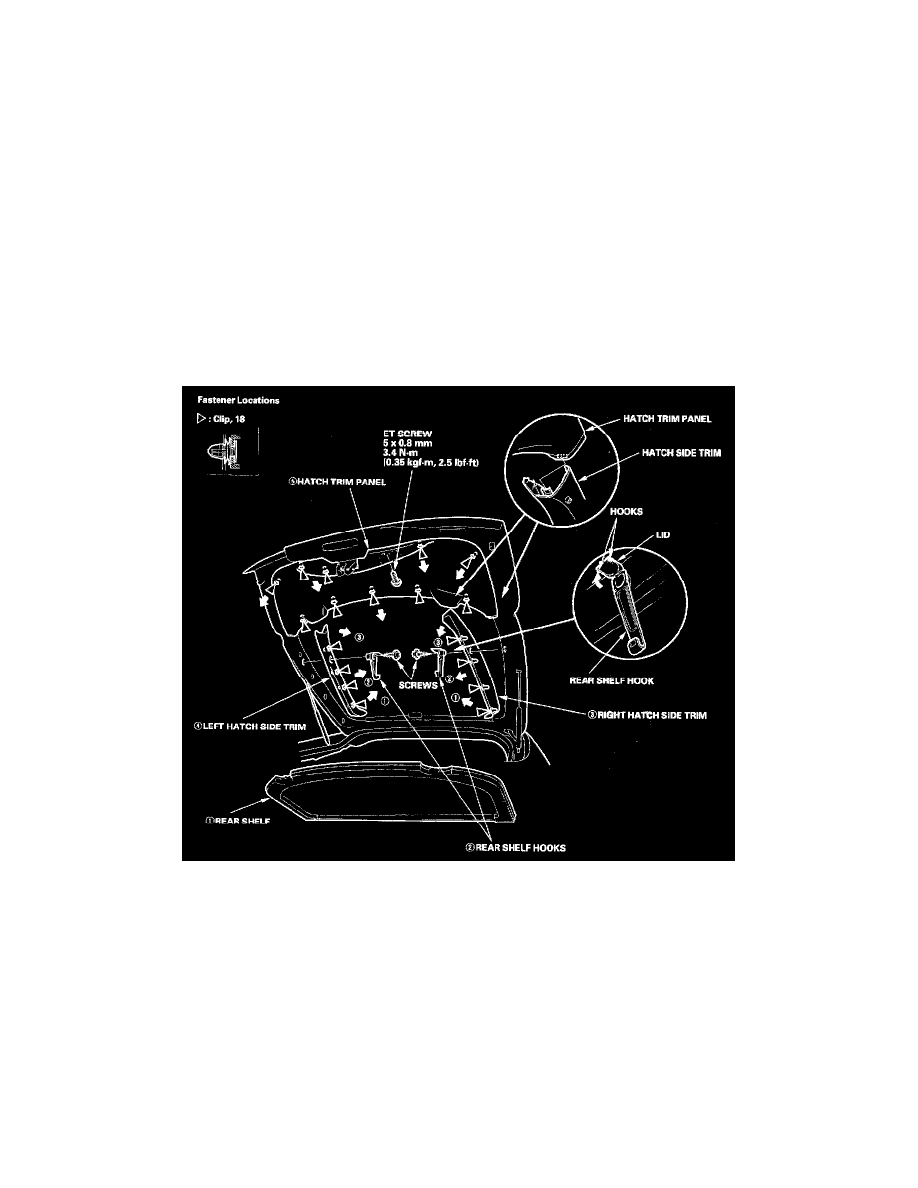
Trim Removal/Installation - Hatch Area
Trim Removal/Installation - Hatch Area
Special Tools Required
KTC trim tool set SOJATP2014
NOTE:
-
Put on gloves to protect your hands.
-
Use the appropriate tool from the KTC trim tool set to avoid damage when prying components.
-
Take care not to bend or scratch the trim and panels.
1. Remove the trim in the sequence shown:
-
Rear shelf
-
Rear shelf hooks
-
Right hatch side trim
-
Left hatch side trim
-
Hatch trim panel
2. Install the trim in the reverse order of removal, and note these items:
-
Replace any damaged or stress-whitenings clips,
-
If the threads on a pull pocket screw are worn out, use an oversized self-tapping ET screw (P/N 90137-S2G-003) made specifically for this
application.
-
Push the clips into place securely.