
RSX L4-2.0L (2005)
Oil Pan: Service and Repair
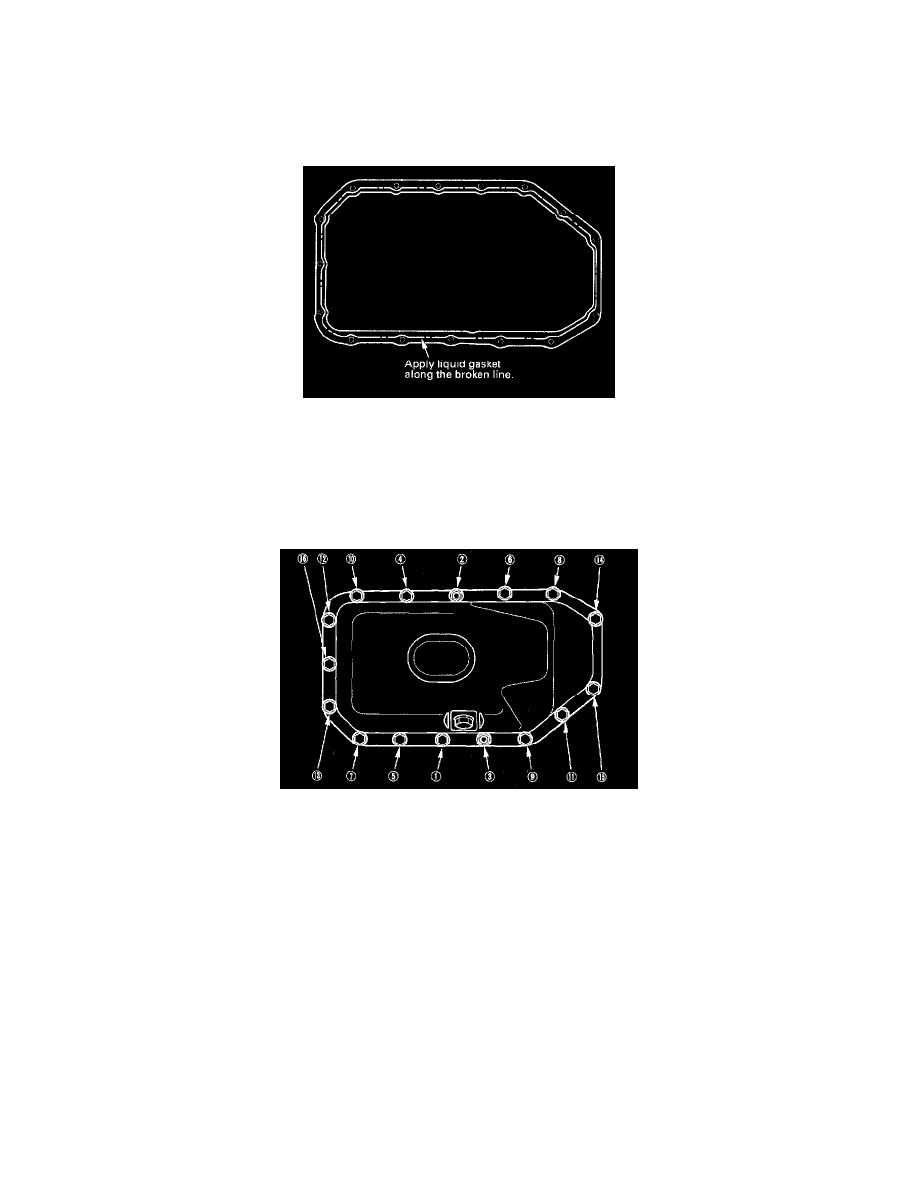
Oil Pan Installation
Oil Pan Installation
K20A3 Engine
1. Remove all of the old liquid gasket from the oil pan mating surfaces, bolts, and bolt holes.
2. Clean and dry the oil pan mating surfaces.
3. Apply liquid gasket, P/N 08718-0001 or 08718-0009, evenly to the engine block mating surface of the oil pan and to the inner threads of the bolt
holes.
NOTE: Do not install the parts if 4 minutes or more have elapsed since applying liquid gasket. Instead, reapply liquid gasket after removing the
old residue.
4. Install the oil pan.
5. Tighten the bolts in two or three steps. In the final step, tighten all bolts in sequence to 12 Nm (1.2 kgf-cm, 8.7 ft. lbs.). Wipe off the excess liquid
gasket on the each side of crankshaft pulley and flywheel/drive plate.
NOTE:
^
Wait at least 30 minutes before filling the engine with oil.
^
Do not run the engine for at least 3 hours after installing the oil pan.
6. If the engine is still in the vehicle, install the subframe.
^
1 Install the subframe. Align the reference lines on the subframe with the bolt head center, then tighten the bolts.
^
2 Install the automatic transmission (ATF) filter mounting bolt.
^
3 Tighten the rear mount mounting bolts.
^
4 Tighten the new front mount mounting bolt.
^
5 Connect the suspension lower arm ball joints.
K20A2, K20Z1 Engines
1. Remove all of the old liquid gasket from the oil pan mating surfaces, bolts, and bolt holes.
2. Clean and dry the oil pan mating surfaces.