
RSX L4-2.0L (2005)
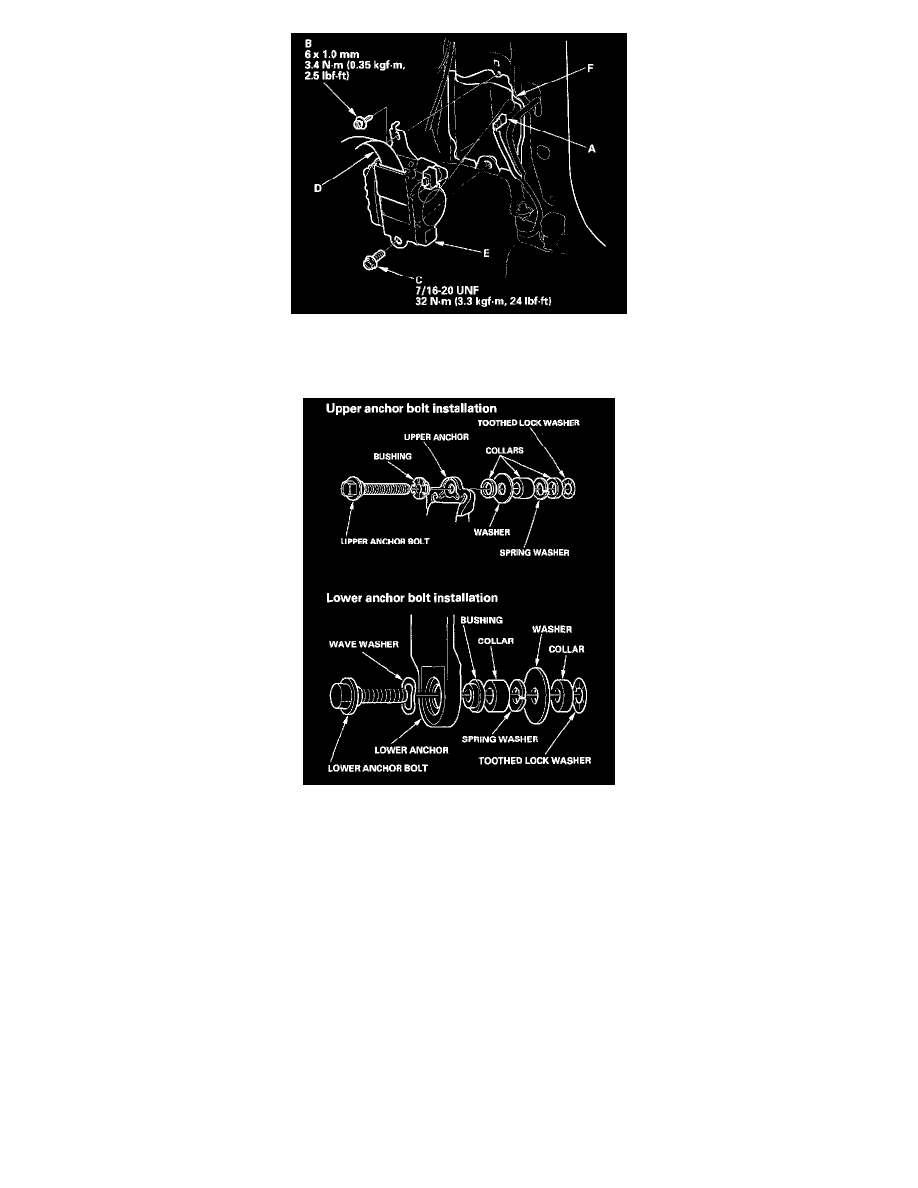
7. Disconnect the seat belt tensioner connector (A) Remove the retractor mounting self-tapping ET screw (B) and the retractor bolt (C), then remove
the front seat belt (D) and retractor (E).
8. If necessary, remove the front seat belt protector (F).
9. Install the belt in the reverse order of removal, and note these items:
-
If the threads on the retractor mounting self-tapping ET screw are worn out, use an oversized self-tapping ET screw (P/N 90133-SZ4-0030)
made specifically for this application.
-
Apply liquid thread lock to the anchor bolts before reinstallation.
-
Check that the retractor locking mechanism functions.
-
Assemble the washers, collars, and bushings on the upper and lower anchor bolts as shown.
-
If the seat belt tensioner has been activated, replace the front seat belt protector with a new one.
-
Before installing the anchor bolts, make sure there are no twists or kinks in the seat belt.
-
Make sure the seat belt tensioner connector is plugged in properly.
-
Reconnect the negative cable to the battery.
-
Enter the anti-theft code for the radio, and then enter the customer's radio station presets.
-
Reset the clock.
-
Do the ECM idle learn procedure and the power window control unit reset procedure.
Seat Belt Buckle
1. Make sure you have the anti-theft code for the radio, and then write down the frequencies for the preset buttons.
2. Disconnect the negative cable from the battery, and wait at least 3 minutes before beginning work.
3. Remove the front seat.
4. On the passenger's seat with BOSE sound system, remove the front stereo amplifier.