
TL V6-3.5L (2007)
Axle Shaft Assembly: Removal and Replacement
Driveshaft Installation
Driveshaft Installation
NOTE: Before starting installation, make sure the mating surfaces of the joint and the splined section are not dusty or dirty.
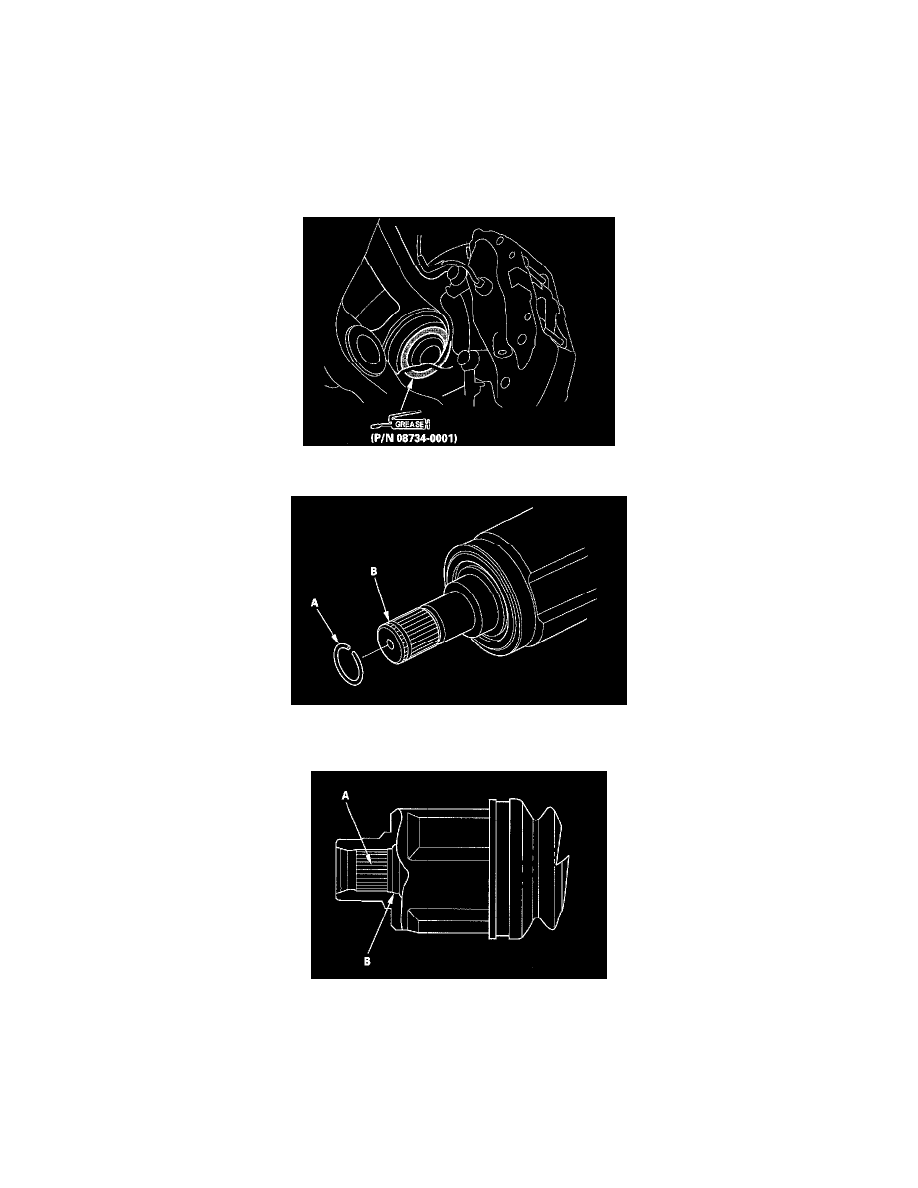
1. Apply about 5 g (0.18 oz) of moly 60 paste (P/N 08734-0001) to the contact area of the outboard joint and the front wheel bearing.
NOTE: The paste helps to prevent noise and vibration.
2. Install a new set ring (A) onto the set ring groove (B) of the left driveshaft.
3. Apply 0.5-1.0 g (0.02-0.04 oz) of grease to the whole splined surface (A) of the right driveshaft. After applying grease, remove the grease from the
splined grooves at intervals of 2-3 splines and from the set ring groove (B) so that air can bleed from the intermediate shaft.
4. Clean the areas where the driveshaft contacts the differential thoroughly with solvent or brake cleaner, and dry with compressed air.
NOTE: Do not wash the rubber parts with solvent.
5. Insert the inboard end (A) of the driveshaft into the differential (B) or intermediate shaft (C) until the set ring (D) locks in the groove (E).
NOTE: Insert the driveshaft horizontally to prevent damaging the differential oil seal.