
TL FWD V6-3.5L (2009)
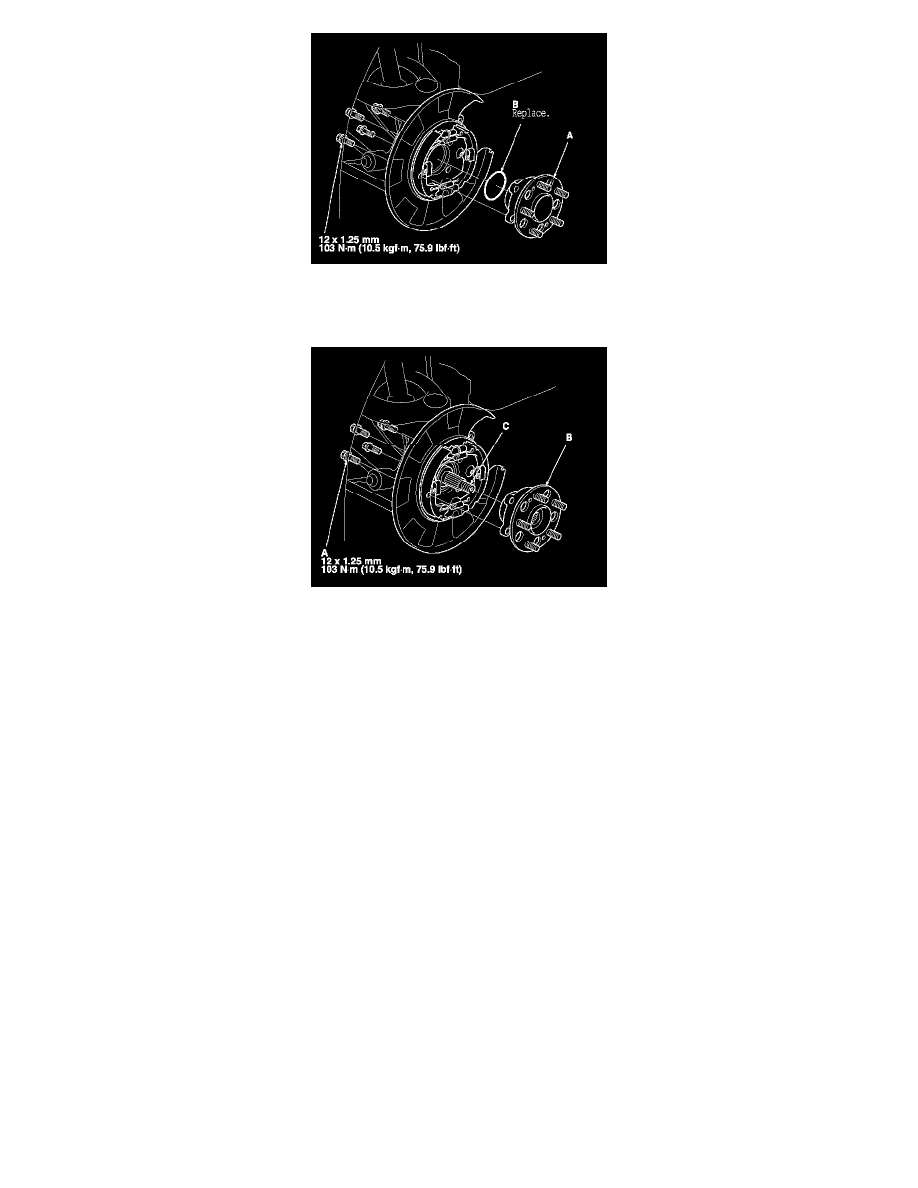
10. With SH-AWD: Remove the flange bolts (A), and remove the hub bearing unit (B) by tapping the driveshaft end (C) with a soft face hammer
while drawing the hub bearing unit outward.
NOTE: Do not pull the driveshaft end outward. The driveshaft inboard joint may come apart.
11. Check the hub bearing unit for damage and cracks.
12. Install the hub bearing unit in the reverse order of removal, and note these items:
-
Without SH-AWD: Use a new O-ring on reassembly.
-
With SH-AWD: Use a new spindle nut on reassembly.
-
With SH-AWD: Before installing the spindle nut, apply a small amount of engine oil to the seating surface of the nut. After tightening, use a
drift to stake the spindle nut shoulder against the driveshaft.
-
Before installing the brake disc/drum, clean the mating surfaces of the hub bearing unit and the brake disc/drum.
-
Before installing the wheel, clean the mating surfaces of the brake disc/drum and the inside of the wheel.
13. Check the wheel alignment, and adjust it if necessary. See: Alignment/Service and Repair
Knuckle Replacement
NOTE: The illustrations show the model without SH-AWD; the model with SH-AWD is similar.
1. Remove the hub bearing unit.
2. Remove the parking brake shoes, and disconnect the parking brake cable from the parking brake lever. See: Brakes and Traction Control/Parking
Brake System/Parking Brake Shoe/Service and Repair/Removal and Replacement
3. Remove the parking brake cable mounting nuts (A) from the backing plate (B), and remove the parking brake cable (C).
4. Remove the backing plate with the parking brake shoe assembly.