TSX L4-2.4L (2005)

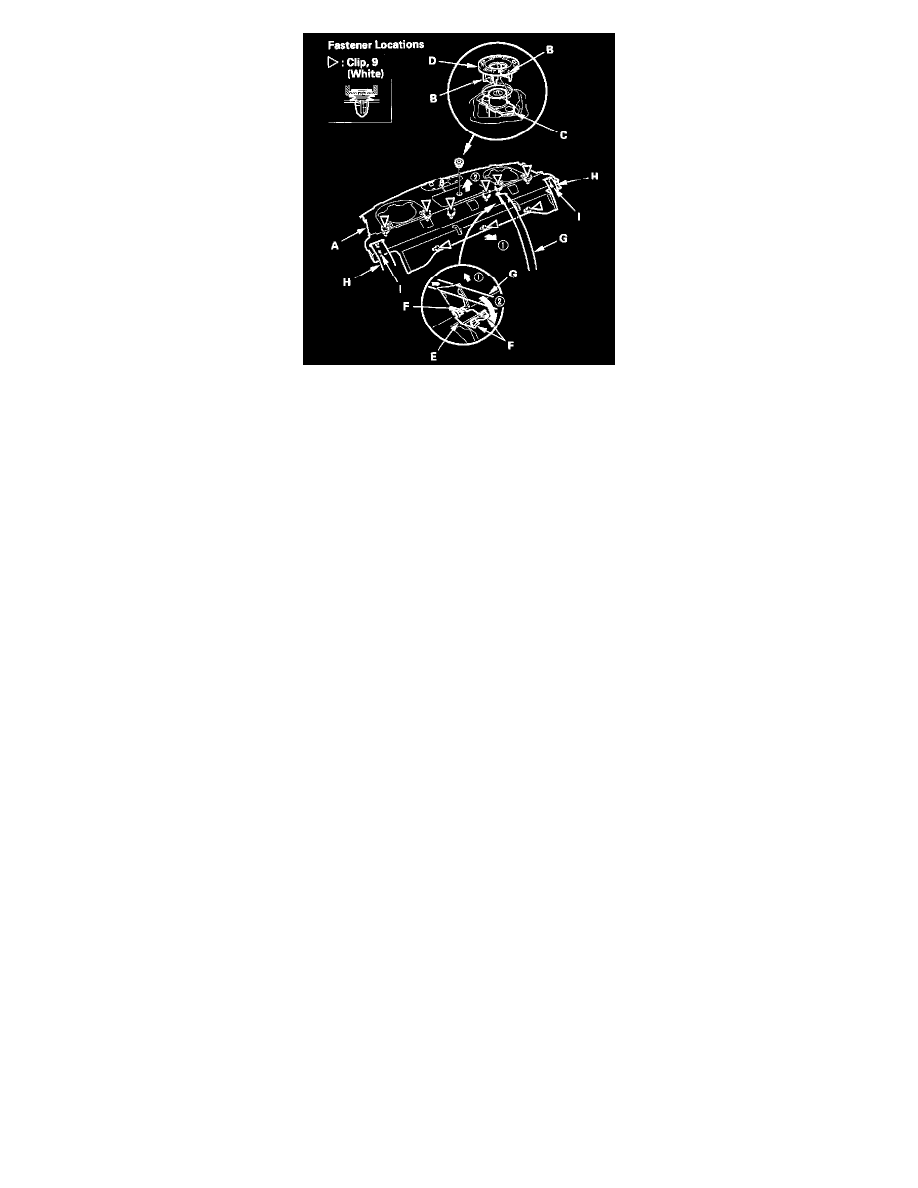
4. Remove the rear shelf (A).
1. From the trunk compartment, release the hooks (B) from the rear seat-back lock cylinder (C), then remove the lock cylinder trim (D).
2. Gently pull back front edge of the rear shelf to detach the clips.
3. Lift the rear shelf to detach the clips.
4. Pull back the lid (E) to release the hooks (F), then open the lid.
5. Pull the rear center seat belt (G) out through the lid opening, and pull the rear seat belts (H) out through the slit (I) in the rear shelf.
6. Install the shelf in the reverse order of removal, and note these items:
-
Check for damaged or stress-whitened clips, and replace them with new ones.
-
When installing the rear shelf, slip the rear seat belt through the slit, and through the rear center seat belt into the lid opening in the rear shelf.
-
Push the clips and hooks into place securely.
-
Make sure the high mount brake light bulb socket is connected securely.
