
ZDX V6-3.7L (2010)
Blind Spot Module: Testing and Inspection
BSI Radar Unit Mounting Area Check
BSI Radar Unit Mounting Area Check
Required Materials:
-
Masking tape
-
Plumb line
-
Scale
Before checking:
-
Make sure the vehicle does not have aftermarket suspension.
-
Make sure all the tires are the correct size, and set their pressures to the specifications shown on the doorjamb label.
-
Make sure the fuel tank is full.
-
Remove all cargo from the vehicle except the spare tire and tool kit.
-
Park the vehicle on level ground (within 1degree). Do not do this procedure with the vehicle on a lift or with the tires on steel plates or rollers.
-
Make sure the steering wheel is pointed straight ahead, and do not turn it after parking the vehicle.
-
Shift the transmission into P, and apply the parking brake.
1. Remove the rear bumper See: Body and Frame/Bumper/Rear Bumper/Service and Repair.
2. Remove the screw, and detach the clips (A), then remove the side spacer (B).
3. Remove the BSI radar unit(s) See: Service and Repair/BSI Radar Unit Removal/Installation.
NOTE: Make sure to remove BSI radar unit when repairing body.
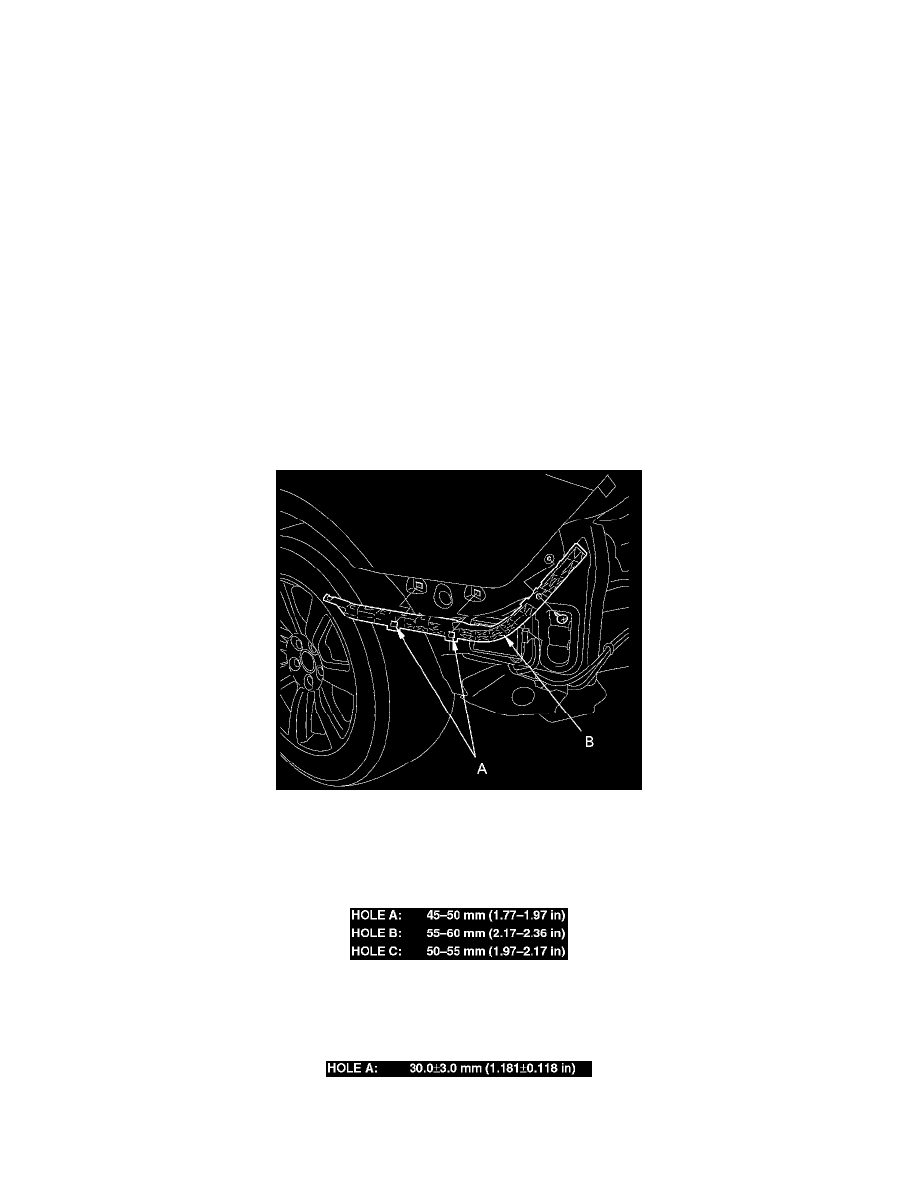
4. Install the 6 mm bolts in the appropriate BSI radar unit mounting holes.
5. Hold or tape the plumb line against the rear quarter panel directly above mounting hole A, and thread bolt in or out until the head of the bolt just
touches the plumb line.
6. Measure the distance from the head to the end of the threaded insert in the quarter panel. If needed, have a body shop adjust the body panel.