
ZDX V6-3.7L (2010)
Alternator: Removal and Replacement
Alternator Removal and Installation
Removal
1. Do the battery terminal disconnection procedure See: Battery/Service and Repair/Procedures.
2. Remove the A/C condenser fan shroud assembly See: Engine, Cooling and Exhaust/Cooling System/Radiator/Service and Repair/Radiator and
A/C Condenser Fan, Motor, and Shroud Removal and Installation.
3. Remove the drive belt See: Engine, Cooling and Exhaust/Engine/Drive Belts, Mounts, Brackets and Accessories/Drive Belt/Service and Repair.
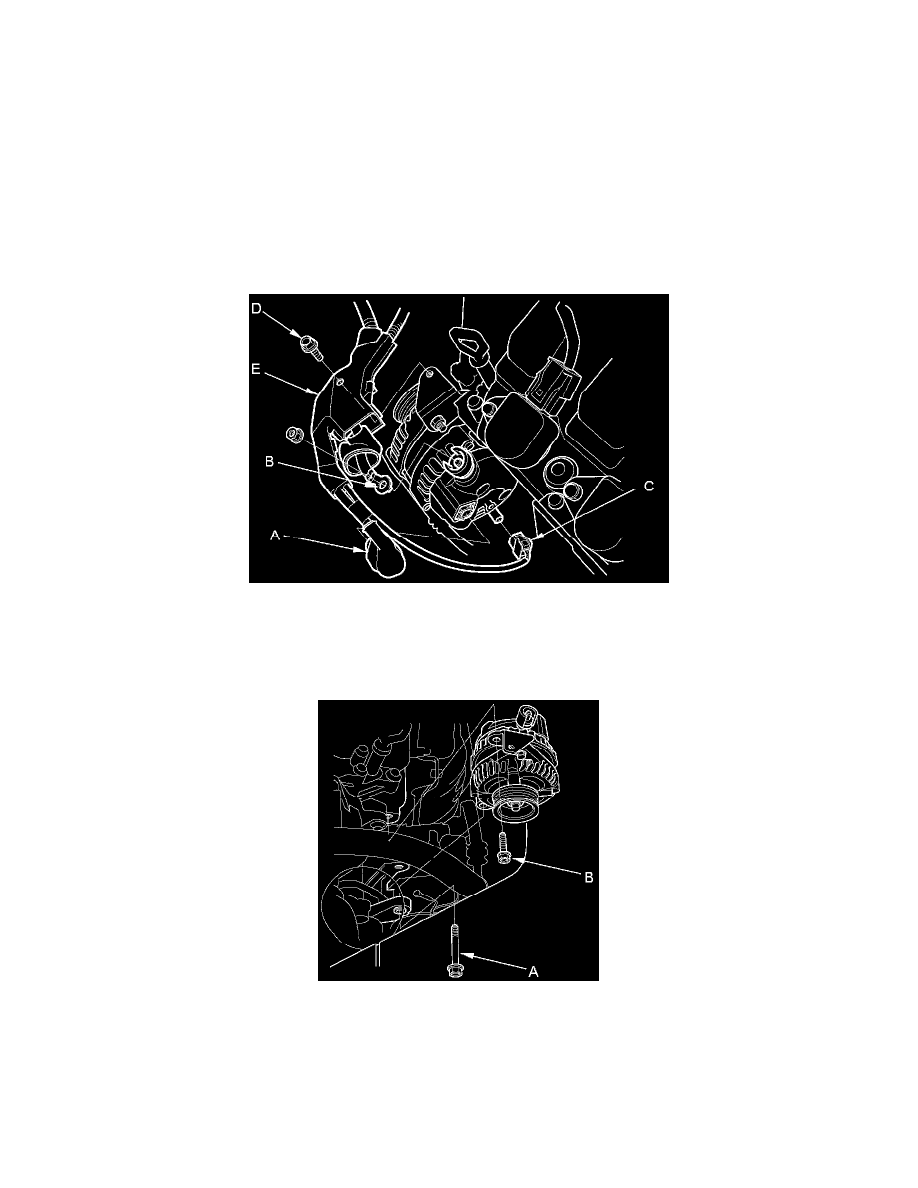
4. Disconnect the alternator connector (A) and the positive alternator cable (B) from the alternator.
5. Disconnect the A/C compressor clutch connector (C) from the A/C compressor.
6. Remove the bolt (D) securing the harness holder (E).
7. Remove the mounting bolt (A) and the alternator bracket mounting bolt (B), then remove the alternator.
Installation
1. Install the alternator, then tighten the mounting bolt (A) and the alternator bracket mounting bolt (B).