
ZDX V6-3.7L (2010)
Rotor Slip Ring Test
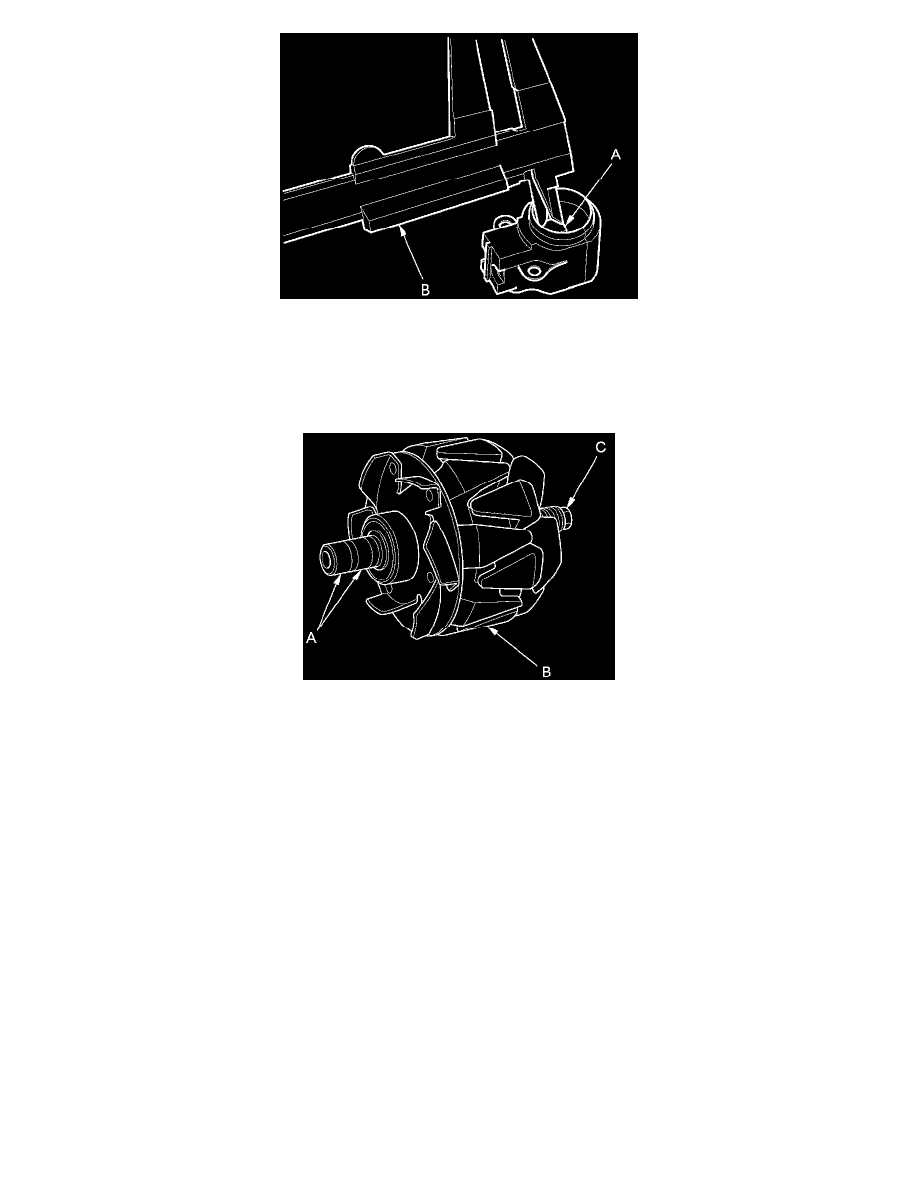
14. Check for continuity between the slip rings (A).
-
If there is continuity, go to step 15.
-
If there is no continuity, replace the rotor assembly.
15. Check for continuity between each slip ring and the rotor (B) and the rotor shaft (C).
-
If there is no continuity, go to step 16.
-
If there is continuity, replace the rotor assembly.
Alternator Reassembly
16. If you removed the pulley, put the rotor in the drive-end housing, then torque its locknut to 110 Nm (11.2 kg-m, 81 lb-ft).
17. Remove any grease or any oil from the slip rings.
18. Put the rear housing assembly and the drive-end housing/rotor assembly together, tighten the four through bolts.
19. Push the brushes (A) in, then insert a pin or drill bit (B) (about 1.6 mm (0.063 in) diameter) to hold them there.