
ZDX V6-3.7L (2010)
6. Place a transmission jack under the knuckle and lower arm B.
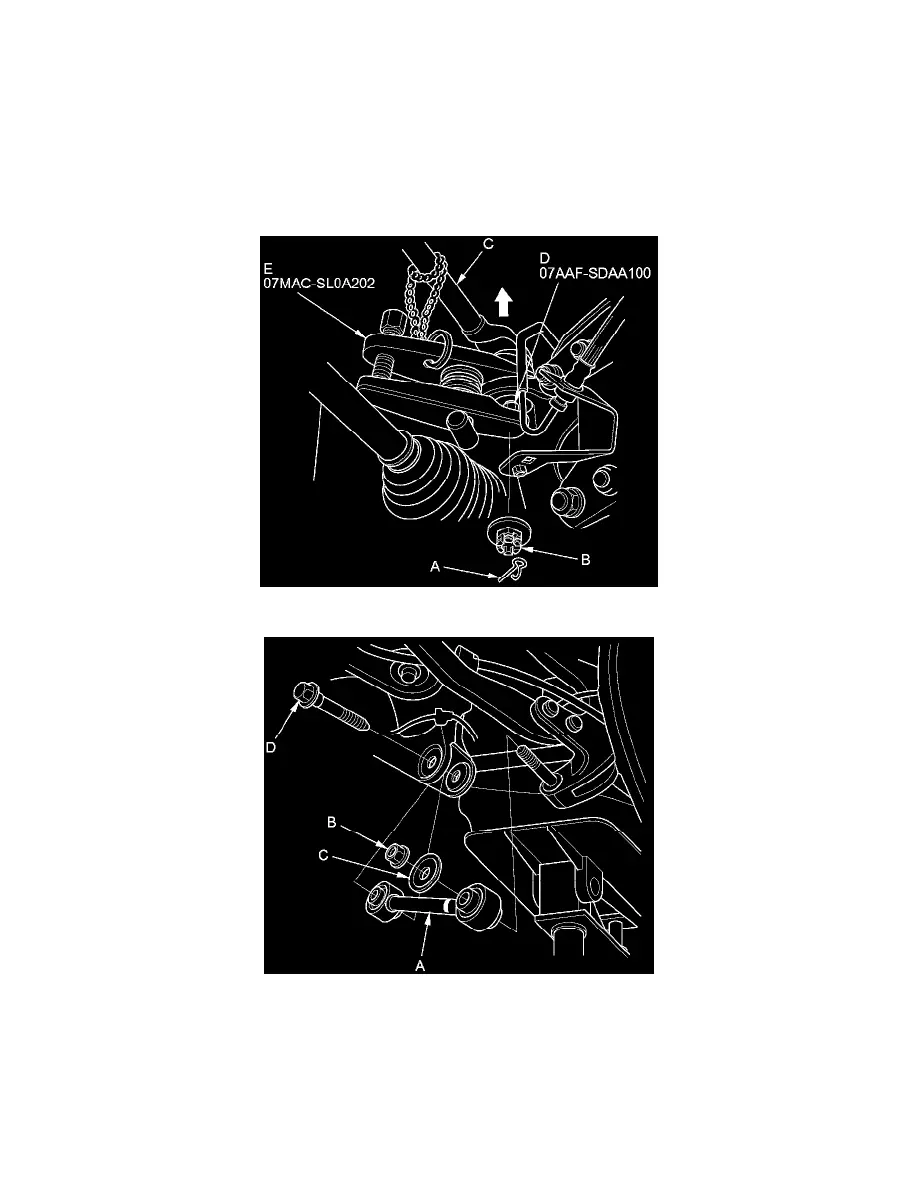
7. Remove the lock pin (A) from the upper arm ball joint, then remove the castle nut (B). Separate the knuckle from the upper arm (C) using the 12
mm ball joint thread protector (D) and the 28 mm ball joint remover (E) See: Steering and Suspension/Suspension/Ball Joint/Service and
Repair/Ball Joint Removal.
NOTE:
-
Be careful not to damage the ball joint boot when installing the remover.
-
Do not force or hammer on the upper arm, or pry between the upper arm and the knuckle. You could damage the ball joint.
8. Remove the self-locking nut (B), the washer (C), and the flange bolt (D), then remove lower arm A.
9. Remove the flange bolt (A).