
Checks and inspections
- Make
- Alfa Romeo
- Model
- 145/146 Factory Service Manual
- Year
- 1994–1999
- Section
- Front suspension (1970 T. SPARK 16V) › Checks and inspections
Suspension and wheelsChecks and inspections
- Using a hydraulic jack, support the front crossmember.
- Slacken the screws fastening the steering box to the crossmember.
- Firstly slacken the two front screws (3a) fastening the crossmember to the body and then the six rear screws (3b) and (3c); then lower the jack and remove the front crossmember together with the stabilizer bar.
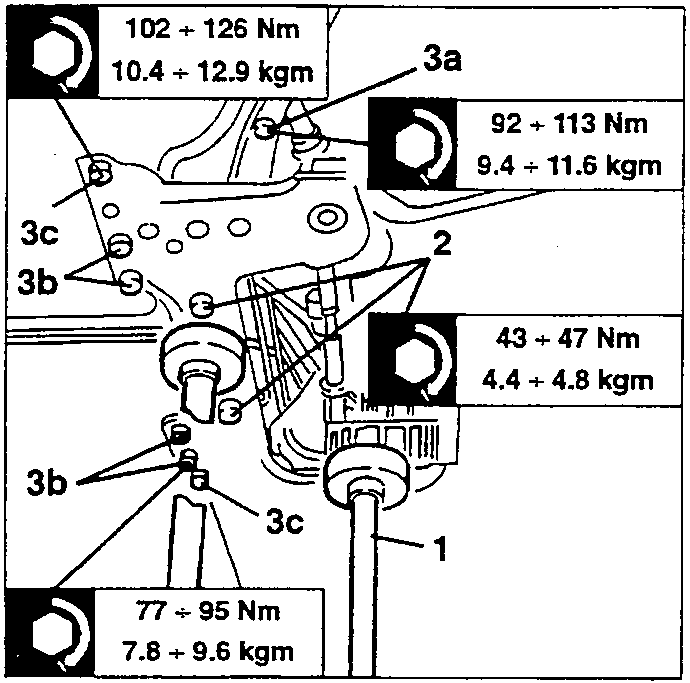
102 ÷ 126 Nm
10.4 ÷ 12.9 kgm
92 ÷ 113 Nm
9.4 ÷ 11.6 kgm
43 ÷ 47 Nm
4.4 ÷ 4.8 kgm
77 ÷ 95 Nm
7.8 ÷ 9.6 kgm
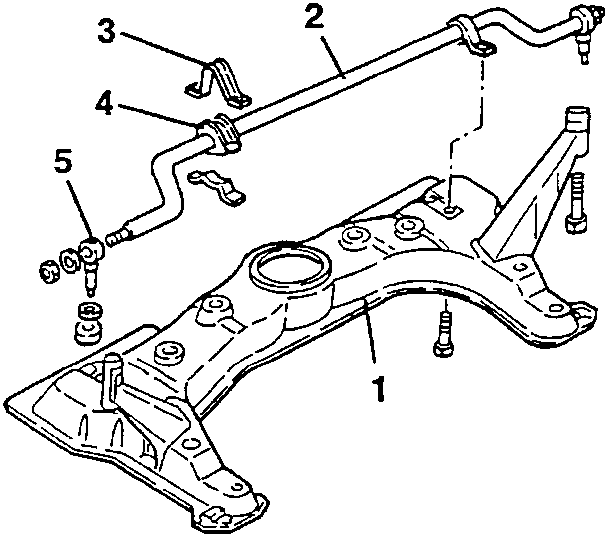
- If necessary, remove the stabilizer bar, slackening the nuts fastening the U-bolts supporting the bar itself on the crossmember and the nuts fastening the stabilizer bar connecting rods to the wishbones.
- If necessary, remove the wishbones.
- When refitting the stabilizer bar on the crossmember make sure that the washers are facing towards the rubber pad, as incorrect assembly might adversely affect the life of the pad itself.
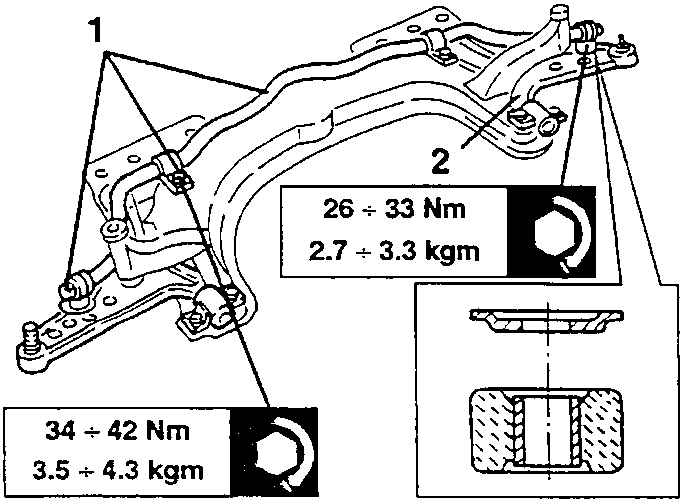
34 ÷ 42 Nm
3.5 ÷ 4.3 kgm
26 ÷ 33 Nm
2.7 ÷ 3.3 kgm
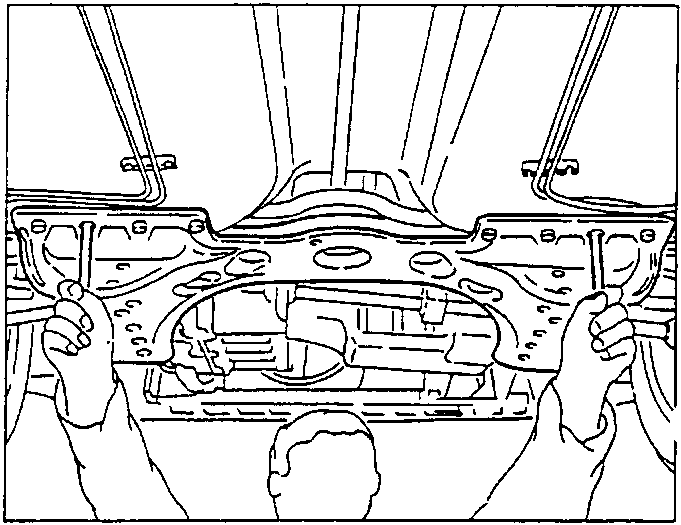
- When refitting the front crossmember it is necessary to fasten it temporarily using two 17.5 mm diameter pins, centre it with the holes on the body and then fasten it definitively tightening the screws to the specified torque.
CHECKS AND INSPECTIONS
- Visually check the crossmember for cracks and distortions that might adversely affect its operation and change it, if necessary.
- Visually check the stabilizer bar for cracks and distortion and change it if necessary.
- Check that the U-bolts connecting the stabilizer bar to the crossmember are intact and show no signs of distortion or oxidation and if necessary, change them.
- Check the rubber pads for signs of wear and change them if necessary.
- Check that the ball pins connecting the stabilizer bar to the wishbones are intact and show no signs of distortion or oxidation, if necessary, change them.
Parts & tools for this job For 1994 Alfa Romeo 145/146
- TOOLCoil spring compressorSearch: coil spring compressor
- TOOLBall joint separatorSearch: ball joint separator
- PARTFront shock absorbersSearch: Alfa Romeo 145/146 1994 front shock absorbers
Links open Amazon search results in a new tab. As an Amazon Associate I earn from qualifying purchases.