
Installation
- Make
- Aston Martin
- Model
- DB9 Factory Workshop Manual
- Year
- Issue 2, 2005
- Section
- Alternator and Regulator System › Installation
14 Power supplyInstallation
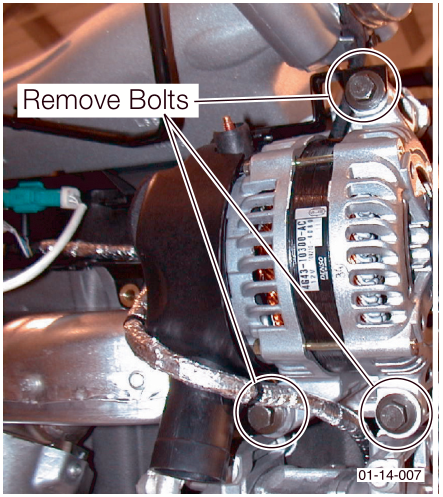
- Remove bolts / washers (x3). Withdraw the alternator complete with the cooling shield.
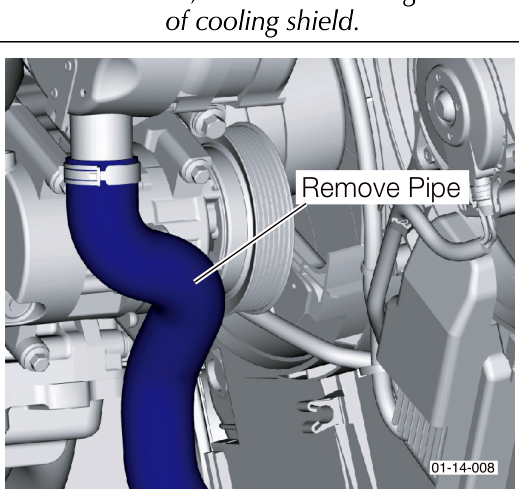
For easier access to bolt, remove air ducting from underside of cooling shield.
Installation
- Place the alternator complete with the cooling shield to mountings.
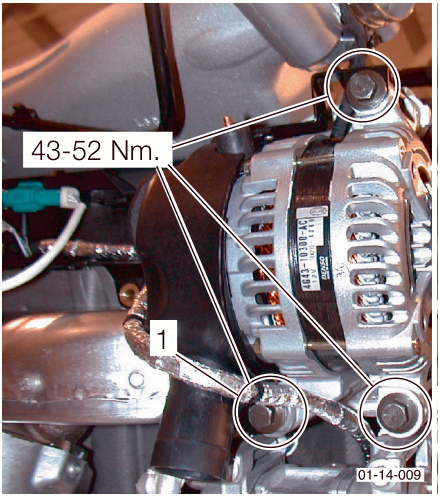
Insert bolt (1) as cooling shield is placed to alternator.
- Secure the alternator and cooling shield assembly to engine block. Tighten bolts (x3) to 43-52 Nm.
- Install the air ducting to the cooling shield, if removed.
- Clip the wiring harness to the cooling shield.
- Connect the wiring harness plug to the alternator.
- Install the drive belt (Refer to ‘Accessory Drive System (03.05)’, page 3-6-1).
- Install the road wheel arch liners.
- Install the road wheels (Two stages (Refer to ‘Road Wheel Nut Torque Tightening’, page 4-5-7)).
Parts & tools for this job For 2005 Aston Martin DB9
- TOOLBattery testerSearch: car battery tester
- TOOLDigital multimeterSearch: automotive digital multimeter
- TOOLBattery terminal cleanerSearch: battery terminal cleaner
Links open Amazon search results in a new tab. As an Amazon Associate I earn from qualifying purchases.