
Subframes: Specifications
- Make
- Aston Martin
- Model
- V8 Vantage Factory Workshop Manual
- Year
- 2005–2010
- Section
- Subframes › Specifications
02 Frame and mountingSpecifications
Specifications
| Description | Nm | lb/ft |
|---|---|---|
| Subframe to Front Structure | 105-125 | 77.5-92.5 |
| Subframe to Body | 105-125 | 77.5-92.5 |
| Engine Mounts | 47 | 35 |
| Steering Rack | 115 | 85 |
| Torque tube (rear) | 43-57 | 32-42.5 |
| Spring and Damper top mounting (rear) | 85 | 63 |
| Rear subframe to Body | 175 | 129.5 |
| Rear subframe reinforcement plates | 62 | 46 |
Maintenance
Front Subframe-Renew
| Repair Operation Time (ROT) | |
|---|---|
| Item | Code |
| Front Subframe-Renew | 02.01.AB |
Removal
- Switch battery isolation switch ‘OFF’.
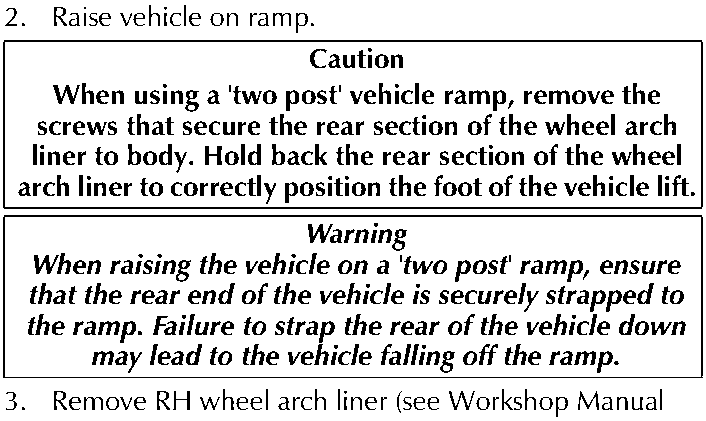
- Raise vehicle on ramp.
- Remove RH wheel arch liner (see Workshop Manual procedure 01.02.GB Wheel Arch Liner - Front - RH - Renew).
- Remove LH wheel arch liner (see Workshop Manual procedure 01.02.FB Wheel Arch Liner - Front - LH - Renew).
- Remove road wheel/s.
- Remove front spring/damper assemblies (see Workshop Manual procedure 04.03.AA Spring and Damper Assembly - Front Pair - Renew).
- Remove nuts (x2) from track rod ends to vertical link.
- Using special tool 204-523, release track rod end from vertical link.
- Disconnect ABS sensor multiplugs then release sensor harness clips (x6) from upper suspension arm and vertical link.
- Disconnect brake pad wear sensor multiplug then release sensor harness clips (x2) from upper suspension arms.
- Remove Allen bolts (x4) from brake callipers to vertical link and tie callipers aside.
- Remove Torx screws (x4) from brake disc to hub and remove brake disc.
- Remove anti-roll bar links nuts (x2) and washers (x2).
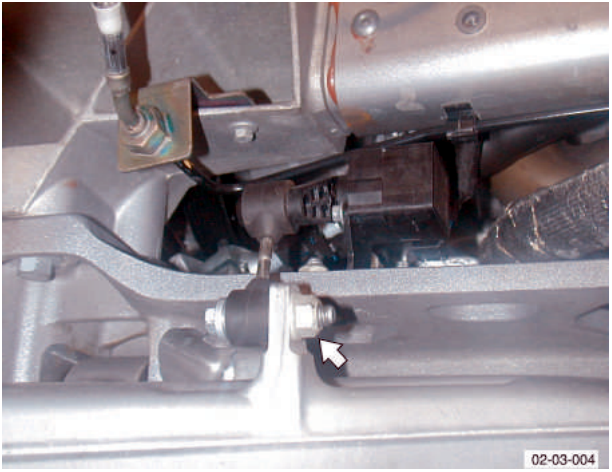
- Remove ride height sensor link nut and bolt from lower suspension arm (see Fig. 1).
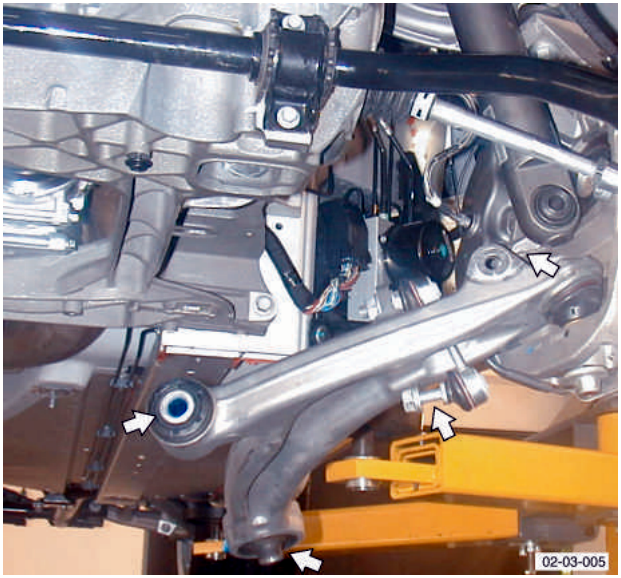
- Mark lower arm bolt and cam washer positions (to retain geometry).
- Remove nuts and bolts (x4) and cam washers (x2) from lower suspension arms to subframe (See Fig. 2).
- Remove nuts and bolts (x4) from upper suspension arm to body.
- With assistance, remove suspension assemblies.
- Install engine lifting bracket to LH side of engine using special tool 303-749.
- Remove EGR valve.
- Install engine lifting bracket to RH side of engine using special tool 303-749.
When using a 'two post' vehicle ramp, remove the screws that secure the rear section of the wheel arch liner to body. Hold back the rear section of the wheel arch liner to correctly position the foot of the vehicle lift.
When raising the vehicle on a 'two post' ramp, ensure that the rear end of the vehicle is securely strapped to the ramp. Failure to strap the rear of the vehicle down may lead to the vehicle falling off the ramp.
Parts & tools for this job For 2005 Aston Martin V8 Vantage
Links open Amazon search results in a new tab. As an Amazon Associate I earn from qualifying purchases.