
Installation
- Make
- Aston Martin
- Model
- V8 Vantage Factory Workshop Manual
- Year
- 2005–2010
- Section
- Driveshaft › Installation
05 DrivelineInstallation
- Remove bolt securing propshaft speed sensor to torque tube and remove sensor.
Installation
- Install propshaft speed sensor to torque tube and secure with bolt.
- Connect multiplug between propshaft speed sensor and transmission harness.
- Install exhaust system (see Workshop Manual procedure 09.00.NB Exhaust System - Excluding Manifold/DownPipes - Renew)
- Lower vehicle on ramp.
- Connect vehicle battery.
Warning
Always connect the battery earth (+ ve) terminal first.
Torque Tube-Renew
| Repair Operation Time (ROT) | |
|---|---|
| Item | Code |
| Torque Tube-Renew | 05.01.BB |
Removal
- Disconnect vehicle battery.
- Raise vehicle on ramp.
Caution
On a two post ramp, ensure the vehicle is ‘strapped’ to the ramp.
Warning
The torque tube is heavy. To avoid personal injury or damage to the torque tube, torque tube removal / installation is a two person operation.
- Remove torque tube assembly (see Workshop Manual procedure 05.01.CA Torque Tube - Remove for Access and Refit).
- Sportshift only - Remove grommet sealing clutch bleed pipe to torque tube.
- Release clips and remove bleed and supply pipes from slave cylinder. Install clips in union.
Caution
Plug pipe connection to prevent ingress of moisture or dirt.
- Sportshift only - Remove grommet sealing clutch pipe to torque tube.
- Manual only - Loosen and remove pipe adaptors (x2) from slave cylinder.
- Sportshift only - Release clip, disconnect clutch pipe from slave cylinder adaptor.
- Sportshift only - Release clip securing transmission harness to clutch pipe mounting bracket.
- Sportshift only - Release clips (x4) securing clutch pipe to transmission harness.
- Sportshift only - Remove clutch pipe from torque tube.
- Sportshift only - Disconnect multiplug between clutch position sensor and transmission harness.
- Sportshift only - Release clip securing clutch position sensor harness to top of torque tube.
- Sportshift only - Release clips (x2) securing clutch position sensor harness to side of torque tube.
- Sportshift only - Remove bolts (x2) securing clutch position sensor to slave cylinder and remove sensor.
- Remove bolts (x2), securing slave cylinder to torque tube.
- Remove bolts (x2), securing slave cylinder to torque tube.
- Remove slave cylinder, collect spacer.
- Sportshift only - Disconnect multiplug between propshaft speed sensor and transmission harness.
- Sportshift only - Remove bolt securing propshaft speed sensor to torque tube and remove sensor.
- Sportshift only - Release clips (x5) securing transmission harness to torque tube.
- Remove exhaust mountings (bolts x4) (see Fig. 1).
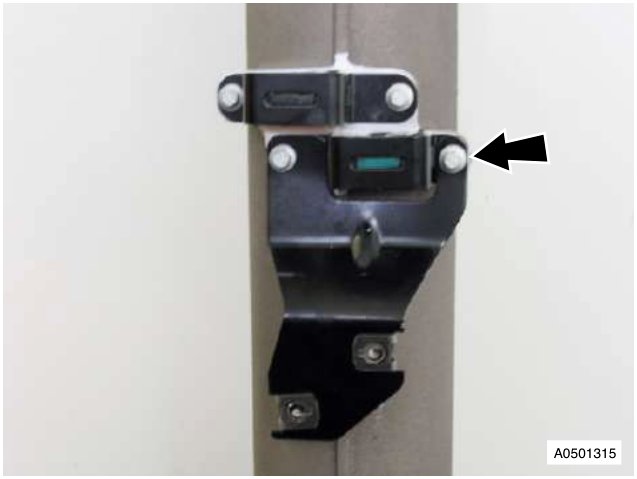
Fig. 1
Installation
- Install exhaust mountings (bolts x4) (torque).
- Clean slave cylinder, spacer and pipe adaptors.
- Sportshift only - Secure transmission harness to torque tube using clips.
- Sportshift only - Secure propshaft speed sensor to torque tube using bolt.
- Sportshift only - Connect multiplug between propshaft speed sensor and transmission harness.
- Install spacer and slave cylinder, install and torque tighten bolts (x2).
- Sportshift only - Secure clutch position sensor to slave cylinder using bolts.
- Sportshift only - Secure clutch position sensor harness to side of torque tube using clips.
- Sportshift only - Secure clutch position sensor harness to top of torque tube using clip.
- Sportshift only - Connect multiplug between clutch position sensor and transmission harness.
Parts & tools for this job For 2005 Aston Martin V8 Vantage
- PARTWheel bearingSearch: Aston Martin V8 Vantage 2005 wheel bearing
- TOOLBearing puller kitSearch: wheel bearing puller kit
- PARTCV boot kitSearch: Aston Martin V8 Vantage 2005 cv boot kit
Links open Amazon search results in a new tab. As an Amazon Associate I earn from qualifying purchases.