audi Workshop Repair Guides

Audi Workshop Service and Repair Manuals

Vehicles with 1.2 l TDI engine > < Vehicles with 1.4 l MPI engine
Vehicles with 1.6 l FSI engine
   
Vehicles with 1.6 l FSI engine
Special tools and workshop equipment required
t  Hose clamp fitting tool -V.A.G 1921-
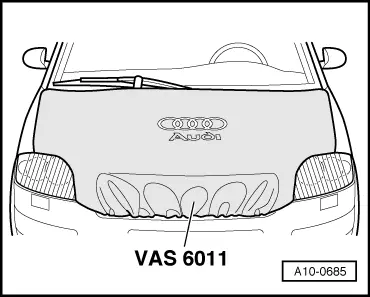
t  Protective cover for bonnet Audi A2 -VAS 6011-
t  Locking pin -T10060 A-

Removing
  Caution
On vehicles with telematics system, activate service mode of telematics control unit before disconnecting battery → Radio, telephone, navigation, self-diagnosis; Rep. Gr.01.
–  With the ignition switched off, disconnect the earth wire at the battery → Chapter.
   
–  Wash and rub dry the outside of the bonnet.
–  Release the service flap from inside.
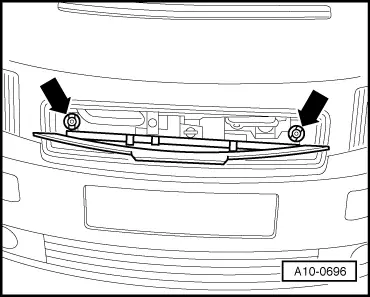
–  Release the bonnet -arrows- and pull it forwards slightly.
  A10-0696
–  Fit the protective cover -VAS 6011- over the bonnet.
  Note
  A10-0685
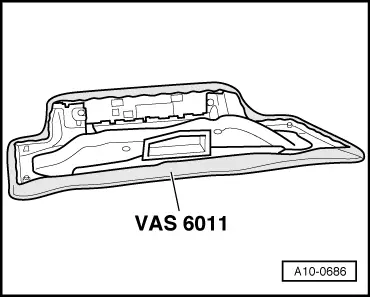
Do not stand the bonnet on end.
–  Detach the bonnet and set it down on the protective cover -VAS 6011-.
  A10-0686
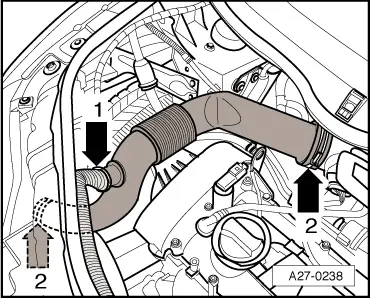
–  Remove the resonator from the air guide hose -arrow 1-; for this purpose, press the release tabs.
–  Remove the air duct; for this purpose, release the spring clips -2- with the hose clamp fitting tool -V.A.G 1921-.
–  Remove the air duct.
  A27-0238
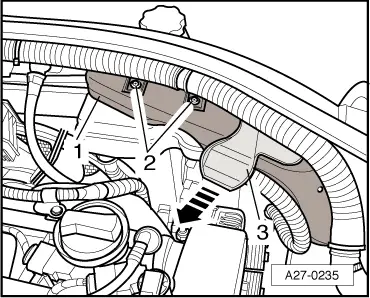
–  Remove bolts -2-.
–  Detach the water collector -3- in -direction of arrow-.
–  Detach the air hose -1- at the lock carrier and air cleaner housing.
  Note
  A27-0235
Mark the running direction of the poly V-belt with chalk or felt pen. Running a used belt in the opposite direction may result in destruction of the belt.
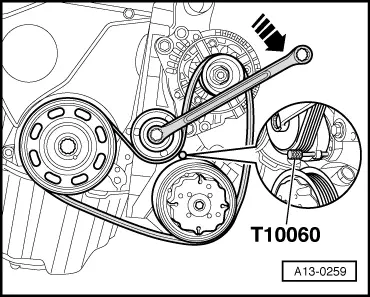
–  In order to slacken the poly V-belt, turn tensioner in -direction of arrow- using a ring spanner.
–  Lock the poly V-belt tensioner in position by inserting the locking pin -T10060 A- in the locating holes.
–  Remove the poly V-belt.
  A13-0259
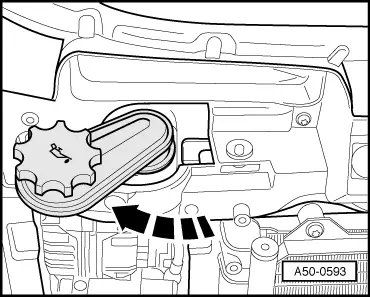
–  Swing the oil filler connectors past the stop to the right side of the vehicle -arrow-.
–  Pull off the oil filler connectors upwards.
  A50-0593
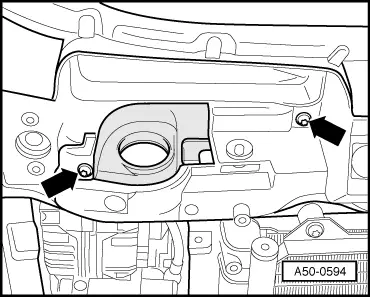
–  Unscrew bolts -arrows-.
–  Remove the oil filler tank from the lock carrier.
–  Detach the oil filler pipe from the oil filler tank; for this purpose, press the release tabs.
  A50-0594
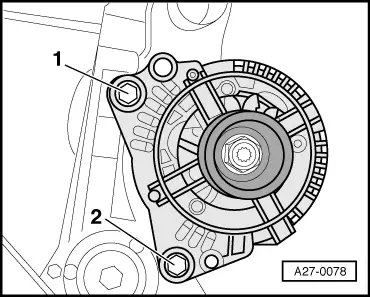
–  Remove bolts -1- and -2- for alternator.
–  Remove the alternator from the bracket and swivel it to the right together with the connected wiring.
  Note
t  If the alternator sticks in its holder, screw the bolts back in again down to the last 2 turns.
t  Tap carefully on the bolt heads with the flat side of a hammer to release the bushes of the alternator mount.
  A27-0078
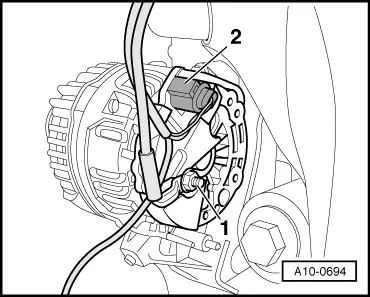
–  Detach the terminal 30/B+ wire -Item 1- from the alternator.
–  Detach electrical connector -2-.
–  Lift out alternator.
Installing
Install in reverse order, paying attention to the following:
–  To facilitate positioning of the alternator, drive back the bushings for the securing bolts slightly.
  Note
Stiff alternator mount bushes must be released as otherwise the clamping force of the bush will not be adequate even if tightened to the correct torque.
  A10-0694
–  Make sure the poly V-belt is properly positioned and correctly routed.
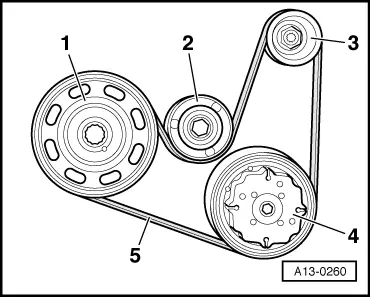
Poly V-belt routing on vehicles with air conditioner:
1 - Crankshaft pulley
2 - Tensioning roller
3 - Alternator pulley
4 - Air conditioner compressor pulley
5 - Poly V-belt
–  Position the poly V-belt on the crankshaft and alternator pulleys.
–  As a final step, position the poly V-belt on the air conditioner compressor pulley.
All models:
–  Slacken off the tensioner and pull the locking pin -T10060 A- out of the locating holes.
–  Make sure the poly V-belt is correctly positioned.
–  Connect the battery. Action to be taken → Anchor.
–  Start the engine and check belt running.
Tightening torques
  A13-0260
ComponentNm
Terminal 30/B+ wire to alternator16
Alternator to bracket25
Oil filler tank to lock carrier3.5
Air hose to lock carrier2.5


Vehicles with 1.2 l TDI engine > < Vehicles with 1.4 l MPI engine