audi Workshop Repair Guides

Audi Workshop Service and Repair Manuals

Exploded view - removing and installing Haldex coupling > < Exploded view - removing and installing four-wheel drive control unitJ492, rear final drive 0BD, 0BS and 0BY (Haldex coupling ge
Removing and installing four-wheel drive control unitJ492
Removing and installing four-wheel drive control unit -J492-
Special tools and workshop equipment required
t  Allen key (4 mm)
   
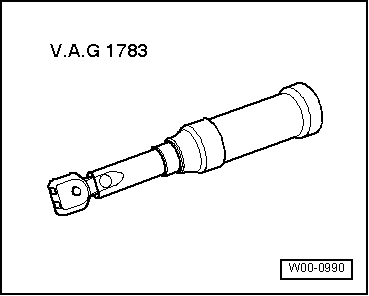
t  Torque wrench (2 ... 10 Nm) -V.A.G 1783-
  W00-0990
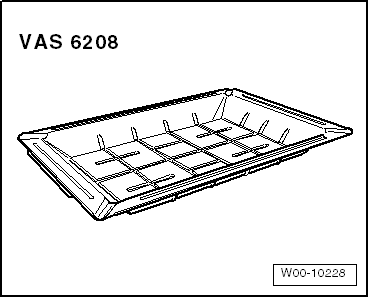
t  Drip tray for workshop hoist -VAS 6208-
–  Switch off ignition.
  W00-10228
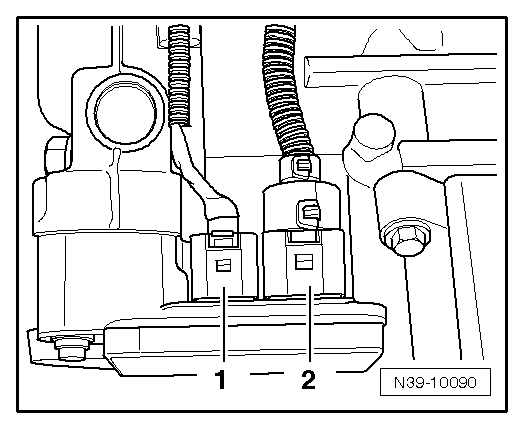
–  Unplug connectors -1- and -2- at top of control unit.
–  Position drip tray under final drive.
  Note
It is advisable to have a workshop trolley with tools and cleaning cloths within easy reach so that removed parts can be put down safely.
  N39-10090
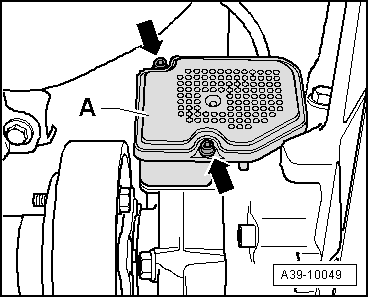
–  Remove bolts -arrows-.
–  Carefully detach control unit -A-.
  A39-10049
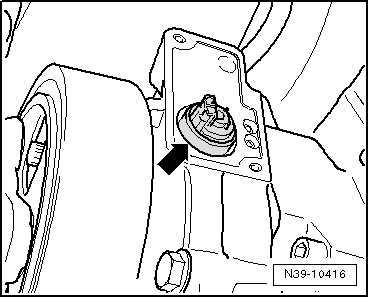
–  If necessary, detach cover → Item from housing of Haldex coupling, while keeping hold of valve -arrow-.
–  Place a cloth over coupling opening control valve -N373--arrow-, take hold of valve body with pliers and pull out valve.
Installing
Installation is carried out in reverse sequence; note the following:
  Note
  N39-10416
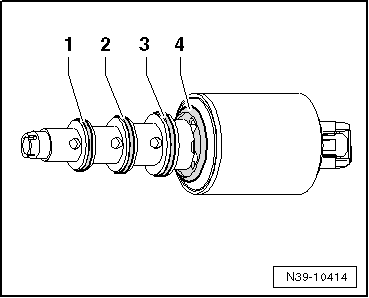
The seals for the valve have different internal diameters.
t  -1- Internal diameter: 10 mm
t  -2- Internal diameter: 11 mm
t  -3- Internal diameter: 12 mm
t  -4- Seal on valve body
  N39-10414
–  First lubricate seal -1- with Haldex oil and fit seal onto coupling opening control valve -N373-.
–  Then fit seals -2-, -3- and -4-.
–  Press centring lips (4x) of seal -4- into groove.
  N39-10414
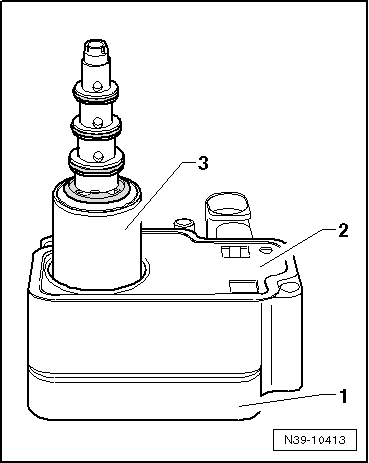
–  Fit new cover -2- onto control unit -1-.
  Note
The cover can only be fitted in one position.
  N39-10413
–  Insert coupling opening control valve -N373--3- in control unit -1-.
  Note
The valve can only be fitted in one position.
  N39-10413
–  Carefully fit control unit -A- and tighten bolts -arrows- to torque → Item.
–  Check oil level in Haldex coupling → Chapter.
  A39-10049

Exploded view - removing and installing Haldex coupling > < Exploded view - removing and installing four-wheel drive control unitJ492, rear final drive 0BD, 0BS and 0BY (Haldex coupling ge