audi Workshop Repair Guides

Audi Workshop Service and Repair Manuals

Removing and installing connector point (left-side) > < Removing and installing 3-position relay carrier
Removing and installing 4-position relay carrier
   
Removing
–  With ignition switched off, disconnect earth wire at battery:
t  Battery in engine compartment → Chapter
t  Battery in luggage compartment → Chapter
–  Remove driver's storage compartment → Rep. Gr.68.
–  Unscrew bolts -1- for fuse carrier -2-.
–  Detach fuse carrier from central tube for dash panel.
–  Disengage wiring harness at central tube for dash panel and move it clear.
  A70-0812
–  Unscrew nuts -arrows- and detach onboard supply control unit -J519--item 1- with wiring attached.
  A97-0280
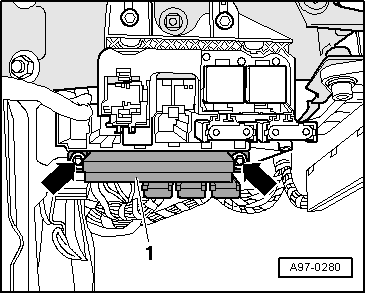
–  Pull the relays or control units out of 4-position relay carrier.
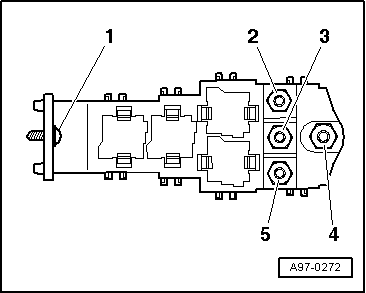
–  Mark assignment of wires at bolt connections -2-, -3- and -5-.
–  Detach wires at bolt connections.
–  Unscrew bolt -1- and nut -4-.
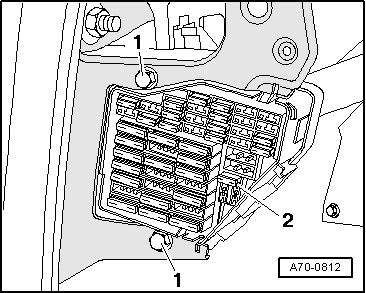
–  Unclip the fuse carriers at the 4-position relay carrier.
–  Detach relays and control units and then unclip appropriate relay carrier.
  Note
Exact assignment of 4-position relay carrier can be found in appropriate current flow diagram → Current flow diagrams, Electrical fault finding and Fitting locations.
Installing
Installation is carried out in the reverse order; note the following:
–  Install wires at bolt connections -2-, -3- and -5- according to markings.
–  Connect the battery. Action to be taken:
t  Battery in engine compartment → Anchor
t  Battery in luggage compartment → Anchor
–  Install driver's storage compartment → Rep. Gr.68.
Tightening torques
  A97-0272
ComponentNm
4-position relay carrier to bodyNut2.4
Bolt1.7
Bolt connection for electrical wires9


Removing and installing connector point (left-side) > < Removing and installing 3-position relay carrier