
A4 Mk3
| Exploded view of centre armrest with flap for load-through hatch |
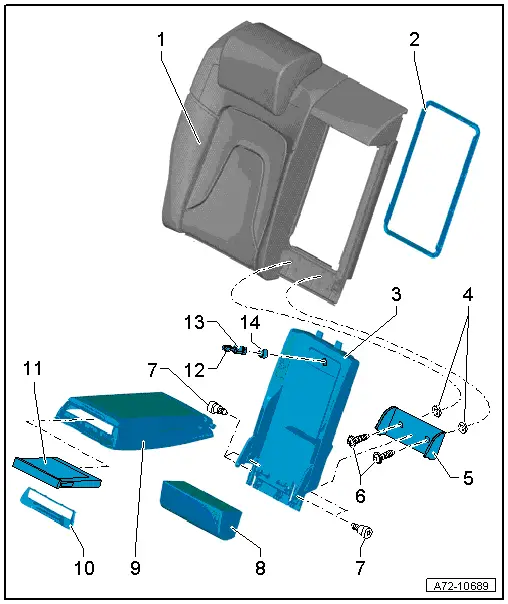
| 1 - | 2/3 section of split backrest (right-side) |
| q | With load-through hatch |
| q | Depending on equipment version |
| 2 - | Trim frame |
| q | Clipped into rear seat backrest |
| q | Removing and installing → Chapter |
| 3 - | Flap |
| q | For load-through hatch |
| q | Removing and installing → Chapter |
| 4 - | Securing clips |
| q | For bolt -item 6- |
| q | 2x |
| 5 - | Bracket |
| q | Is supplied together with centre armrest and flap for load-through hatch |
| q | Do not remove separately |
| 6 - | Bolts |
| q | 2x |
| q | 8 Nm |
| 7 - | Bolt |
| q | 4x |
| q | Self-locking |
| q | Always renew after removing |
| q | 11 Nm |
| 8 - | Intermediate padding |
| q | Removing and installing → Chapter |
| 9 - | Centre armrest |
| q | Removing and installing → Chapter |
| 10 - | Trim |
| q | For cup holder |
| q | Removing and installing → Chapter |
| 11 - | Cup holder |
| q | Removing and installing → Chapter |
| 12 - | Key |
| 13 - | Lock cylinder |
| q | For flap for load-through hatch |
| q | Removing and installing → Chapter |
 Caution
|
| 14 - | Protective cap |
| q | For lock cylinder |
| q | Detach before installing lock cylinder |
Caution
|