audi Workshop Repair Guides

Audi Workshop Service and Repair Manuals

Removing and installing mounting bracket > < Exploded view of central tube for dash panel
Removing and installing central tube for dash panel
   
Removing
–  Remove dash panel → Chapter.
–  Remove steering column → Rep. gr.48.
–  Disengage air duct for dash panel vent (left-side) at central tube for dash panel → Rep. gr.87.
–  Remove air duct for dash panel vent (right-side) → Rep. gr.87.
–  Detach fuse holder C -SC- (left-side) and fuse holder D -SD- (right-side) at central tube for dash panel → Electrical system; Rep. gr.97.
–  Remove data bus diagnostic interface -J533- and move to one side → Electrical system; Rep. gr.90.
–  Remove bolts -1- (left and right) at central tube support and detach bracket -2-.
–  Remove bolts -3- for central tube support (left and right).
  A70-10610
–  Unscrew bolt -1- for air conditioning unit (left and right) at central tube support.
  A70-10680
–  Remove air duct for defroster vent (centre) → Rep. gr.87.
–  Remove bolt -1- for air conditioning unit at brace at top of central tube for dash panel.
–  Remove bolt -2- at brace at top of central tube for dash panel.
–  Unscrew and move clear earth wire at earth point (left-side) at tunnel wall.
–  Unplug and move clear electrical connectors at accelerator pedal module and brake light switch.
–  Remove front sill panel trim (right-side) → Chapter.
–  Unplug electrical multi-pin connectors at connector point at A-pillar (right-side) → Electrical system; Rep. gr.97.
–  Unplug electrical connector at fresh air blower and move clear wiring.
  A70-10681
–  Remove bolts -1- for bracket for air intake box at central tube for dash panel.
–  Unscrew nut -2-.
  A70-10682
–  Remove bolt -1- and unscrew nut -2-.
  A70-10683
–  Lock two nuts -2- and -3- at A-pillar (driver side) on stud -1- and unscrew stud.
  Note
A second mechanic is required to detach central tube for dash panel.
  A70-10684
–  Pull central tube -1- for dash panel (driver side) carefully upwards and at the same time disengage it from air conditioning unit -3- at stop bracket (top -2- and bottom -4-).
–  Pull central tube for dash panel off threaded pin at A-pillar (passenger side).
–  Carefully swivel top of central tube for dash panel to rear and at the same time pull it upwards.
–  Take central tube for dash panel out of passenger compartment.
Installing
–  Carefully insert central tube -1- for dash panel in body.
–  Engage central tube for dash panel at air conditioning unit -3- and at stop bracket (top -2- and bottom -4-).
  A70-10611
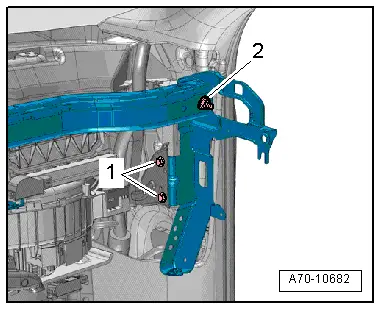
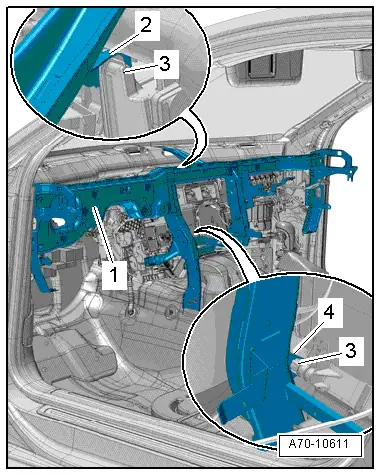
–  Align central tube -4- for dash panel to A-pillar.
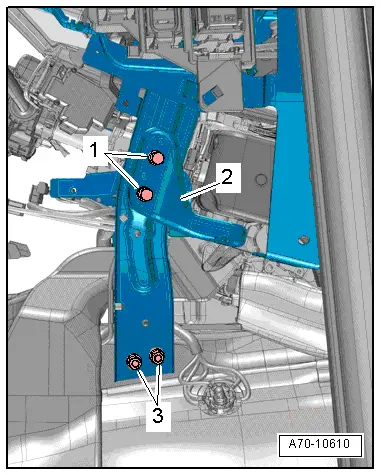
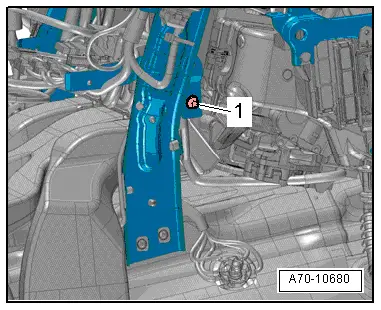
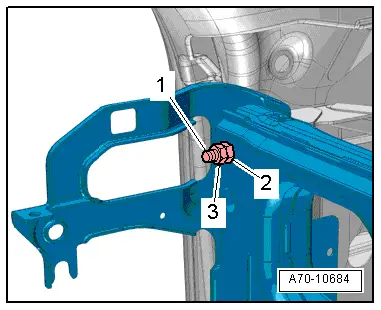
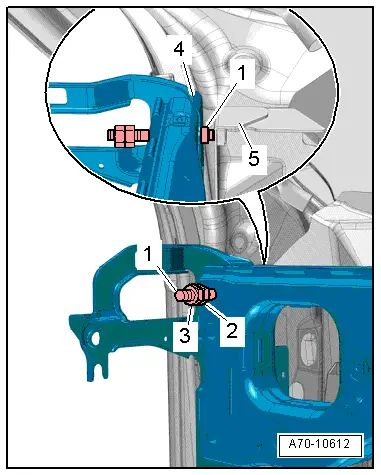
–  Lock two nuts -2- and -3- on stud -1-, screw stud into mounting -5- at A-pillar (driver side) and tighten.
l  Stud must be screwed in completely and collar must make contact with mounting at A-pillar.
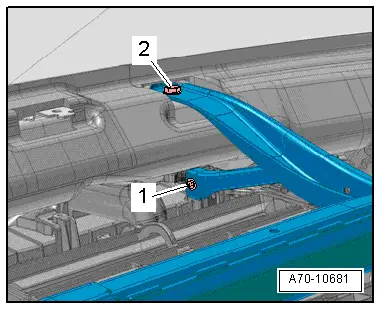
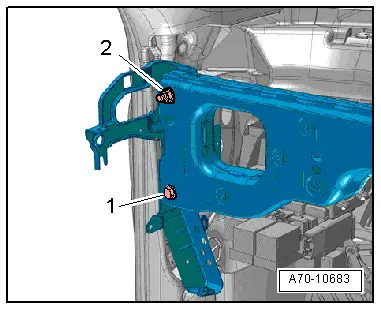
–  Tighten bolt and nuts (left and right) for central tube for dash panel.
Perform remaining installation steps in reverse order of removal; observe the following:
–  Install steering column → Rep. gr.48.
  WARNING
The battery must be connected with the ignition switched on. If pyrotechnic components (e.g. airbag or belt tensioner) are inexpertly repaired, this may result in unwanted triggering after connecting the battery. There must not be anyone in the vehicle while you are connecting the battery.
–  With ignition switched on, connect battery earth wire → Electrical system; Rep. gr.27.
  Note
If the airbag warning lamp -K75- indicates a fault following installation, you must interrogate, erase and then re-interrogate the event memory → Vehicle diagnostic tester.
Tightening torques → Chapter
  A70-10612

Removing and installing mounting bracket > < Exploded view of central tube for dash panel