audi Workshop Repair Guides

Audi Workshop Service and Repair Manuals

Removing and installing trim for light switch > < Removing and installing loudspeaker trim (side)
Removing and installing loudspeaker trim (centre)
Removing
  Note
Be very careful when removing and installing, as loudspeaker trim can be damaged quite easily.
   
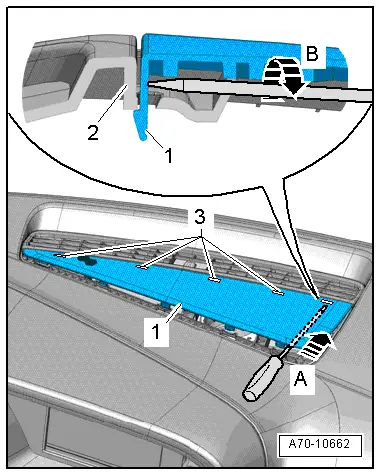
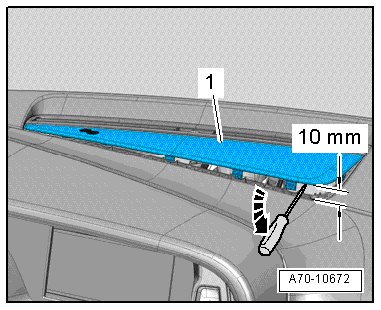
–  Use a small screwdriver to carefully disengage loudspeaker trim -1- from retaining pins (rear, as seen in direction of travel) -arrow-, but only pull upwards about 10 mm.
  Caution
Take care not to pull loudspeaker trim up any further as this would cause retaining pins at (front, as seen in direction of travel) to break off.
  A70-10672
–  Push a long screwdriver all the way through under loudspeaker trim towards front -arrow A- until it makes direct contact with front retaining pin (right-side).
–  Carefully rotate screwdriver about its own axis -arrow B- until retaining pin -1- disengages from guide -2-.
–  Repeat process for other retaining pins -3-.
Installing
Installation is carried out in the reverse order; note the following:
–  First insert loudspeaker trim in front of dash panel and press on until it engages audibly.
  A70-10662

Removing and installing trim for light switch > < Removing and installing loudspeaker trim (side)