
5 Series E34 525td (M51) TOUR
Insert gear train with shift arm in rear housing section.
Attach 1st/2nd gear shift arm with sliding blocks to 1st/2nd gear
slide sleeve.
Caution!
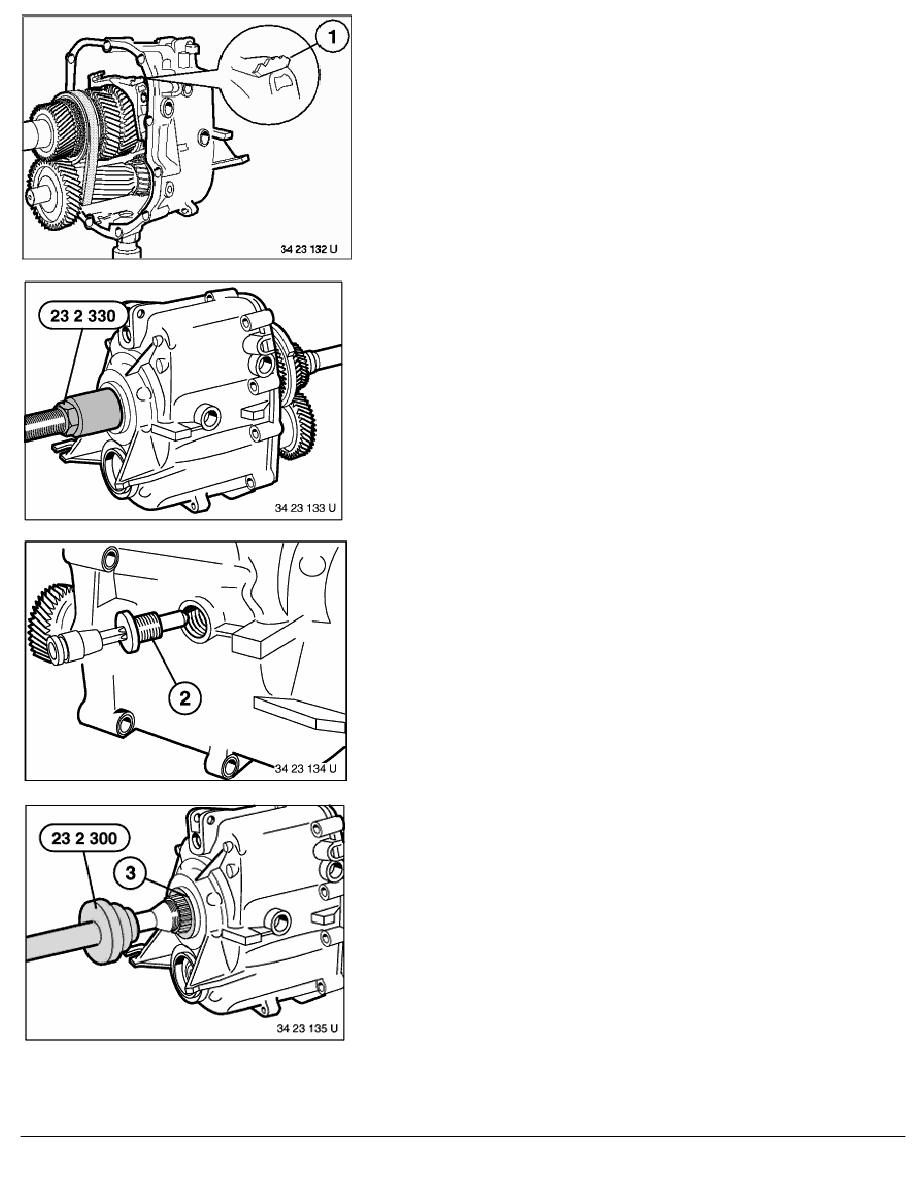
Connect shift arm with catch (1) in direction of drive shaft on
left.
Attach special tool 23 2 330 to output shaft journal. Draw in
output shaft with special tool 23 2 330 until firmly seated.
When drawing in, make sure shift arms and countershaft do not
get jammed, align if necessary.
Remove special tool 23 2 330 .
Center 3rd/4th gear shift arm by hand with bore in housing. In this
position, screw in bearing pins (2) in succession on left and right
and then tighten down.
Tightening torque, 23 31 1AZ.
Oil sealing lip of radial seal.
Drive in radial seal (3) for output flange with special tool
23 2 300 .
Caution!
Use a plastic hammer to knock in.
RA Removing and installing complete drive and output shafts (S5D 260Z / 310Z / 320Z
BMW AG - TIS
23.01.2013 07:11
Issue status (12/2007) Valid only until next DVD is issued
Copyright
Page - 9 -