
5 Series E34 525td (M51) TOUR
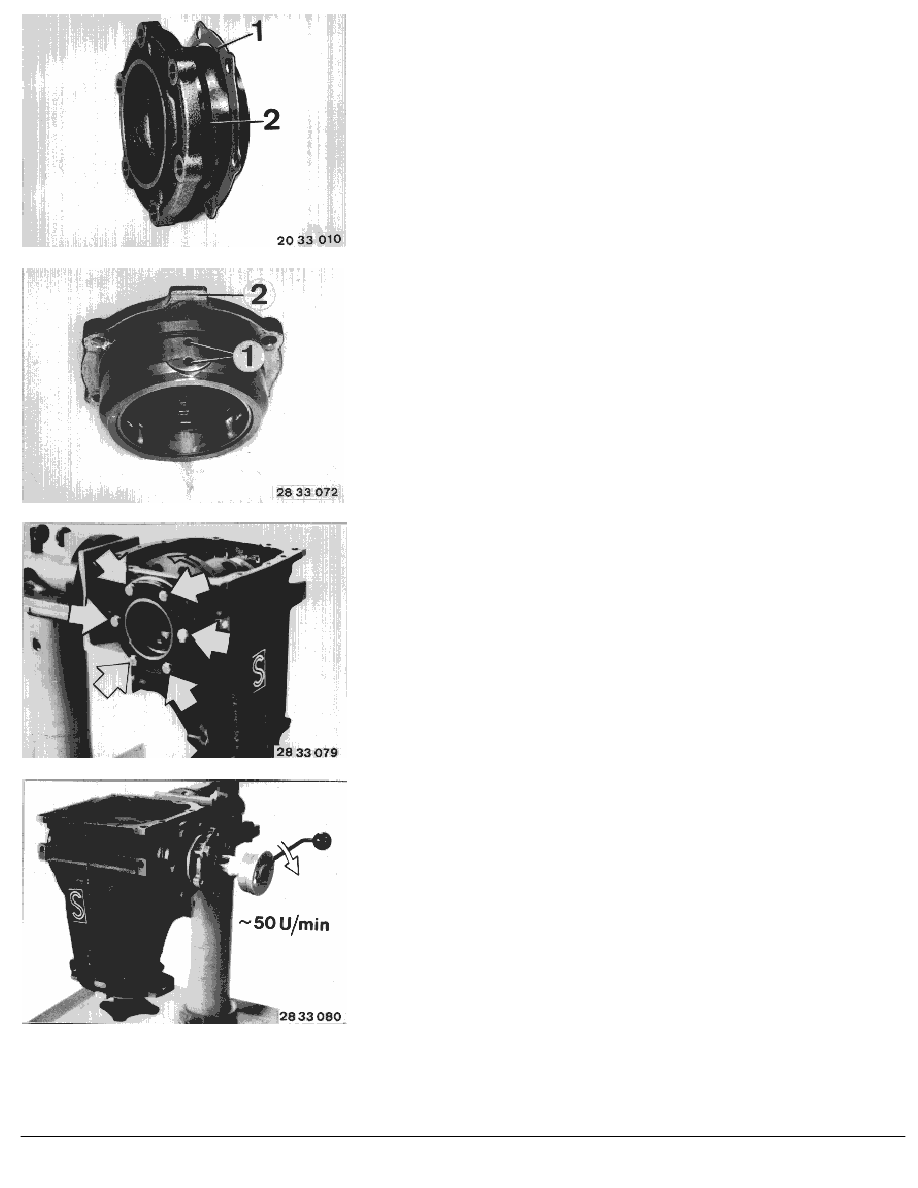
Install side bearing caps marked with belonging shims (1), but at
first without O-rings (2).
Evenly tighten bearing cover screws opposite the crown wheel,
Tightening torque, refer to Technical Data.
Installation:
Compensating bores (1), recognized on the outside tab (2),
always face up in installed position of transmission.
The axial preload force of the final drive mount (4000 N) can be
determined from the friction torque,
refer to Technical Data
Tighten bolts of second bearing cap uniformly only enough, that
the differential can still be turned easily.
On side opposite crown wheel, fit an output flange and determine
friction torque using a bracket with welded on nut (in-house
manufacture) and special tool 00 2 000 (friction torque gauge).
Turn friction torque meter at speed of approx. 50 rpm.
RA Replacing complete locking differential (Type M) - final drive removed -
BMW AG - TIS
23.01.2013 07:46
Issue status (12/2007) Valid only until next DVD is issued
Copyright
Page - 5 -