
CTS V6-3.2L VIN N (2003)
crankshaft sprocket.
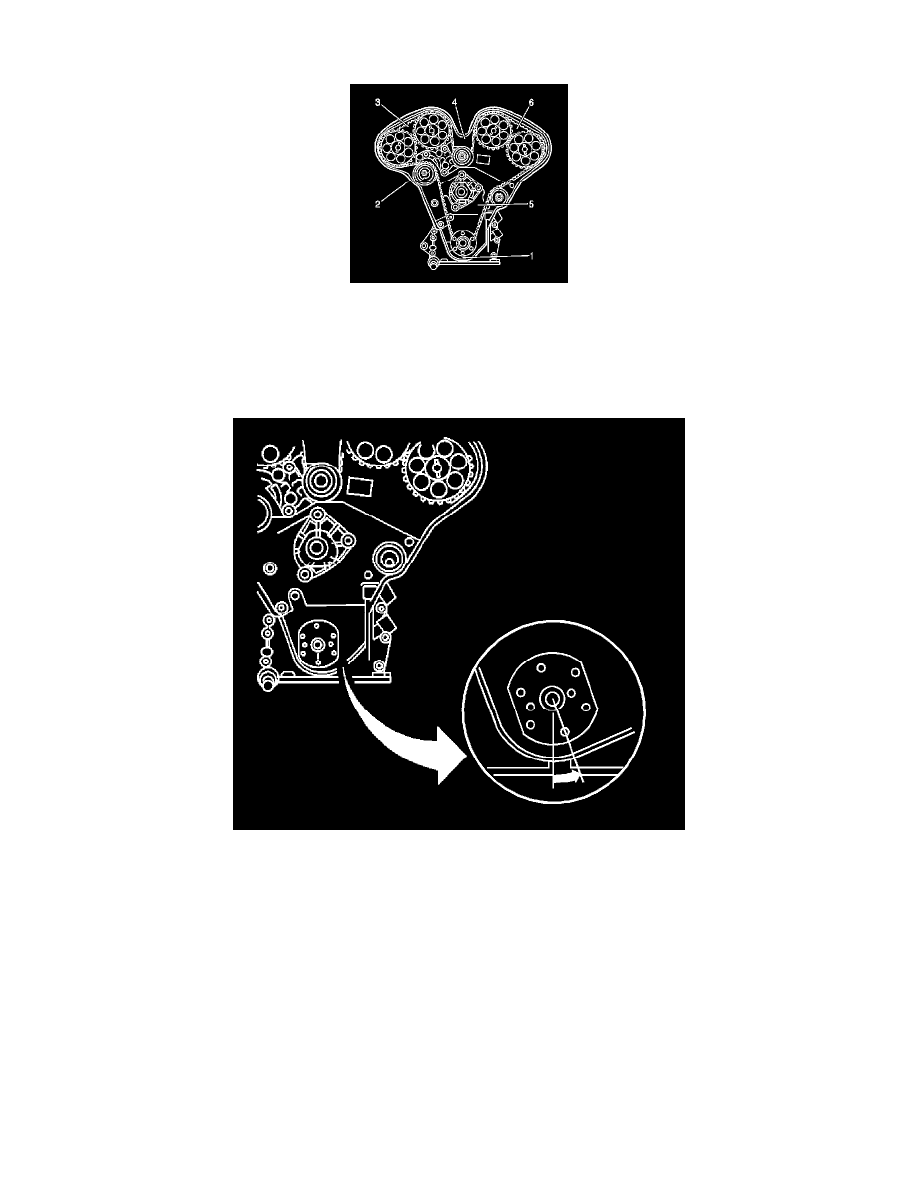
3. Wedge the J 42069-30 between the oil pump housing and timing belt in order to prevent the belt teeth from jumping the crankshaft sprocket teeth.
4. Route the timing belt through the timing belt tensioner (2).
5. Slip the timing belt through camshaft gears 1 and 2 simultaneously (3), ensuring the dash marks on the timing belt align with the marks on the
camshaft gears and the notches on the rear timing belt cover.
6. Route the timing belt through the upper idler pulley (4).
7. Slip the timing belt through camshaft gears 3 and 4 simultaneously (6), ensuring the dash marks on the timing belt align with the marks on the
camshaft gears and the notches on the rear timing belt cover.
8. Using the J 42098 rotate the crankshaft counter clockwise to 3 degrees BTDC, allowing the timing belt to slide on the J 42069-30.
9. Install the lower idler pulley and spacer with the timing belt.
Notice: Use the correct fastener in the correct location. Replacement fasteners must be the correct part number for that application. Fasteners requiring
replacement or fasteners requiring the use of thread locking compound or sealant are identified in the service procedure. Do not use paints, lubricants,
or corrosion inhibitors on fasteners or fastener joint surfaces unless specified. These coatings affect fastener torque and joint clamping force and may
damage the fastener. Use the correct tightening sequence and specifications when installing fasteners in order to avoid damage to parts and systems.
10. Install the lower idler pulley bolt. Tighten the lower idler pulley bolt to 40 Nm (30 lb ft).