
DeVille DHS V8-4.6L VIN Y (2000)
Console: Service and Repair
Front Floor Console Replacement (DTS, w/o UV8)
Front Floor Console Replacement (DTS, w/o UV8)
Removal Procedure
Caution: Refer to SIR Caution.
1. Disable the SIR. Refer to Disabling the SIR System.
2. Set the parking brake.
3. Remove the left console trim panel. Refer to Front Floor Console Side Trim Panel Replacement - Left Side (DTS) (See: Front Floor Console Side
Trim Panel Replacement - Left Side (DTS)) .
4. Remove the right console trim panel. Refer to Front Floor Console Side Trim Panel Replacement - Right Side (DTS) (See: Front Floor Console
Side Trim Panel Replacement - Right Side (DTS)) .
5. Remove the console center trim plate. Refer to Front Floor Console Trim Plate Replacement (DTS) (See: Front Floor Console Trim Plate
Replacement) .
6. Remove the IP center compartment. Refer to Instrument Panel Compartment Replacement (Base and DHS) (See: Glove Compartment/Service and
Repair/Instrument Panel Compartment Replacement (Base and DHS))Instrument Panel Compartment Replacement (DTS) (See: Glove
Compartment/Service and Repair/Instrument Panel Compartment Replacement (DTS)) .
7. Remove the left knee bolster. Refer to Driver Knee Bolster Replacement (Without UV2) (See: Dashboard / Instrument Panel/Service and
Repair/Driver Knee Bolster Replacement (Without UV2))Driver Knee Bolster Replacement (UV2) (See: Dashboard / Instrument Panel/Service
and Repair/Driver Knee Bolster Replacement (UV2)) .
8. Remove the right knee bolster. Refer to Passenger Knee Bolster Replacement (See: Dashboard / Instrument Panel/Service and Repair/Passenger
Knee Bolster Replacement) .
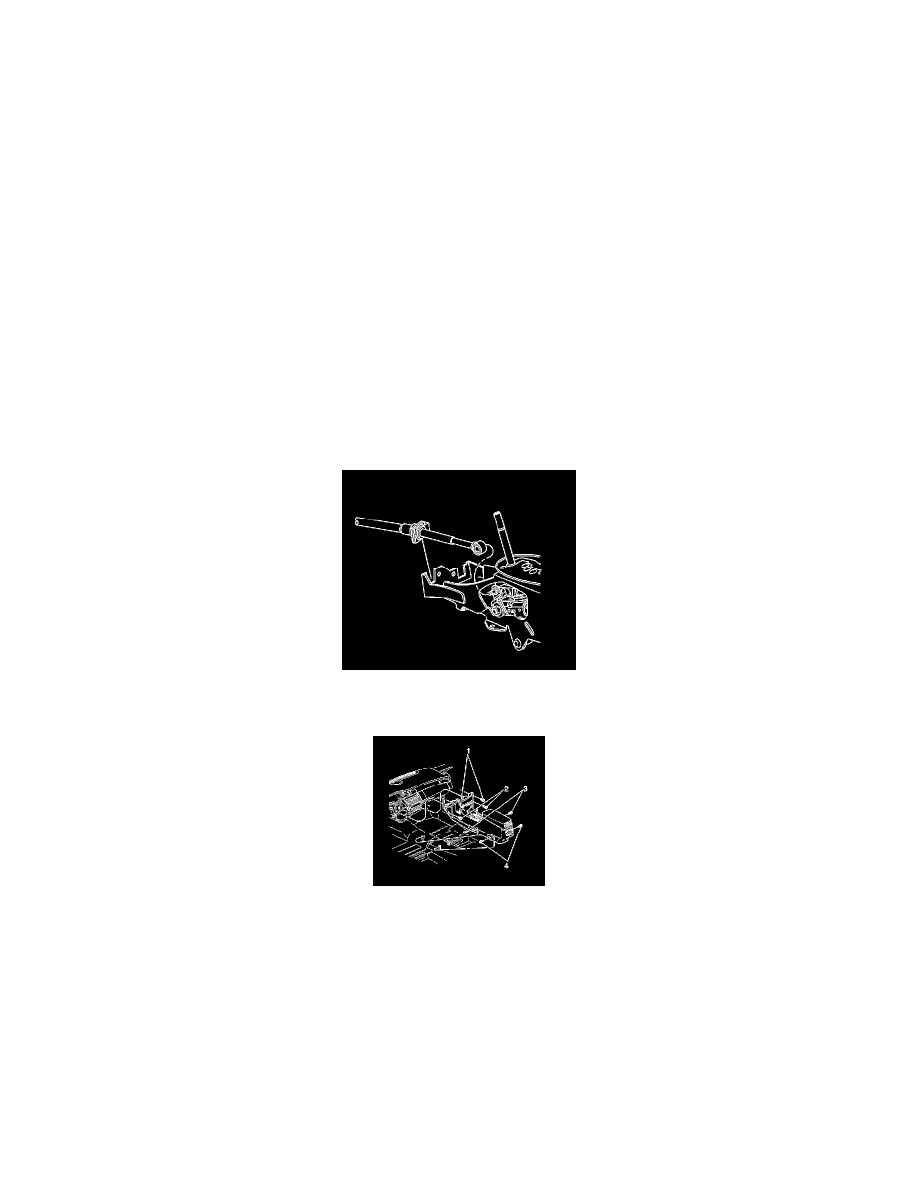
9. Disconnect the transaxle range selector cable terminal from the shift lever pin.
10. Pull the lock release and remove the transaxle shift cable from the console.
11. Remove the 4 console fasteners (1, 2) to the IP.
12. Adjust the front seats rearward.
13. Remove the 2 front console to floor fasteners (3).
14. Adjust the front seats forward.
15. Remove the 2 rear console to floor fasteners (4).
16. Move the console rearward, in order to access the electrical connectors.
17. Disconnect the center console electrical connectors.
18. Remove the center console.
Installation Procedure