DeVille DHS V8-4.6L VIN Y (2000)

rear compartment floor trim may cause a static electricity discharge to ignite any fuel vapor resulting in personal injury and vehicle damage.
NOTE: Remove the rear compartment floor trim to avoid damage from fuel spillage.
4. Remove the rear compartment floor trim (1).
5. Remove the bolts from the fuel sender access panel (2).
NOTE: In order to prevent damage, cover the fuel pipe fittings with a shop towel before disconnecting the fuel pipes or removal of the fuel sender
retaining ring, in order to catch any fuel that may leak out. Place the towel in an approved container when procedure is completed.
6. Disconnect the quick-connect fittings at the fuel sender assembly.
7. Disconnect the electrical connector at the fuel sender.
8. Disconnect the electrical connector at the fuel tank pressure sensor.
IMPORTANT: When removing the fuel sender assembly from the fuel tank, the reservoir bucket on the fuel sender assembly is full of fuel. The fuel
sender assembly must be tipped slightly during removal in order to avoid damage to the float. Place any remaining fuel into an approved container
once the fuel sender assembly is removed from the fuel tank.
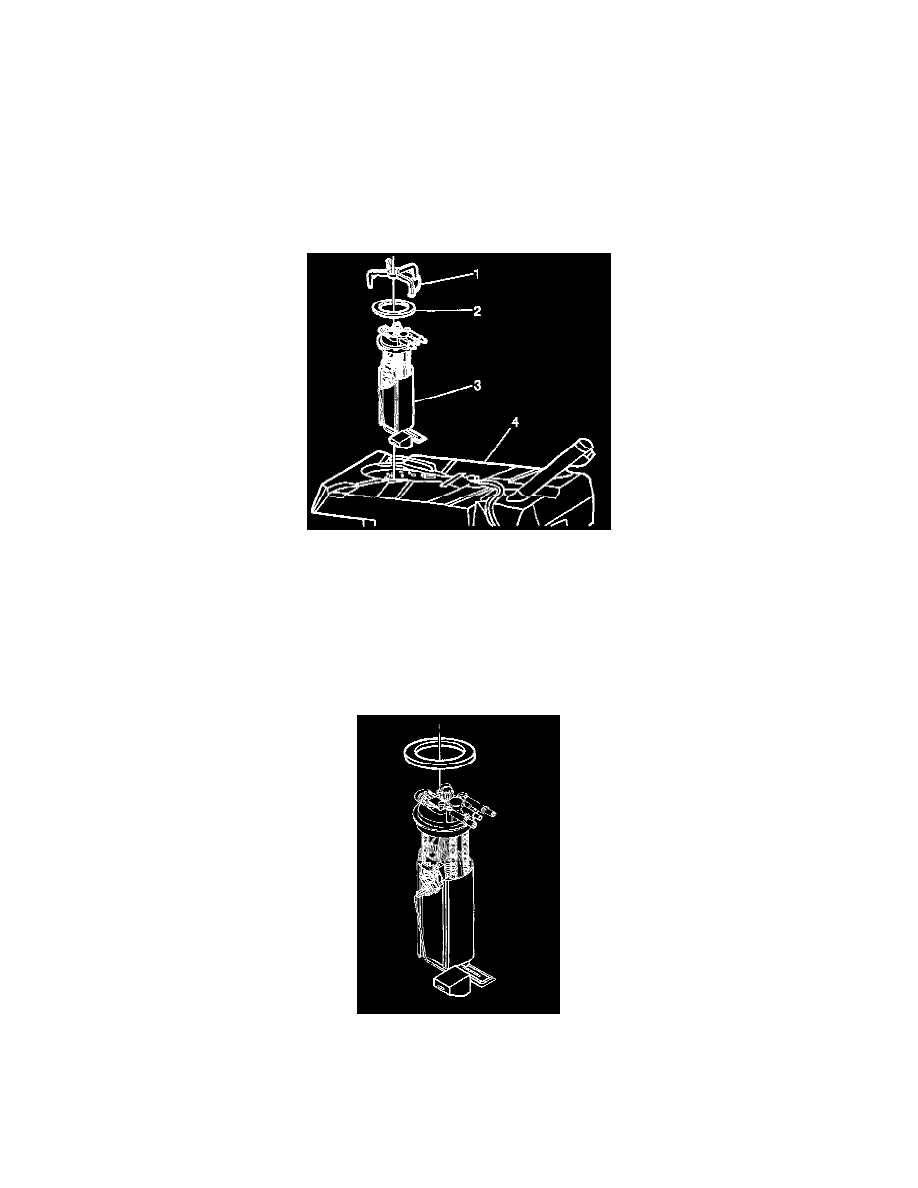
9. Remove the fuel sender retaining ring (2) using the J 39765(1).
IMPORTANT: The fuel sender assembly will spring-up when the locking ring is removed.
10. Pull the fuel sender straight up while pumping the fuel from the reservoir.
11. Clean the fuel sender assembly O-ring sealing surfaces.
12. Inspect the fuel sender assembly O-ring sealing surfaces.
INSTALLATION PROCEDURE
IMPORTANT: Always replace the fuel sender O-ring when reinstalling the fuel sender assembly.
