
Fleetwood V8-368 6.0L VIN 9 FI (1982)
Ball Joint: Service and Repair
Upper
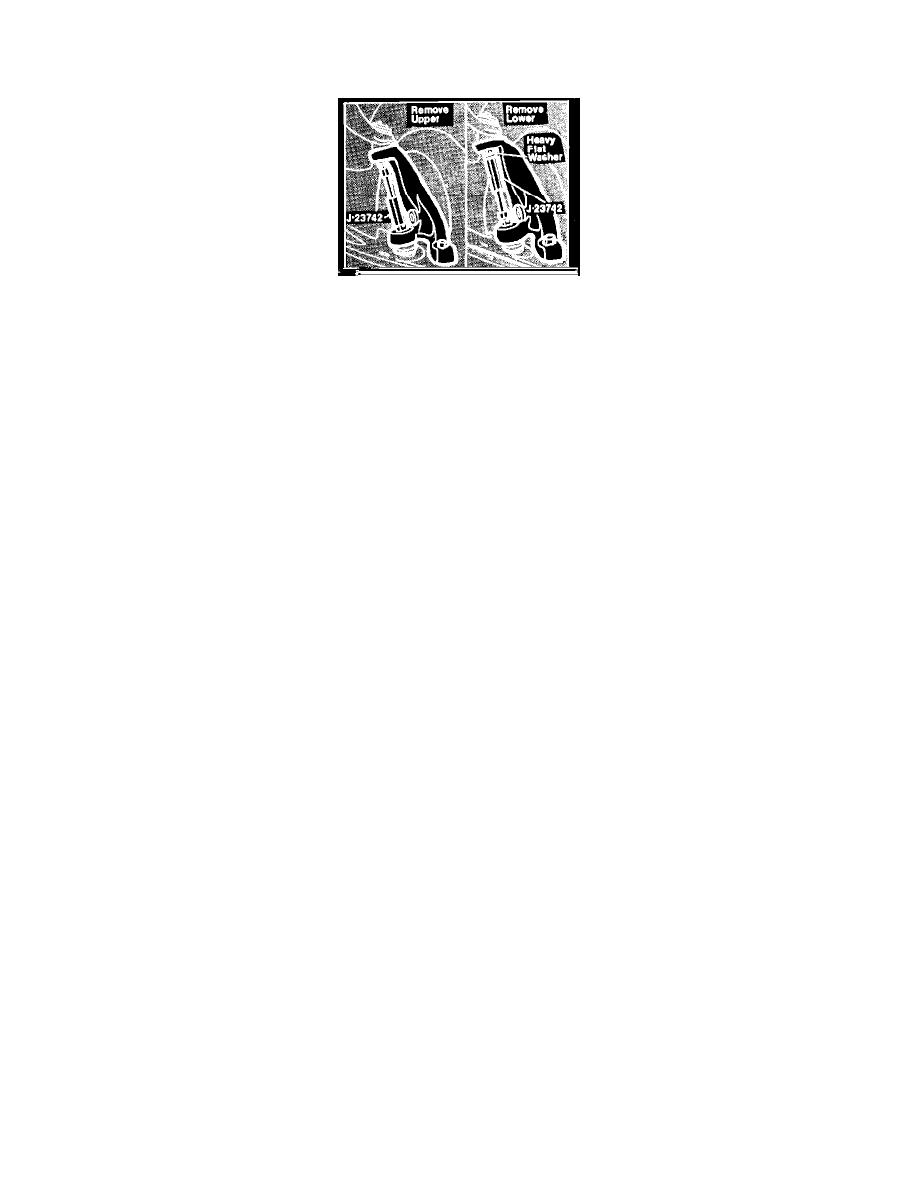
Fig. 3 Removing ball joint studs from steering knuckle. Brougham & DeVille
1.
Raise vehicle and remove wheel.
2.
Remove cotter pin from upper ball joint stud.
3.
Remove caliper and position aside. When removing caliper use care not to damage brake tubing or hose. Secure caliper to frame with wire.
4.
Loosen stud nut, however, not more than one turn.
5.
Using tool No. J-23742, free ball joint stud from steering knuckle, Fig. 3. The lower control arm must be supported so spring cannot force
arm down.
6.
Remove upper ball joint stud nut, allow steering knuckle to swing out of way and place block of wood between frame and upper control arm.
7.
To remove rivets securing ball joint to upper control arm, grind rivet heads off, then, using a punch, drive rivets out. Use care not to damage ball
joint seat or upper control arm when removing rivets.
8.
Remove ball joint.
9.
Install new ball joint in control arm and attach with bolt and nut assembly provided with new joint. Install bolts from bottom and torque nuts to 20
ft. lbs.
10.
Remove block of wood from between frame and upper control arm, position upper ball stud to steering knuckle, install and torque nut to 60 to 61
ft. lbs. Install cotter pin. If cotter pin hole is not aligned do not back nut off. Nut may be torqued to a maximum of 100 ft. lbs. (1/6
additional turn) to align cotter pin hole.
11.
Install caliper, lubricate ball joint and install wheel.
12.
Check wheel alignment.