
Fleetwood V8-368 6.0L VIN 9 FI (1982)
Ball Joint: Service and Repair
Lower
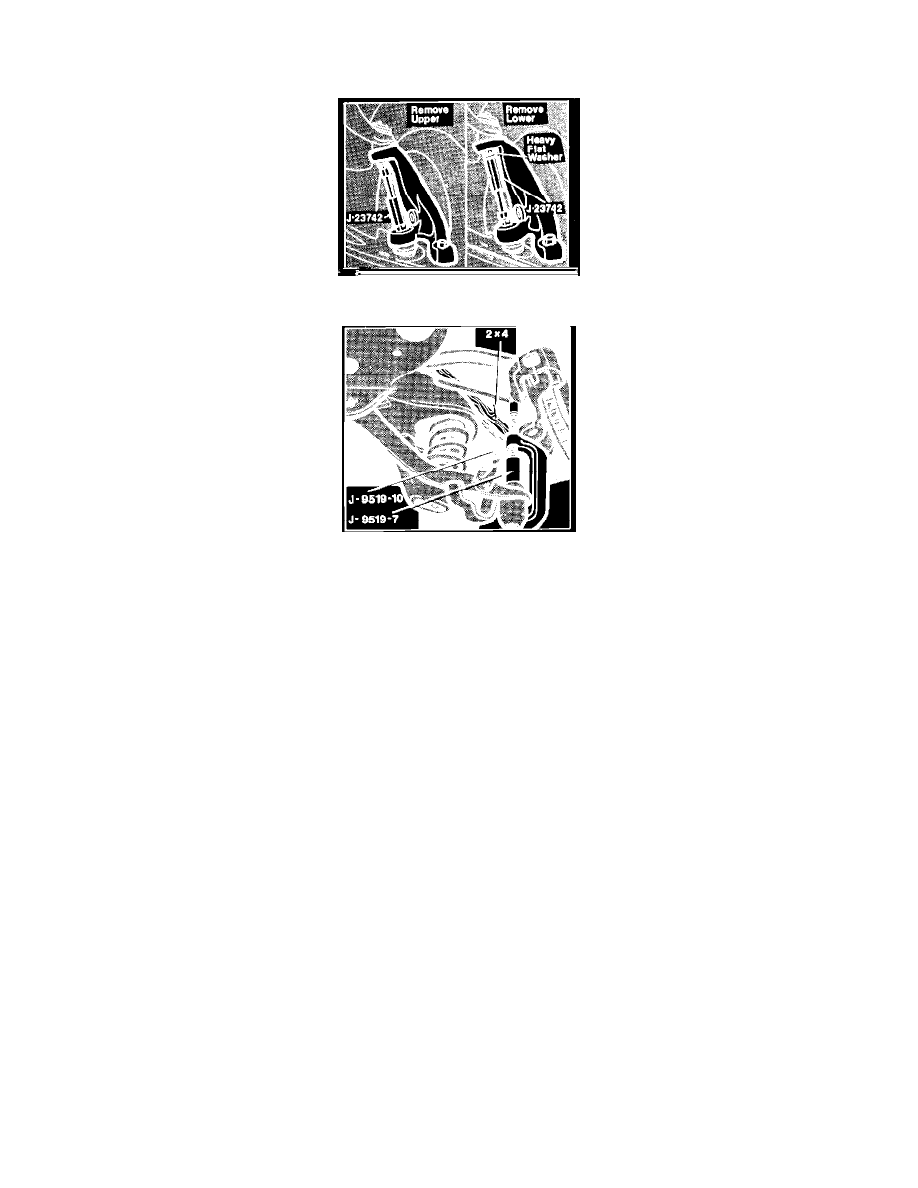
Fig. 3 Removing ball joint studs from steering knuckle. Brougham & DeVille
Fig. 4 Removing ball joint from lower control arm. Brougham & DeVille
1.
Raise vehicle and remove wheel.
2.
Remove cotter pin from lower ball joint stud and loosen nut one turn.
3.
Using tool No. J-23742, free ball joint stud from steering knuckle, Fig. 3. Lower control arm must be supported so spring cannot force arm
down.
4.
Remove lower stud nut and pull upward and outward on bottom of brake disc to free ball joint stud from steering knuckle.
5.
Lift upper control arm up with steering knuckle and hub attached and place a block of wood between frame and upper control arm. It may be
necessary to remove tie rod from steering knuckle.
6.
Using tools J-9519-10 and J-9519-7 or equivalent, remove ball joint from lower control arm, Fig. 4.
7.
Install ball joint in lower control arm using tools J-9519-9 and J-9519-10 or equivalent. Position bleed vent in ball joint rubber boot to face
inward and the stud cotter pin hole to face forward.
8.
Remove block of wood from between frame and upper control arm, then install lower ball joint stud in steering knuckle. Install and torque nut to
80 to 83 ft. lbs. and install cotter pin. Some models are equipped with prevailing torque fasteners, and therefore no cotter pins are used. On
models with fasteners that use cotter pins as locking devices, nut may be torqued to a maximum of 92 ft. lbs. to align cotter pin holes.
9.
Lubricate ball joint and install tie rod, if removed. Torque tie rod nut to 40 ft. lbs. on 1982 models, or 30 ft. lbs. on 1983---88 models. Some
models are equipped with prevailing torque fasteners, and therefore no cotter pins are used.
10.
Install wheel and check wheel alignment.