
SRX AWD V6-3.0L (2010)
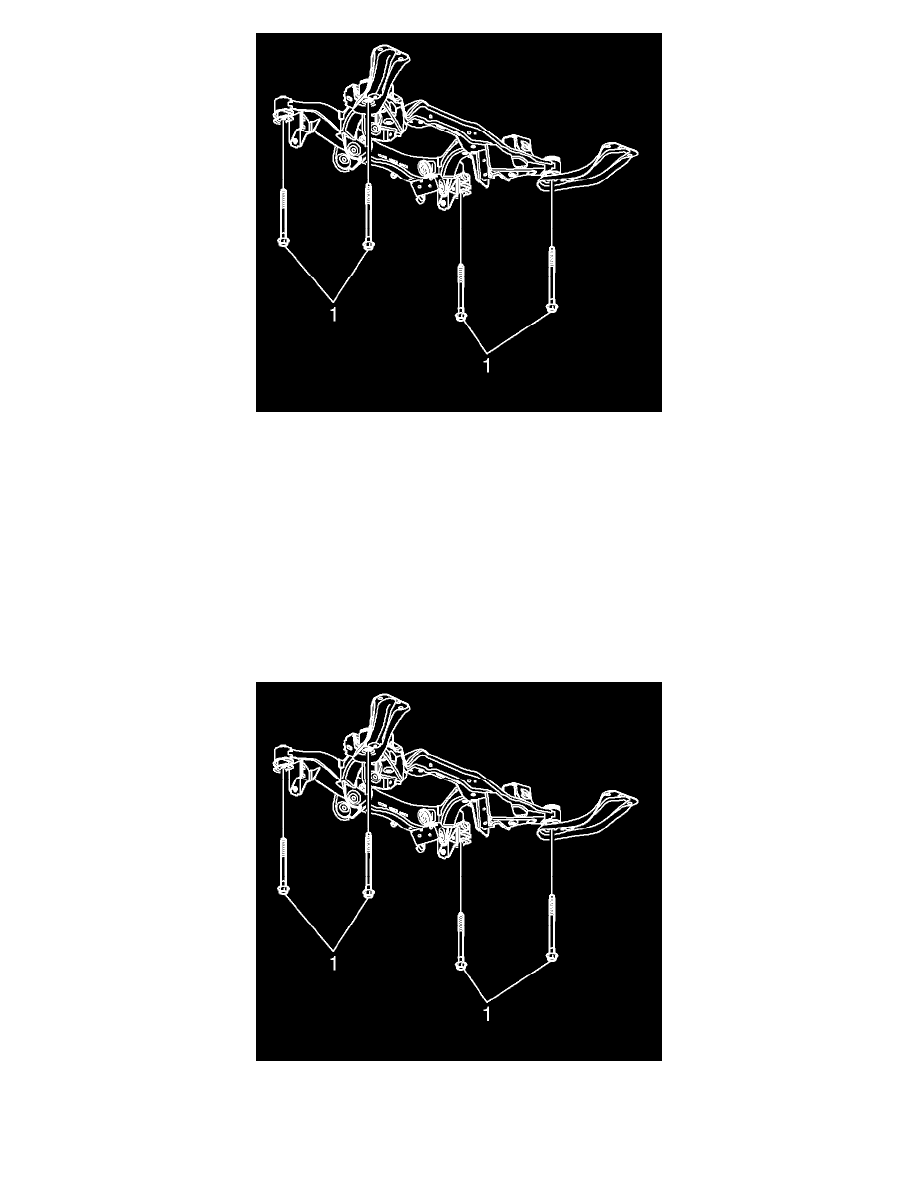
17. Remove the 4 rear support to body bolts (1).
18. Remove the rear support assembly from the vehicle.
19. Remove the inner fastener from adjustments links. Refer to Adjust Link Replacement (See: Steering/Tie Rod/Service and Repair/Rear
Suspension).
20. With the aid of an assistant, remove the rear support from the transmission jack and place it on the floor.
Installation Procedure
Note: When transferring any suspension components, refer to each suspension component replacement procedure for the proper torque
specifications.
1. With the aid of an assistant, position the rear support onto the transmission jack and firmly secure the support to the jack with straps.
2. Install the inner fastener to adjustment links. Refer to Adjust Link Replacement (See: Steering/Tie Rod/Service and Repair/Rear Suspension).
3. Position the rear support assembly to the vehicle.
Caution: Refer to Fastener Caution (See: Service Precautions/Vehicle Damage Warnings/Fastener Caution).
4. Install 4 NEW rear support to body bolts (1) and tighten to 90 Nm (66 lb ft) + 85 degrees.
5. Install the differential carrier assembly. Refer to Differential Carrier Assembly Replacement ().