
SRX AWD V6-3.6L (2008)
1. Raise and support the vehicle. Refer to Lifting and Jacking the Vehicle (See: Maintenance/Vehicle Lifting/Service and Repair) .
2. Remove the exhaust system. Refer to Exhaust System Replacement (See: Engine, Cooling and Exhaust/Exhaust System/Service and Repair) .
3. Reference mark the propeller shaft constant velocity (CV) joint to the drive pinion flange.
Notice: The propeller shaft must be supported during removal and/or installation so that the CV joint does not articulate more than 8 degrees.
Allowing the propeller shaft to articulate greater than 8 degrees could cause damage to the CV boot. Damage to boot could lead to contamination
or loss of lubrication which could lead to CV joint damage.
4. Remove the propeller shaft CV joint-to-drive pinion flange bolts.
5. Push the propeller shaft toward the front of the vehicle to release the propeller shaft from the drive pinion flange.
6. Position the propeller shaft aside and support with heavy mechanics wire or equivalent.
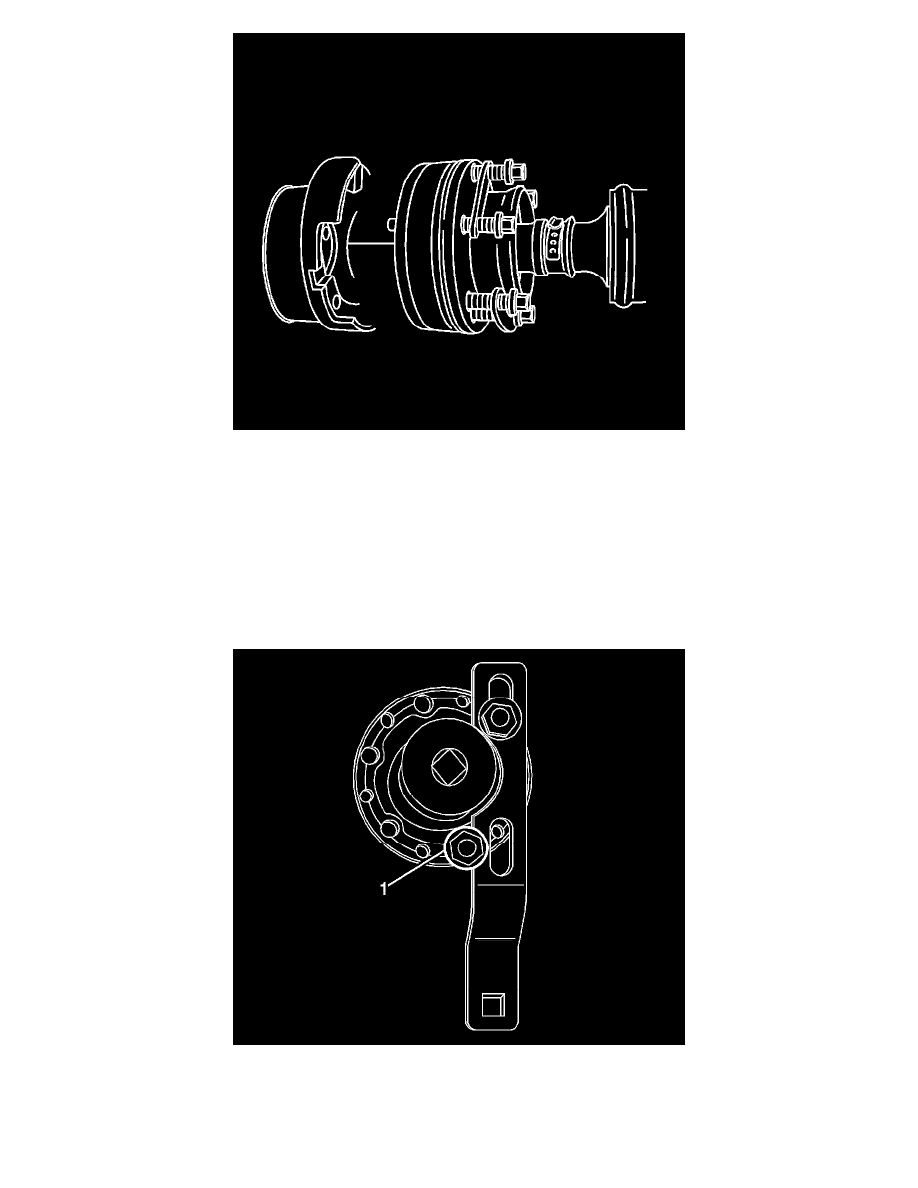
7. Install the J 45012 to the drive pinion flange.
Position the lower bolt (1) behind and outside of the J 45012 .
8. While holding the J 45012 , remove the drive pinion nut using the J 34826 .
9. Remove J 45012 from the drive pinion flange.