
G 30 Van V8-379 6.2L DSL VIN C FI (1992)
1.
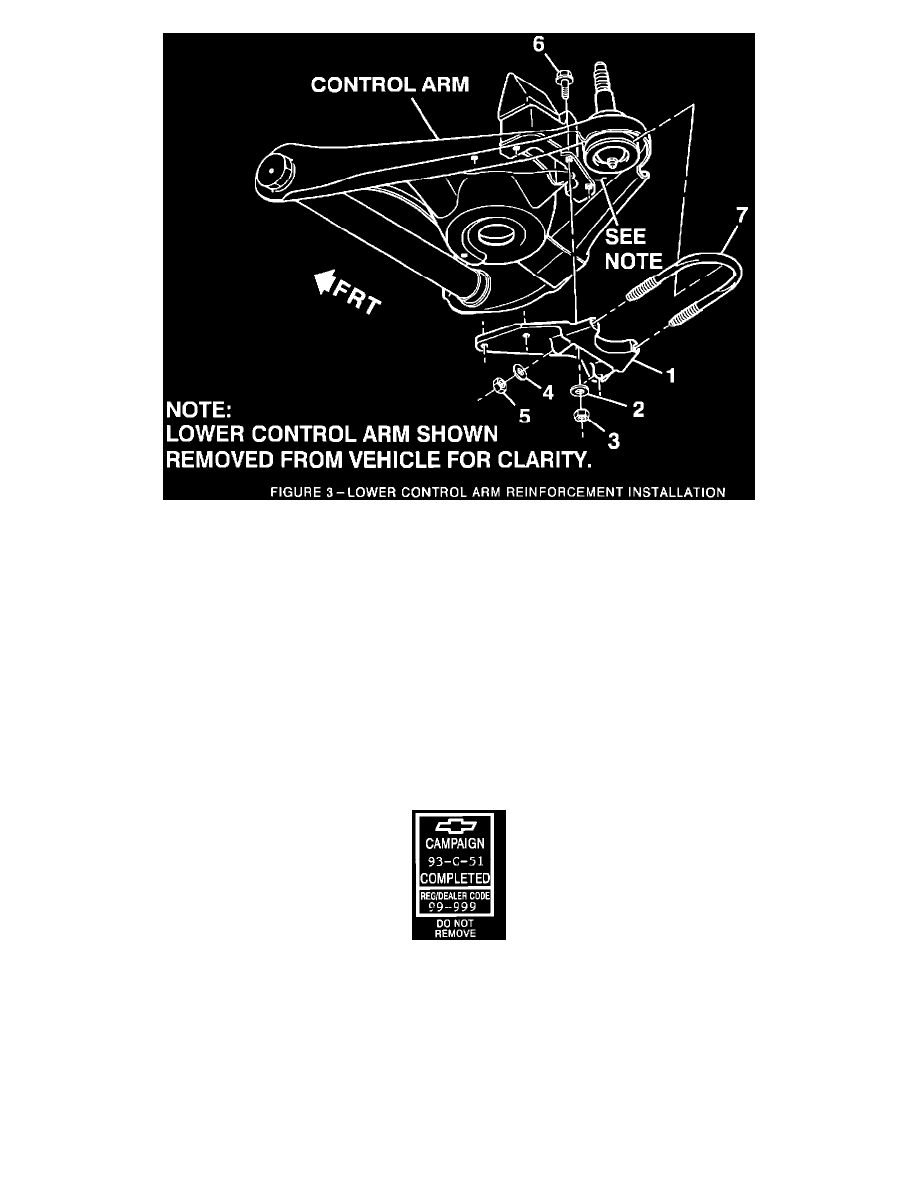
Reinstall reinforcement (Figure 3, Item 1) and U-bolt (Figure 3, item 7). Hand start all bolts and nuts. Tighten U-bolt nuts (Figure 3, Item 5) to
approximately 22 N-m (16 lb.ft.). Make sure U-bolt is ALIGNED with bottom edge of ball joint and is not cocked while continuing to torque.
NOTICE:
If rear most bolt head interferes with bump stop bracket, install bolt from bottom of control arm.
2.
Torque 3/8-16 bolts (Figure 3) to 37-43 N-m (27-32 lb.ft.) Torque center bolt first and remainder in any sequence.
3.
Torque U-bolt nuts (Figure 3) to 40-46 N-m (30-34 lb.ft.).
4.
Continue to other side of vehicle and follow steps 1-3 above for that lower control arm.
5.
Once both lower control arm reinforcements have been installed and torqued, lower vehicle.
6.
Install Campaign Identification Label.
Campaign Identification Label
Each vehicle corrected in accordance with the instructions outlined in this Product Campaign Bulletin will require a "Campaign Identification Label".
Each label provides a space to include the campaign number and the five (5) digit dealer code of the dealer performing the campaign service. This
information may be inserted with a typewriter or a ball point pen.
Each "Campaign Identification Label" is to be located on the radiator core support in an area which will be visible when the vehicle is brought in for
periodic servicing by the owner. Additional "Campaign Identification Labels" can be obtained from DAC.
Apply "Campaign Identification Label" only on a clean, dry surface.
Claim Information