
S10/T10 Blazer 4WD V6-4.3L VIN W (1997)
-
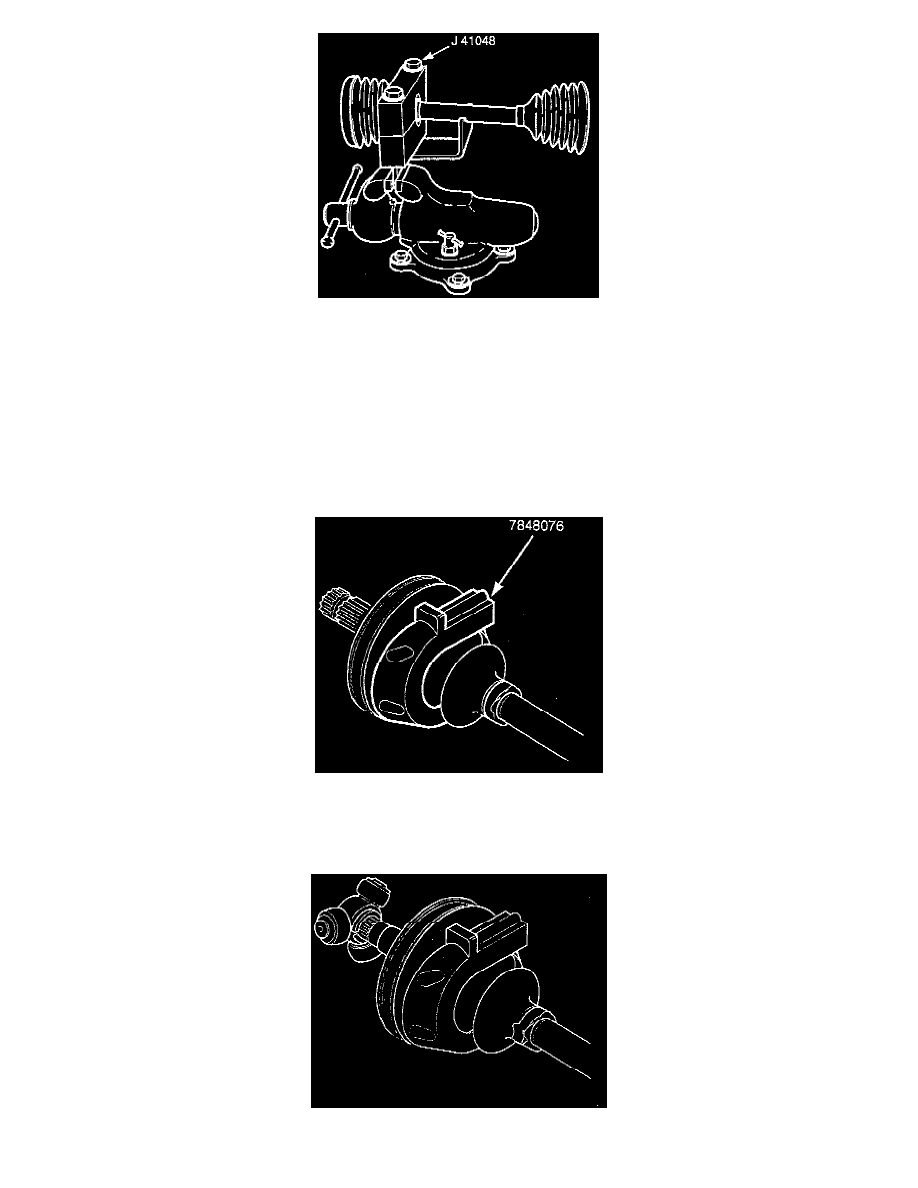
Place the top half of the J41048 tool on the bottom half.
-
Check to make sure there are no pinch points on the seal before proceeding with procedures.
-
Insert the bolts. Tighten the bolts by hand until snug.
-
Make sure the seal, the housing and the swedge clamp remain in alignment.
-
Tighten each bolt 180° at a time, using a ratchet wrench. Alternate between each bolt until both sides are bottomed.
-
Loosen the bolts. Separate the dies.
-
Check the swayed clamp for any "lip" deformities. If deformities exist, place the swedge clamp back into the J 41048 tool. Make sure the
swedge clamp covers the whole swaying area. Re-swedge the swedge clamp.
Optional: If a retaining clamp is present in the service kit, see retaining clamp procedure under INSTALL THE C/V JOINT SEAL AND C/V
JOINT ONTO THE DRIVE AXLE.
5. Install the convolute retainer (tool 7848076) over the seal, being sure to capture four convolutions.
Important: You must assemble the joint with the convolute retainer (tool 7848076) in the correct position, as illustrated. The seal will be
damaged if the joint is not assembled to meet the specified dimension.
6. Install the spacer ring and spider assembly onto the axle shaft.