
Tracker 4WD L4-1.6L VIN 6 (1998)
Wheel Speed Sensor: Service and Repair
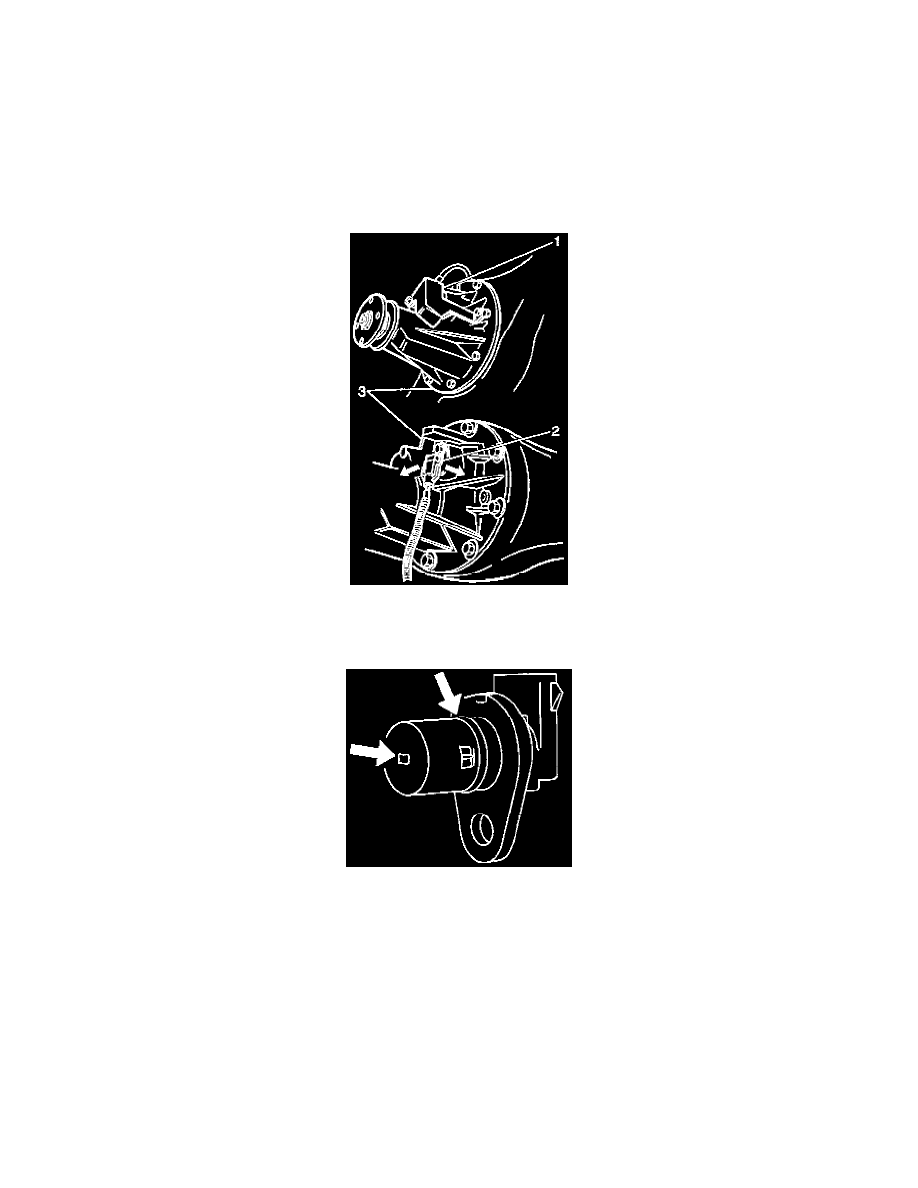
Replacement (Rear)
REMOVAL PROCEDURE
1. Disconnect the Negative (-) battery cable.
CAUTION: Before removing or installing any electrical unit or when a tool or equipment could easily come in contact with "live"
exposed electrical terminals, disconnect the negative battery cable to help prevent personal injury and/or damage to the vehicle or
components. Unless instructed otherwise, the ignition switch must be in the "OFF" or "LOCK" position.
2. Raise and support the vehicle.
3. Remove the two bolts and the rear wheel speed sensor cover (1) from the differential carrier (3).
4. Disconnect the rear wheel speed sensor electrical connector (2).
5. Remove the retaining bolt and the rear wheel speed sensor from the vehicle.
6. Inspect for the following on the sensor face:
-
Inspect for an accumulation of metallic particles, dirt, grease, or other contaminants.
-
Clean the sensor as required.
7. Inspect the sensor face for evidence of damage. Inspect the sensor for contact with the toothed sensor ring. The sensor should not contact the
toothed sensor ring. Determine and correct the cause of the damage when damage is evident. Replace the sensor if damage interferes with proper
operation. Check the axle bearing for excessive wear.
INSTALLATION PROCEDURE
NOTICE: The wheel speed sensor is a tight fit and is to be pushed in by hand. DO NOT force the sensor into position, as damage to the sensor
could result.
NOTICE: Wheel speed sensors must be given an anti corrosion coating before installation to prevent corrosion. Do not use grease. Use sealer.