
Tracker 4WD L4-1.6L VIN 6 (1998)
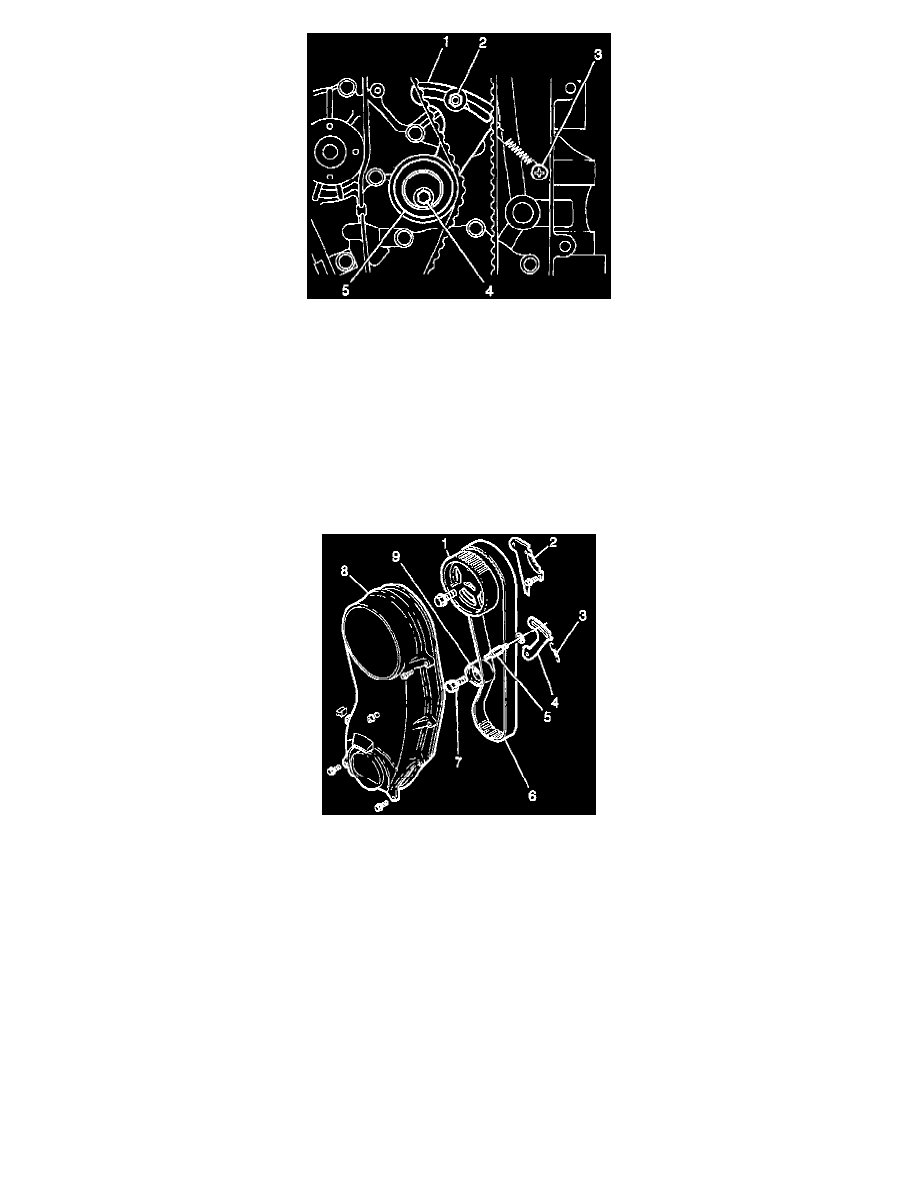
19. Loosen the timing belt tensioner bolt (4).
20. Remove the timing belt tensioner spring from the timing belt tensioner plate (1).
NOTICE: Do not turn the crankshaft and camshaft independently of one another once the timing belt has been removed. If the crankshaft or
camshaft is turned independently, interference between the pistons and valves may occur causing component damage.
21. Remove the timing belt from the camshaft and the crankshaft timing belt gears.
22. Remove the following from the engine:
^
One stud (2)
^
One bolt (4)
^
The timing belt tensioner (5)
^
The tensioner plate (1)
23. Inspect the timing belt (6) for wear or cracking. Replace the belt if necessary.
24. Inspect the tensioner (9) for smooth operation. Replace the tensioner if necessary.
INSTALLATION PROCEDURE
NOTICE: When installing a new or used timing belt, the directional arrows on the timing belt, the directional arrows on the timing is properly
installed. Install the timing belt tensioner stud and bolt finger tight only.
IMPORTANT: Do not tighten the timing belt tensioner stud and bolt to specification until the timing belt is properly installed. Install the timing
belt tensioner and stud and bolt finger tight only.
1. Install the timing belt tensioner plate and tensioner to the engine. Secure the plate and tensioner with the timing belt tensioner stud and bolt.
2. Push the timing belt tensioner plate up for the timing belt installation.