
Pacifica V6-3.8L VIN L (2005)
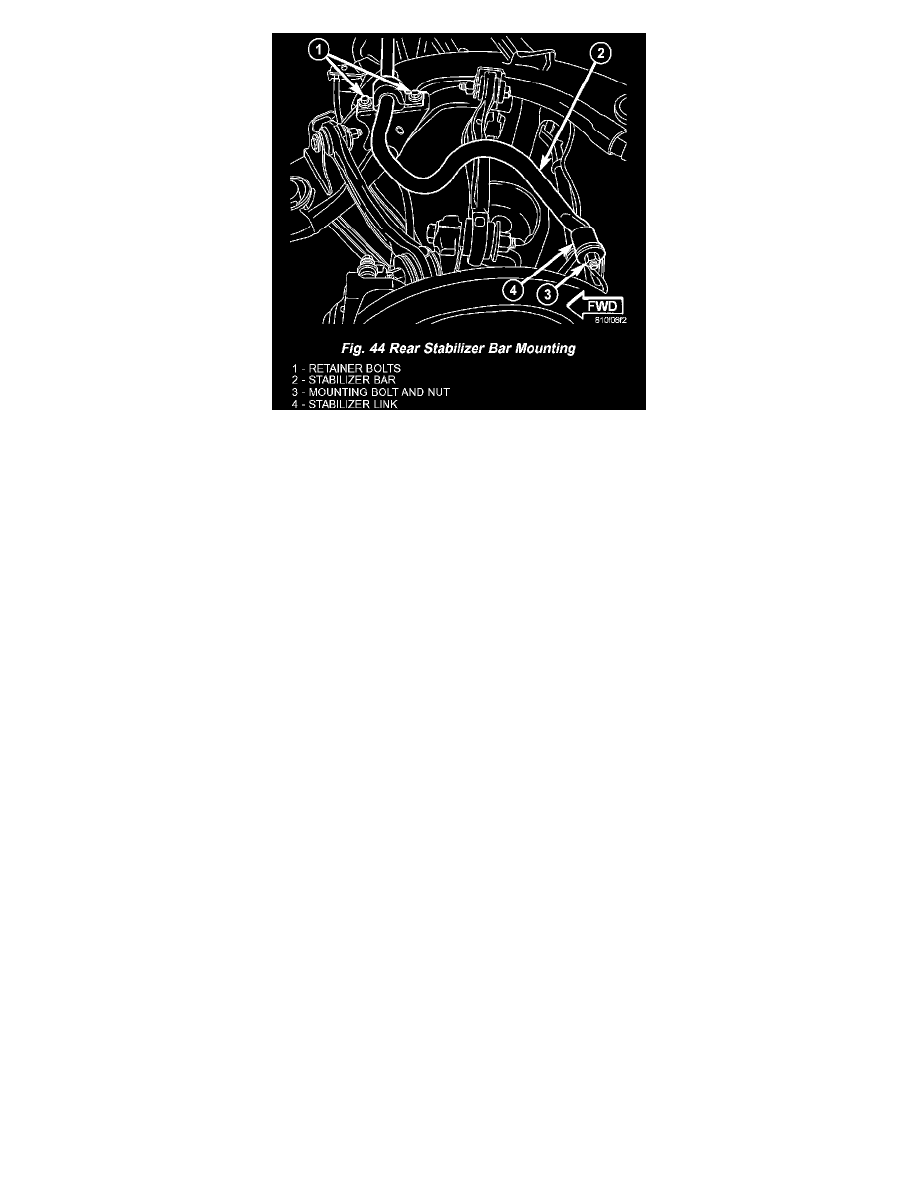
30. Remove bolt and nut fastening stabilizer bar to each stabilizer link (Fig. 44).
31. Remove bolts fastening each stabilizer bar cushion retainer to crossmember (Fig. 44).
32. Remove stabilizer bar with cushions and retainers.
33. Remove retainers from cushions.
34. Remove cushions from stabilizer bar utilizing slits in bushings.
INSTALLATION
1. Install cushions on stabilizer bar utilizing slits in bushings. Install each cushion so its slit faces forward and flat side is positioned toward
crossmember once installed.
2. Install retainers on cushions.
3. Install stabilizer bar with cushions and retainers on crossmember.
4. Install cushion retainer mounting bolts (Fig. 44). Do not tighten at this time.
5. Install bolt and nut fastening stabilizer bar to each stabilizer link (Fig. 44). Do not tighten at this time.
6. Tighten cushion retainer mounting bolts to 61 Nm (45 ft. lbs.) torque.
7. Raise crossmember to body mounting points. As crossmember is raised, slide propeller shaft onto alignment pin on end of rear driveline module
input flange and align shocks with pockets in spring links.
8. Continue to raise crossmember with jack until two crossmember mounting bolts can be installed (Fig. 35). Install left side crossmember mounting
bolts, but not the right side bolts (Fig. 35). It is not necessary to tighten bolts at this point.
CAUTION: To avoid damaging other components of vehicle, do not lower crossmember any further than necessary to install coil spring.
9. Slowly lower jack allowing right side of crossmember to drop. Do not lower jack at a fast rate. Lower jack just enough to allow spring Installation.
Do not lower jack any further than necessary.
10. Install coil spring and isolator (Fig. 36), top end first.
NOTE: Verify spring lower end coil is correctly placed against abutment built into spring link.
11. Carefully raise jack, guiding coil spring and lower end of shock absorber into mounted positions. Once shock absorber lower mounting hole lines
up with hole in spring link, stop jacking.
12. Install lower shock mounting bolt (Fig. 33). Do not tighten at this time.
13. Raise right side of crossmember into mounted position. Install right side crossmember mounting bolts (Fig. 35). Snug, but do not fully tighten
bolts at this time.
14. Remove both front and rear crossmember mounting bolts on left side of vehicle (Fig. 35).
CAUTION: To avoid damaging other components of vehicle, do not lower crossmember any further than necessary to install coil spring.
15. Slowly lower jack allowing left side of crossmember to drop. Do not lower jack at a fast rate. Lower jack just enough to allow spring installation.
Do not lower jack any further than necessary.
16. Install coil spring and isolator (Fig. 36), top end first.
NOTE: Verify spring lower end coil is correctly placed against abutment built into spring link.