
Caravan AWD V6-201 3.3L (1991)
^
Make sure the vehicle being tested has a fully charged battery.
^
The tests are presented in modified flowchart form.
-
The first two columns contain instruction statements. Perform each instruction in order. Perform each instruction as stated.
-
The third column contains diagnostic questions. Answer each question with a "yes" or "no" answer.
-
The fourth column contains repair or replacement instructions. Perform only the repair/ replacement instruction(s) that follow from the
"yes" or "no" answer to each question.
-
To proceed from one process box to another, follow the direction of the lines between the boxes as indicated by the arrows.
-
If a test is continued, an instruction is given in an arrow-shaped "box" to direct you to another test.
NOTE: Tests are identified by a number/letter combination, such as Test 1A or Test 5C. To avoid confusion between the number 1 and the
letter "I" and between the number 0 and the letter "0", no test identifications use the letters "I" or "0".
^
Be careful when performing electrical tests so as to prevent accidental shorting of terminals. Such mistakes can damage fuses or components.
Also, a second fault message could be set, making diagnosis of the original problem more difficult.
^
Use the DRBII voltmeter unless otherwise instructed to use an "external" voltmeter.
NOTE: Under no circumstances should a test lamp be used in place of a voltmeter.
^
Use the DRBII ohmmeter unless otherwise instructed to use an "external" ohmmeter. After each repair is completed, perform the Verification
Test procedure Test VER-1).
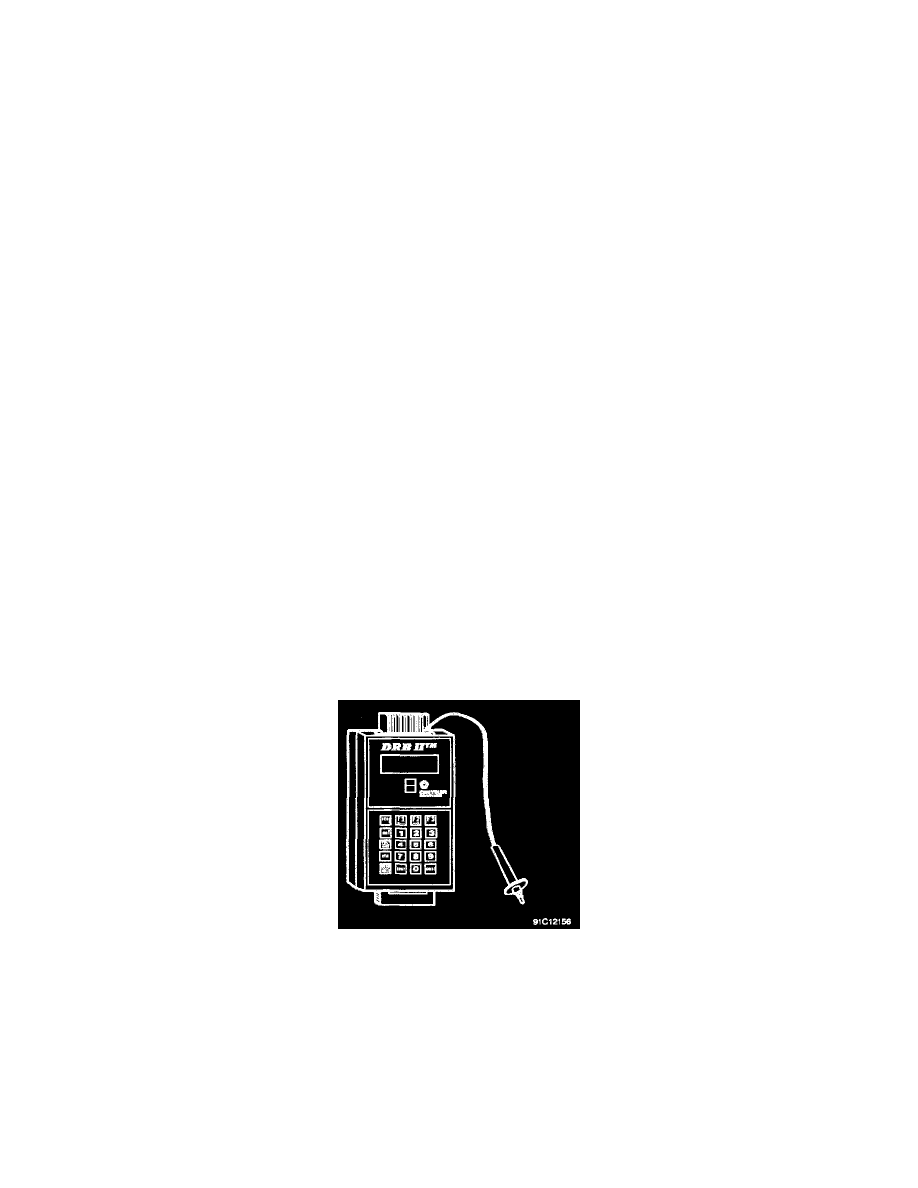
Help 1 - Operation of the DRBII For Diagnostic Testing
This HELP contains the following information and instructions:
-
How to Use the DRBII Keys
-
How to Use the DRBII Volt/Ohmmeter
-
HOW TO USE THE DRBII KEYS
^
To reach HELP on the DRBII, press and hold [F3] at any time.
^
To move forward or backward one item at a time within a menu, press the up arrow or down arrow key.
^
To select an item, press the item number, or move the arrows to the desired item and press ENTER.
^
To return to the previous display, press ATM.
^
To monitor one item of a multiple-item display, move the arrows to the desired item and press ENTER.
^
To freeze a variable display item, press READ/HOLD. To unfreeze the item, press READ/ HOLD again.
^
To restart the DRBII, hold MODE and press ATM at the same time.
HOW TO USE THE DRBII VOLT/OHMMETER
To access the volt/ohmmeter function of the DRBII, proceed as follows.
A. Connect the red volt/ohmmeter test lead to the red port at the right top of the DRBII.
NOTE: There are two ports at the top of the DRBII. Be sure to connect the lead to the correct port.
Voltmeter Mode
A. Press VOLT/OHM once. The top line of the display will change to read as follows:
*VOLTS = .X--*
B. Touch the test probe to the connector or wire to be measured.
C. Read the voltage on the DRBII display.
D. When voltage testing Is done, press VOLT/OHM three times to exit voltmeter mode.