
Removing-refitting power unit
- Make
- Fiat
- Model
- Bravo /Brava (182) Factory Service Manual
- Year
- 1995–2001
- Section
- Removing-refitting (98 range, 1242 16v) › Removing-refitting power unit
10 EngineRemoving-refitting power unit · page 1 of 9
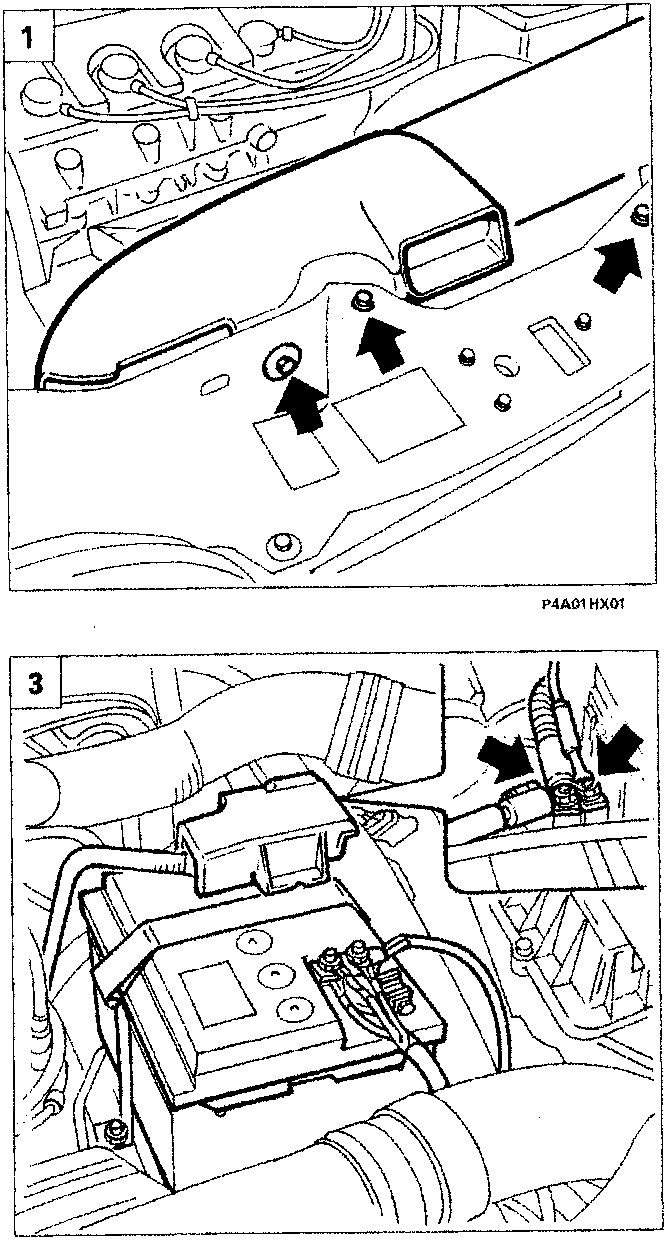
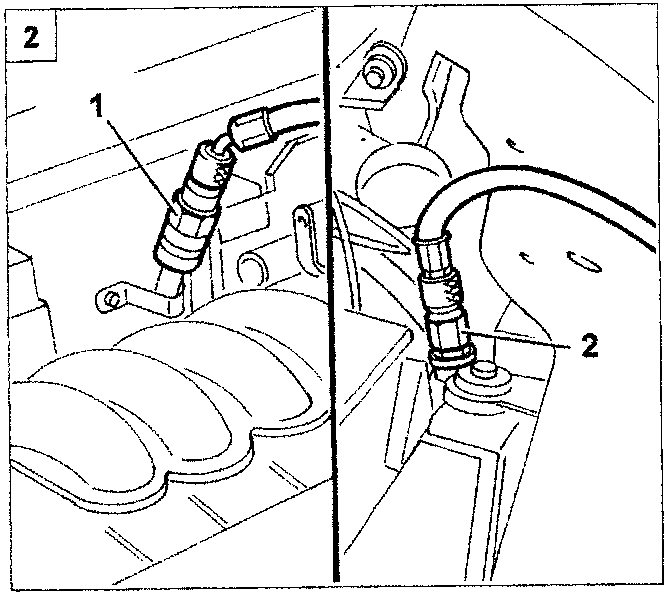
REMOVING-REFITTING POWER UNIT

- Undo the three fixing bolts and remove the air intake disconnecting first from the air filter.
- Drain the air conditioning system using the special equipment, connecting the pipe marked with the light blue connector (1) to the low pressure circuit needle valve and the pipe marked with the red connector (2) to the high pressure circuit needle valve.
Protective gloves and goggles should be worn whilst draining the system as protection against contact with R134A. To faciliate the draining of the refrigerant from the vehicle air conditioning system, the system should be left running first for 10 - 15 minutes.

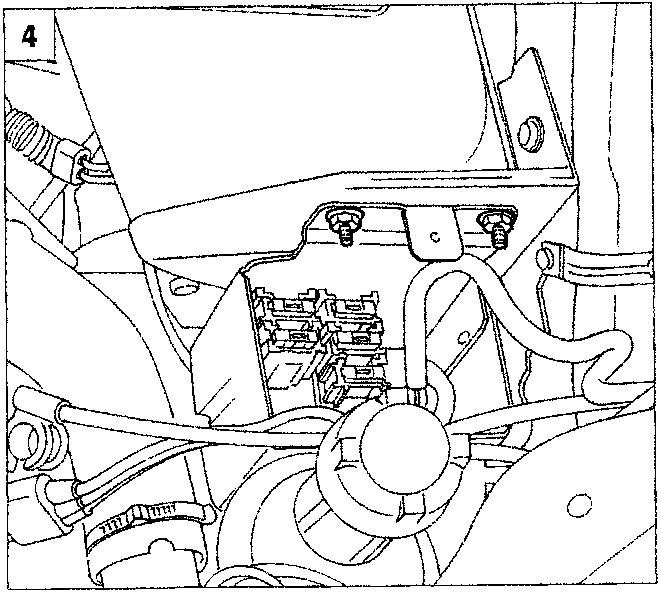
- Disconnect the negative battery lead, remove the protective cover for the positive pole, disconnect the terminal and separate the starter motor supply cables from the terminal; undo the nut securing the battery to the drip tray, then remove the latter from the engine compartment.
- Undo the bolt securing the relay casing cover and remove it, then undo the nuts fixing the casing to the battery drip tray and position the casing to the side.
Parts & tools for this job For 1995 Fiat Bravo
- PARTEngine gasket setSearch: Fiat Bravo 1995 engine gasket set
- TOOLTorque wrenchSearch: 3/8 inch torque wrench
- TOOLFeeler gauge setSearch: feeler gauge set
Links open Amazon search results in a new tab. As an Amazon Associate I earn from qualifying purchases.