
Heater radiator
- Make
- Fiat
- Model
- Bravo /Brava (182) Factory Service Manual
- Year
- 1995–2001
- Section
- Manual air conditioner and heater › Heater radiator
50 Auxiliary unitsHeater radiator
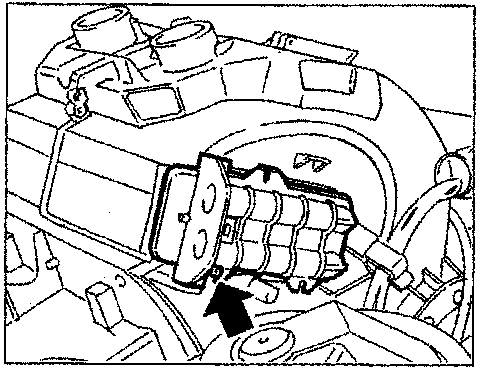
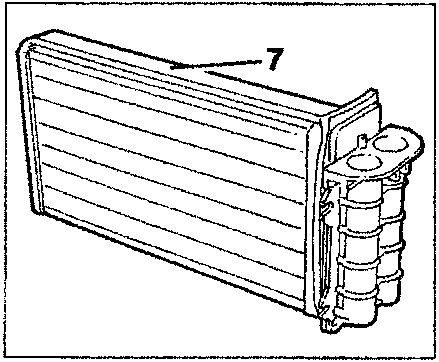
HEATER RADIATOR
Removing
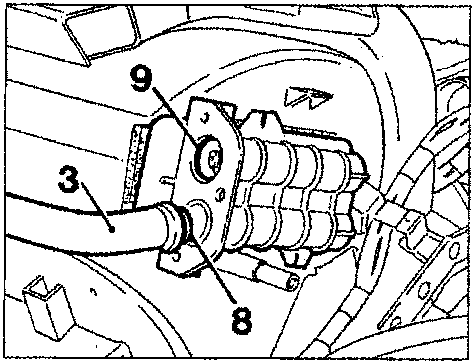
- carry out the operations described and illustrated on page 44, except for the third operation;
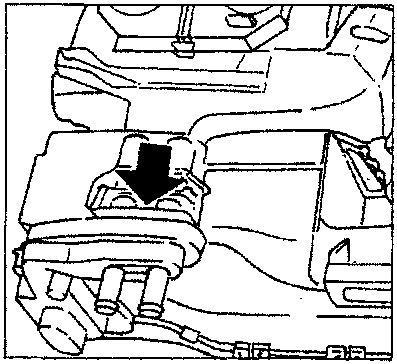
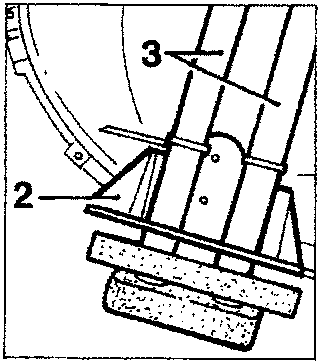
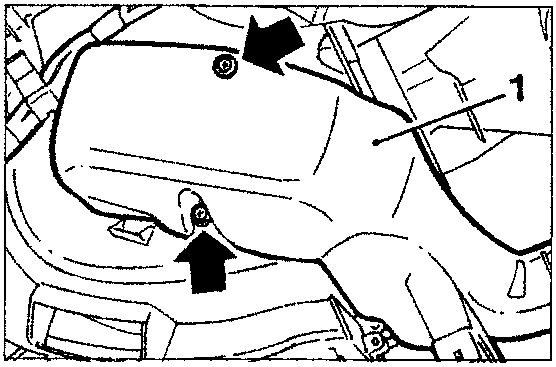
- undo the screws shown by the arrows in the first and third figures above, which secure the cover (1), and remove the frame (2) which keeps the pipes (3) in position;
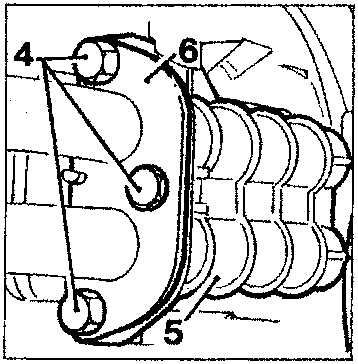
- undo the three bolts (4), taking care not to lose their nuts inserted in the seats in the split connector (5) of the heater radiator, and disconnect the two metal pipes (3) from the latter after removing the plate (6);
- undo the screw shown by the arrow in the second central figure and slowly withdraw the heater radiator (7) from the unit, taking care not to damage the finned surface and the adhesive strip of sponge rubber on the perimeter.
Assembly and refitting
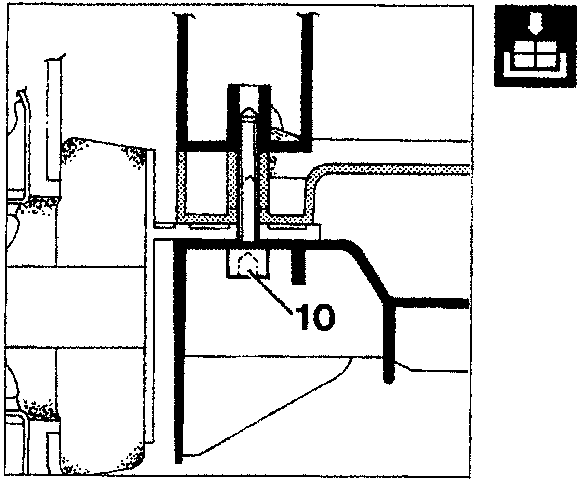
Reverse the procedure described and illustrated for removal, bearing in mind that before fitting the two metal pipes (3) to the split connector of the heater radiator, check that the tapered metal rings (8) are fitted on the ends and that the O-rings (9) are inserted in the seating holes.
NOTE The screw arrowed in the top left figure should be replaced with a socket-headed screw (10) which can be unscrewed without having to remove the dashboard and heater-distributor unit, so the above-mentioned components will not need to be removed, only the front two trim panels on the tunnel.
Parts & tools for this job For 1995 Fiat Bravo
- FLUIDCoolantSearch: Fiat coolant antifreeze
- PARTThermostatSearch: Fiat Bravo 1995 thermostat
- TOOLCooling system pressure testerSearch: cooling system pressure tester
Links open Amazon search results in a new tab. As an Amazon Associate I earn from qualifying purchases.