
Windscreen glass r r including cleaning of housing
- Make
- Fiat
- Model
- Ulysse Factory Service Manual
- Year
- 2002–2010
- Section
- Bodyshell windows › Windscreen glass r r including cleaning of housing
WINDSCREEN GLASS R R INCLUDING CLEANING OF HOUSING
Removing
Op. 5050B34 WINDSCREEN WIPER ARM/S COMPLETE WITH BLADE - R+R
- [Both]
Op. 7055A18 L/H OR R/H SIDE RUBBING STRIP DECORATIVE SEAL - R+R
Op. 7040H30 FRONT PILLAR TRIM - R R
- [Both]
Op. 7065C68 REAR VIEW MIRROR - R+R
Op. 7065C34 L/H OR R/H SUN BLIND (ONE) - R+R
- [Both]
Op. 7040E10 FRONT COURTESY LIGHT - R+R
Op. 7040H33 GLASSES HOLDER (1) LH OR RH, ON ROOF TRIM - R R
Op. 7065C30 INTERIOR L/H OR R/H GRAB HANDLE (ONE) - R+R
Op. 7065C62 ADDITIONAL INTERIOR REAR VIEW MIRROR - R.R.
Op. 7040A69 DASHBOARD COVER UPPER TRIM - R.R.
- Lower the roof trim as necessary.
1. Release the lower windscreen seal from the housing and remove it.
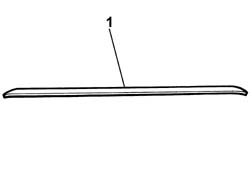
1. Release the trim on the instrument panel from the retaining clips.
2. Remove the trim on the instrument panel.
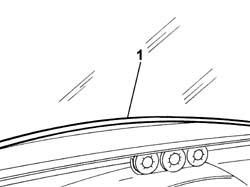
1. Apply adhesive tape to the edges to protect the bodywork in the areas shown.
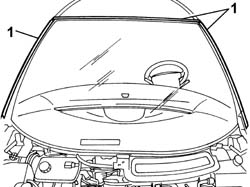
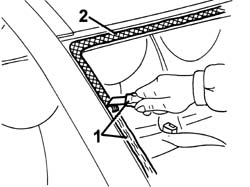
1. Working on the outside of the windscreen, pass the wire for a length of about 40 - 50 cm through the windscreen sealant and let it come out on the inside.
2. Fit the special tools and, with the assistance of a second mechanic, cut the sealant.
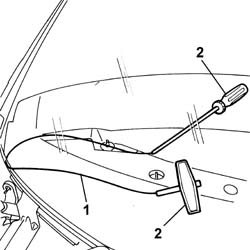
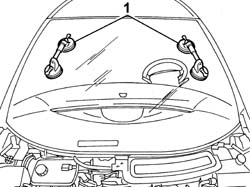
1. Fit the suction pads on the windscreen and, with the assisstance of a second mechanic, remove the windscreen.
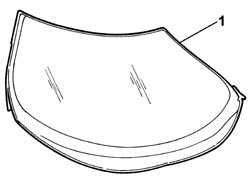
Refitting
1. Using suitable equipment, cut and level the bead of sealant in the windscreen housing leaving a thickness of between 0.25 and 1 mm, taking care not to scratch the paintwork.
The thickness of the remaining sealant will act as a support for the new bonding
2. Thoroughly clean the windscreen housing using an air jet and degrease fully using heptane.
- If necessary, retouch the paintwork.
- Check that the glass is not damaged.
- Degrease the serigraphed perimeter of the new windscreen using heptane.
- Apply the glass adhesion promoter (primer) to the serigraphed perimeter using the wick supplied in the Kit.
| Description | Qty. | Component | Type | Classification | |
|---|---|---|---|---|---|
| PRIMER | WINDSCREEN GLASS SEALING STRIP | Sealant |
- Wait for about 15 minutes before continuing with the next operation to allow the adhesion promoter thinner to evaporate.
1. Fit the suction pads on the glass.
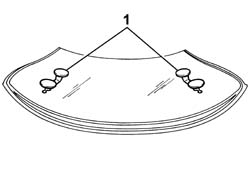
- Fit the lower windscreen seal and attach it.
- Fit the trim on the instrument panel on the retaining clips.
Op. 7040A69 DASHBOARD COVER UPPER TRIM - R.R.
avoid touching the area treated previously with your hands
1. Remove the adhesive tape from the edges of the bodywork and along the side and upper perimeters of the windscreen housing.
2. Using a new seal, carry out a test fitting and centre the windscreen perfectly using the handles fitted previously.
3. When the windscreen has been centered, mark the position of the windscreen in relation to the housing using strips of adhesive tape.
4. Cut the strips of adhesive tape and remove the windscreen.
1. Using a spray gun apply a bead of sealant along the entire perimeter of the rearscreen as evenly as possible.
Start the operation from the centre of the bottom and continue without breaks along the entire perimeter of the glass.
| Description | Qty. | Component | Type | Classification | |
|---|---|---|---|---|---|
| Product n° 71711976 | WINDSCREEN GLASS SEALING STRIP | Sealant |
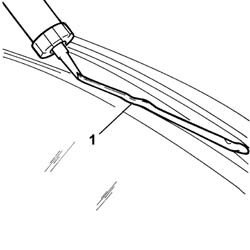
1. Place the windscreen in the housing, with the assistance of a second mechanic, straight after applying the sealant and let it bed in.
2. Position the belt (2a), as illustrated, and tension it so that even pressure is exerted on the entire windscreen to ensure that the matching between the glass (2b), sealant (2c) and windscreen housing (2d) is correct.
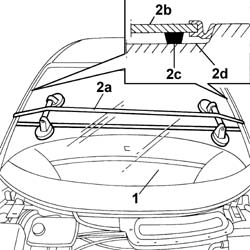
- Before refitting the exterior and interior components, check that there is no penetration by applying soapy water using a sponge along the external perimeter and using an air jet from the inside in order to highlight any possible penetration.
Op. 7065C30 INTERIOR L/H OR R/H GRAB HANDLE (ONE) - R+R
Op. 7040H33 GLASSES HOLDER (1) LH OR RH, ON ROOF TRIM - R R
Op. 7040E10 FRONT COURTESY LIGHT - R+R
Op. 7065C34 L/H OR R/H SUN BLIND (ONE) - R+R
- < R1 > [Both]
Op. 7065C68 REAR VIEW MIRROR - R+R
Op. 7040H30 FRONT PILLAR TRIM - R R
- < R1 > [Both]
Op. 7065A18 HEIGHT ADJUSTER OF ON FRONT SEAT BELT ONE LH OR RH R R
Op. 5050B34 WINDSCREEN WIPER ARM/S COMPLETE WITH BLADE - R+R
- < R1 > [Both]
Parts & tools for this job For 2002 Fiat Ulysse
- TOOLTrim removal tool kitSearch: trim removal tool kit
- PARTTouch-up paintSearch: Fiat touch up paint
- PARTPanel clip assortmentSearch: Fiat panel clips assortment
Links open Amazon search results in a new tab. As an Amazon Associate I earn from qualifying purchases.