
Rear trim
- Make
- Fiat
- Model
- Ulysse Factory Service Manual
- Year
- 2002–2010
- Section
- Removing refitting › Rear trim
REAR TRIM
The vehicle should be in the following condition before the operation: front seat detached, rear seat detached, front and rear door seals detached.
The procedure in question involves the complementary operation of replacing the front and rear doors and stripping the floor panel lining, the centre pillar, the rear pillar and removing the roof panel.
Removing
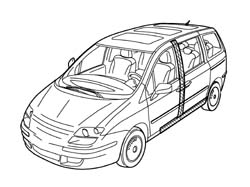
- Work on the component hightlighted previously making sure that the equipment illustrated below is available.
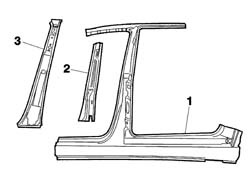
1. central pillar
2. Centre pillar reinforcement
3. Centre pillar box section
- Check that the components connected are not distorted by checking the bodyshell alignment measurements using suitable equipment (gauges, templates or jigs).
Carry out any bodyshell straightening operations before cutting the component.
Remove the anti-corrosion treatment in the replacement part contact areas using a rotary brush and apply electro-galvanizing paint.
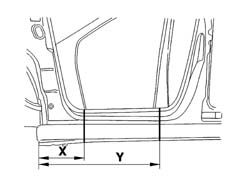
- Trace the cutting line as illustrated in the diagram
- Prepare the edges to be welded and protect them using thermoweldable primer
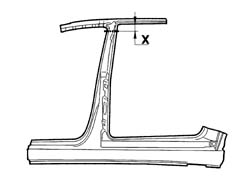
- Trace the reference for the temporary cutting as illustrated in the diagram.
- Proceed with cutting (A) the centre pillar
- Reduce the spot welds illustrated (B) using a chamfering machine.
- Remove the lower part of the centre pillar.
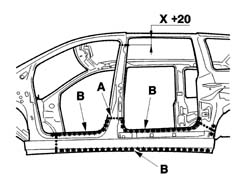
- Reduce the spot welds illustrated using a chamfering machine.
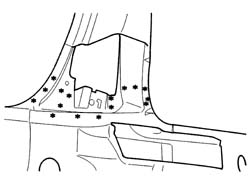
- Proceed with the cutting (C) as indicated and then grind the weld beads (D).
- Remove the component
- Prepare the edges to be welded and protect them using thermoweldable primer
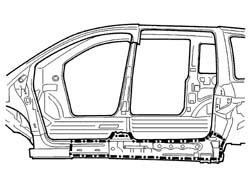
- Prepare the edges to be welded and protect them using thermoweldable primer
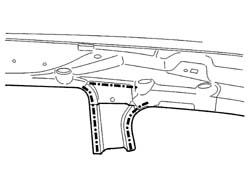
Refitting
- Position the centre foot lining, the reinforcement for the centre foot and the centre foot and fasten with self-locking clamps then, after having checked that the alignment and the clearances are correct, trace the definitive cuts, remove the centre foot lining, the centre foot reinforcement and the centre foot and proceed as described below.
- Make the definitive cuts
- Prepare the edges to be welded and protect them using thermoweldable primer
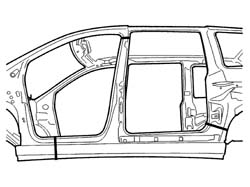
- Proceed with the MIG fill welding (E), then spot weld as illustrated in the diagram and then grind the welds using a disc grinder.
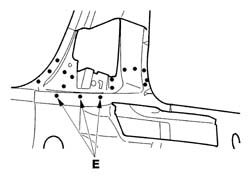
- Proceed with the MIG welding as illustrated in the diagram.
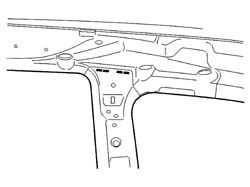
- Apply structural adhesive as illustrated in the diagram (F).
- Apply sealing and welding compound as illustrated in the diagram (G)
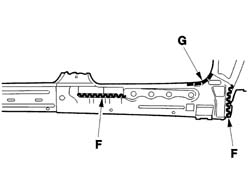
- Fit the centre reinforcement and the centre foot then continue with the MIG welding (H) and then use a spot welder as illustrated in the diagram followed by a disc grinder for grinding the welds.
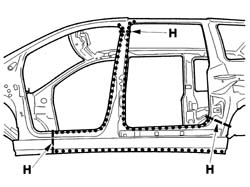
- Finish off by surfacing the area illustrated in the diagram.
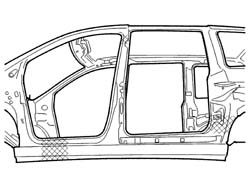
- Apply finishing compound using a brush starting from the bottom of the vehicle.
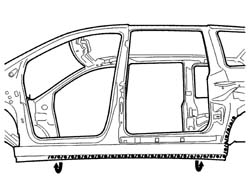
- Check that the welded component is correctly positioned.
- Apply electro-galvanizing paint to the ground parts.
- Proceed with applying wax and foam to the box sections.
When the operation is completed, refit the elements removed previously.
Parts & tools for this job For 2002 Fiat Ulysse
- TOOLTrim removal tool kitSearch: trim removal tool kit
- PARTTouch-up paintSearch: Fiat touch up paint
- PARTPanel clip assortmentSearch: Fiat panel clips assortment
Links open Amazon search results in a new tab. As an Amazon Associate I earn from qualifying purchases.