Ford Workshop Service and Repair Manuals
HOME
FEATURES
MENU
INDEX
ABOUT US
Evaporator Core >
< Clutch and Clutch Field Coil
C-MAX 2003.75 (06.2003-)
Mechanical Repairs
4 Electrical / 412 Climate Control System
412-03 Air Conditioning
Description and Operation
Diagnosis and Testing
Removal and Installation
Clutch and Clutch Field Coil - Vehicles Built Up To: 08-2005 1.6L Duratorq-TDCi (DV) Diesel-2.0L Duratorq-TDCi (DW) Diesel
Air Conditioning - Clutch and Clutch Field Coil—Vehicles Built Up To: 08/2005 1.6L Duratorq-TDCi (DV) Diesel/2.0L Duratorq-TDCi (DW) Diesel
C-MAX 2003.75 (06/2003-)
Removal and Installation
Removal
Remove the A/C compressor.
For additional information, refer to
A/C compressor - 1.6L diesel
/
A/C compressor - 2.0L diesel
in this section.
Detach the clutch field coil wiring harness from the A/C compressor.
Remove the A/C compressor drive plate.
NOTE:
If necessary, remove a seized A/C compressor pulley using a suitable remover.
Remove the A/C compressor pulley.
Remove the distance washers.
Discard the pulley snap ring.
Remove the clutch field coil snap ring.
NOTE:
Mark the installation position of the A/C compressor clutch wiring harness in relation to the compressor housing.
Remove the clutch field coil.
Installation
CAUTION:
Do not tilt the clutch field coil when installing in the A/C compressor.
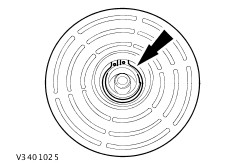
NOTE:
Installation position of the A/C compressor clutch wiring harness in relation to the compressor housing.
NOTE:
Install a new A/C compressor pulley snap ring.
Install the components in the reverse order.
Check the A/C clutch air gap. For additional information, refer to Section
412-00 Climate Control System - General Information
.
Mechanical Repairs
4 Electrical / 412 Climate Control System
412-03 Air Conditioning
Description and Operation
Diagnosis and Testing
Removal and Installation
Clutch and Clutch Field Coil - Vehicles Built Up To: 08-2005 1.6L Duratorq-TDCi (DV) Diesel-2.0L Duratorq-TDCi (DW) Diesel
Evaporator Core >
< Clutch and Clutch Field Coil