
Expedition 2WD V8-5.4L (2009)
3. Position the RH engine support insulator-to-cylinder block bracket and install the 3 bolts.
-
Tighten to 63 Nm (46 lb-ft).
4. NOTICE: Only use hand tools when installing the RH engine support insulator nuts or damage to the engine support insulator can occur.
Install the 2 RH engine support insulator nuts.
-
Tighten to 175 Nm (129 lb-ft).
LH engine support insulator
5. Clean the engine support insulator-to-cylinder block and engine support insulator-to-frame mating surfaces of any dirt or foreign material prior to
installation.
6. Position the LH engine support insulator and hand start the 3 new engine support insulator-to-frame bolts.
-
Tighten to 175 Nm (129 lb-ft).
7. Position the LH engine support insulator-to-cylinder block bracket and install the 3 bolts.
-
Tighten to 63 Nm (46 lb-ft).
All engine support insulators
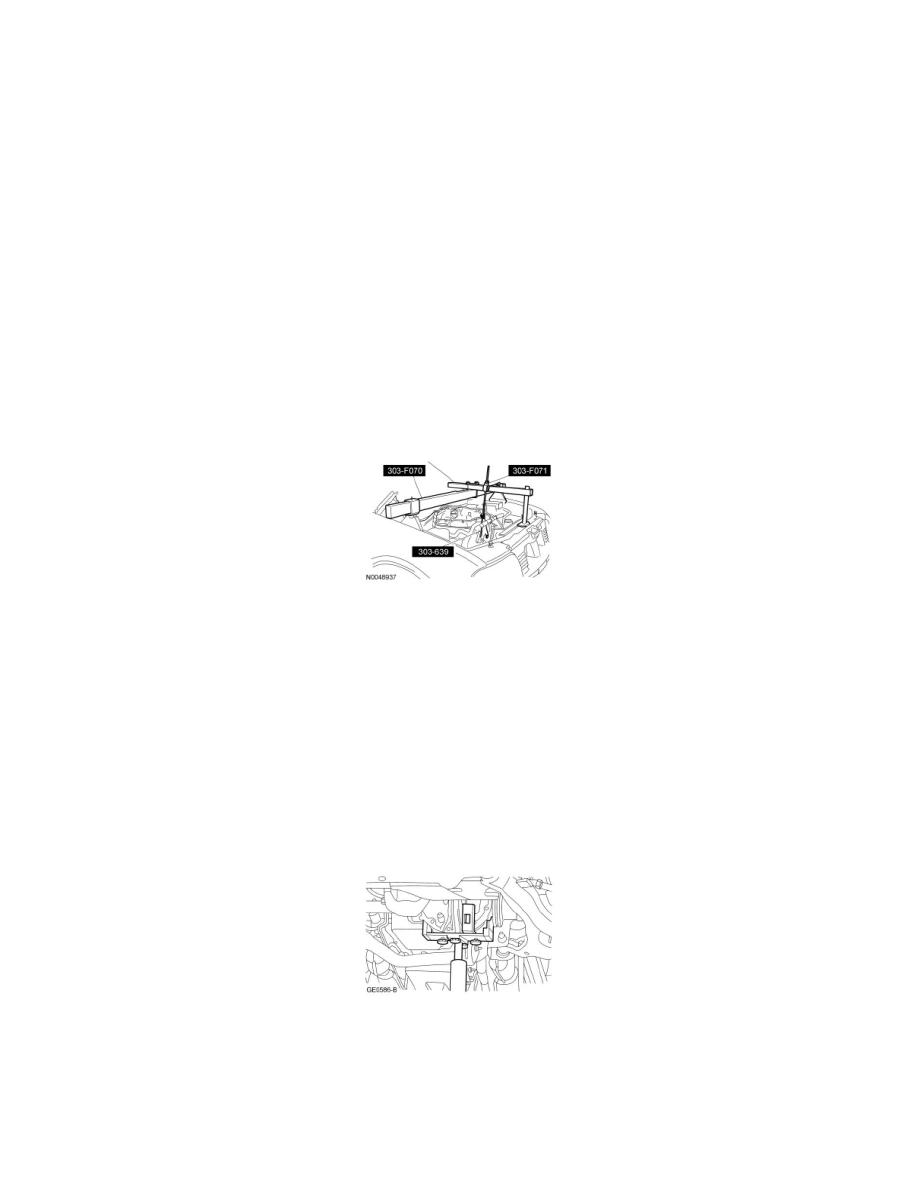
8. Using the Engine Support Bar, Support Hook and Engine Support Bracket, lower the engine into position.
9. NOTICE: Only use hand tools when installing the engine support insulator through bolt or damage to the engine support
insulator-to-cylinder block bracket can occur.
Install the LH and RH engine support insulator bolts.
-
Apply threadlock to the bolt threads prior to installation.
-
Tighten to 350 Nm (258 lb-ft).
4WD vehicles - RH engine support insulator
10. NOTICE: Use care when positioning the front axle housing or the vacuum lines to the axle solenoid may become disconnected or
damaged.
Raise the front axle carrier into position.
11. Install the lower front axle carrier mounting bushing bolt.
-
Tighten to 115 Nm (85 lb-ft).