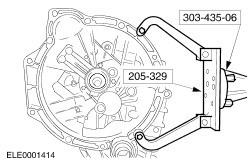
| Disassembly Special Tool(s) | | Remover, Drive Pinion Seal 205-078 (15-048) | | | Remover, Differential Bearing Cone 205-176 (15-074) | | | Mounting Bracket, Engine/Differential 205-329 (15-105A) | | | Remover, Seal 303-112 (21-051) | | | Separator, oil pan 303-428 (21-179) | | | Mounting Stand 303-435 (21-187) | | | Mounting Bracket for 303-435 303-435-06 (21-031B) | | | Installer, Extension Housing Bushing/Seal 308-045 (16-015) | | | Remover, Input Shaft Fifth Gear 308-082 (16-035) | General Equipment Disassembly CAUTION:Use vise protectors. CAUTION:Use a copper or plastic mallet to prevent damage. | | -
Using the special tools, mount the transaxle on the mounting stand. | | | -
Clean any grease and foreign material from the input shaft. | | | -
Remove the clutch slave cylinder. | | | -
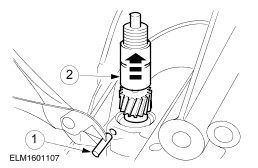
Remove the vehicle speed sensor (VSS). - Remove the retaining pin.
- Pull out the VSS.
| | | -
Remove the selector interlock mechanism. | | | -
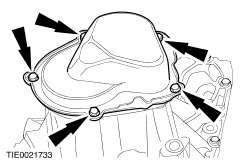
Remove the fifth gear housing cover retaining bolts. | | | -
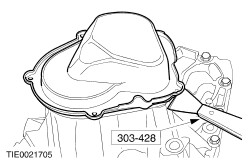
Using the special tool, remove the fifth gear housing cover. | | | -
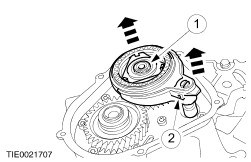
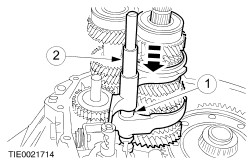
Remove the fifth gear synchronizer assembly, the selector fork and the fifth gear. - Remove and discard the snap ring.
- Remove and discard the retaining pin.
| | | -
NOTE:To aid assembly mark the position of the fifth gear synchronizer assembly. Disassemble the fifth gear and synchronizer assembly. - Snap-ring.
- Retaining plate.
- Synchronizer assembly.
- Synchronizer ring.
- Fifth gear.
| | | -
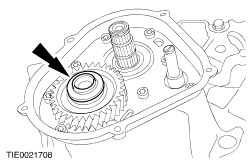
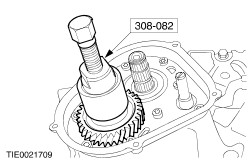
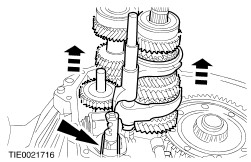
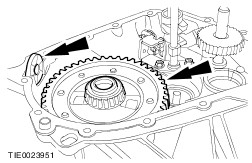
Remove the fifth gear snap ring. | | | -
Using the special tool, remove the fifth gear. | | | -
Remove the fifth gear housing. | | | -
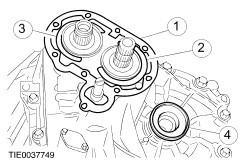
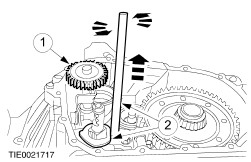
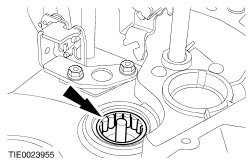
Remove the fifth gear housing gasket, the snap rings and the blanking plug. - Remove and discard the gasket.
- Remove the output shaft snap ring.
- Remove the input shaft snap ring.
- Pull out the blanking plug.
| | | -
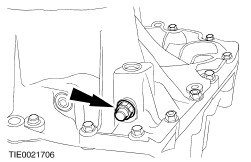
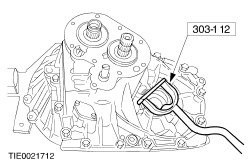
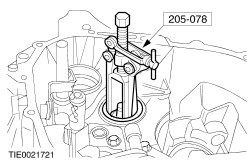
Using the special tool, remove both halfshaft oil seals (left-hand side shown). - Only remove the reversing lamp switch if there is evidence of leakage.
| | | -
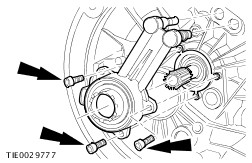
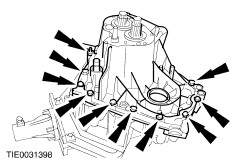
Separate the two halves of the transaxle housing (14 bolts). - Carefully separate the transaxle housing.
| | | -
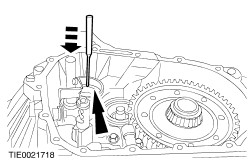
Remove the selector shaft guide sleeve upper snap ring. - Remove and discard the upper snap ring.
- Slide the selector shaft guide sleeve downwards.
| | | -
Remove the selector shaft guide sleeve. - Remove and discard the selector shaft guide sleeve lower snap ring.
- Remove the selector shaft guide sleeve.
| | | -
NOTE:Install a rubber band to the second selector shaft to aid assembly. Remove the input shaft, the output shaft and the selector forks as an assembly. | | | -
Remove the reverse gear idler, the selector shaft and the shift lock. - Remove the reverse gear idler.
- Remove the selector shaft and the shift lock.
| | | -
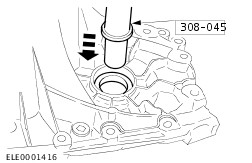
Using a suitable drift, remove and discard the input shaft oil seal. | | | -
Remove the differential assembly and the permanent magnet. | | | -
Remove the output shaft roller bearing. - Remove the rollers and the roller cage from the output shaft roller bearing.
| | | -
CAUTION:Only use the special tool as shown, failure to do so may result in the blanking plug being pressed out of the housing. Using the special tool, remove the output shaft roller bearing outer race. | | | -
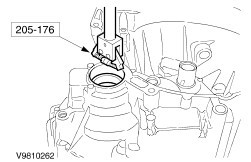
Using the special tool, remove the differential bearing cup. | | | -
NOTE:Install the special tool in the transaxle housing grooves. Using the special tool, remove the differential bearing cup. | | |