| Removal and Installation Special Tool(s) | | Separator, Ball Joint 211-020 (13-006) | | | Spindle Carrier Lever 204-159 (14-039) | General Equipment Removal | | -
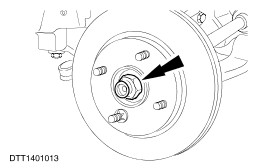
CAUTION:Use a socket to loosen the wheel hub retaining nut to prevent damage. Loosen the wheel hub retaining nut. - Bend back the locking tab.
- Loosen the wheel hub retaining nut.
| | | -
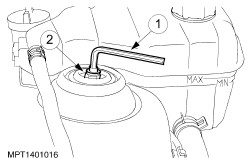
Loosen the strut and spring assembly upper retaining nut. - Prevent the piston rod from rotating using an Allen key.
- Loosen the top mount nut.
| | | -
Detach the flexible brake hose from the suspension strut. | | | -
CAUTION:Secure the brake caliper out of the way to prevent damage to the flexible brake hose. Detach the brake caliper and anchor plate. | | | -
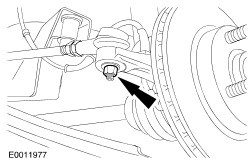
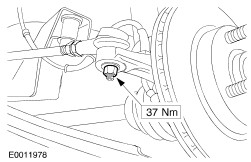
Remove the tie-rod end locknut. | | | -
CAUTION:Protect the ball joint seal using a soft cloth to prevent damage. Using the special tool, detach the tie-rod end ball joint. | | | -
Remove the wheel hub retaining nut and washer. | | | -
Remove the brake disc. - Remove the disc retainer, if equipped.
- Remove the brake disc.
| | | -
Remove the lower arm to wheel knuckle pinch bolt and nut. | | | -
CAUTION:Protect the ball joint seal using a soft cloth to prevent damage. Remove the lower arm from the wheel knuckle. | | | -
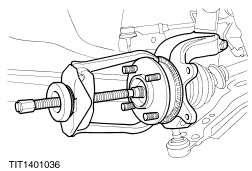
CAUTION:Make sure that the halfshaft does not detach from the inner constant velocity joint. Using a two-legged puller, pull the wheel knuckle off the halfshaft. | | | -
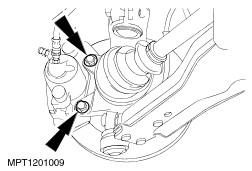
Remove the suspension strut to wheel knuckle pinch bolt and nut. | | | -
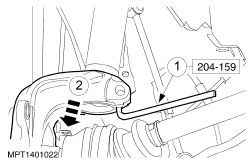
Using the special tool, remove the wheel knuckle from the suspension stut. - Insert the special tool and rotate through 90 degrees.
- Remove the wheel knuckle.
| Installation | | -
CAUTION:Make sure a heat shield is installed to prevent damage to the ball joint. To install, reverse the removal procedure. | | |