| Diagnosis and Testing Refer to Wiring Diagrams Section 417-01, for schematic and connector information. Special Tool(s) | | Terminal Probe Kit 29-011A | Inspection and Checking - Verify the customer concern.
- Visually check the following electrical causes for the concern:
Visual Inspection | Electrical | - Fuse(s)
- Bulb(s)
- Connectors
- Trailer socket
- Trailer lamps
- Wiring harness
| - If the cause for the concern is found, rectify it before performing any further tests (if possible).
- If the concern is not visually evident, refer to the Symptom Chart.
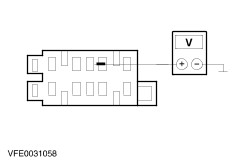
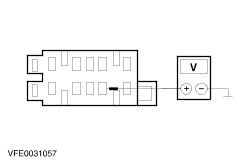
Symptom Chart Symptom Chart | Symptom | Possible Sources | Action | | Trailer lamps inoperative | * Fuse(s) * Circuit(s) in the vehicle * Circuit(s) in the trailer * Trailer socket * Trailer interface (TI) module * Trailer switch interface (SI) module * Rear fog lamp cut-off relay * Central junction box (CJB) | * | | One individual trailer lamp inoperative | * Circuit(s) in the vehicle * Circuit(s) in the trailer * Trailer interface (TI) module * Trailer switch interface (SI) module | * | | Trailer lamps illuminate continuously | * Circuit(s) in the vehicle * Circuit(s) in the trailer * Trailer socket * Trailer interface (TI) module * Trailer switch interface (SI) module | * | System Checks NOTE:Use a digital multimeter for all electrical measurements. | PINPOINT TEST A : TRAILER LAMPS INOPERATIVE | | TEST CONDITIONS | DETAILS/RESULTS/ACTIONS | | A1: DETERMINE WHICH LAMPS ON THE TRAILER ARE INOPERATIVE | | | 1 Ignition switch in position II. | | | 2 Switch on the SIDE LIGHTS, STOP LAMPS, REAR FOG LAMPS and LEFT and RIGHT-HAND TURN SIGNAL LAMPS in turn. Engage REVERSE GEAR. | | | 3 Check the trailer lamps. | | | Are all lamps on the trailer inoperative? Yes No - Only reversing lamps inoperative (both sides): RENEW the trailer interface (TI) module. CHECK the operation of the system. - Stop lamps and turn signal lamps inoperative: GO to A7. - Only stop lamps inoperative: GO to A9. - Only reversing lamp(s) inoperative: GO to A14. - Only rear fog lamp(s) inoperative: GO to A17. - Only turn signal lamps inoperative (both sides): RENEW the trailer switch interface (SI) module. CHECK the operation of the system. | | A2: CHECK THE GROUND CONNECTION OF THE TRAILER SOCKET | | | 1 Ignition switch in position 0. | | | 2 Measure the resistance between: - 7-pin trailer socket: connector C2010, pin 3, circuit (BN), and ground.
- 7-pin auxiliary trailer socket: connector C2013, pin 3, circuit (BN/WH) and ground and between pin 5, circuit (BN/WH) and ground.
- 13-pin trailer socket: connector C2012, pin 3, circuit (BN/WH) and ground and between pin 13, circuit (BN) and ground.
| | | Is the resistance less than 2 Ohm? Yes No LOCATE and RECTIFY the break in the circuit between the trailer socket and ground G302, G303 or G300 using the Wiring Diagrams. CHECK the operation of the system. | | A3: CHECK FUSE F74 (CJB) | | | 1 CHECK fuse F74 (20 A) (CJB). | | | Is the fuse OK.? Yes No RENEW fuse F74 (20 A). CHECK the operation of the system. If the fuse blows again, LOCATE and RECTIFY the short circuit to ground using the Wiring Diagrams. | | A4: CHECK THE VOLTAGE AT FUSE F74 (CJB) | | | 1 Connect fuse F74 (CJB). | | | 2 Ignition switch in position II. | | | 3 Measure the voltage between fuse F74 (20 A) and ground. | | | Does the meter display battery voltage? Yes No RENEW the central junction box (CJB). CHECK the operation of the system. | | A5: CHECK THE POWER SUPPLY TO THE TRAILER INTERFACE (TI) MODULE | | | 1 Ignition switch in position 0. | | | 2 Disconnect trailer interface (TI) module from connector C2000. | | | 3 Ignition switch in position II. | | | 4 Measure the voltage between the trailer interface (TI) module, connector C2000, pin 2, circuit (RD), wiring harness side and ground. | | | Does the meter display battery voltage? Yes No LOCATE and RECTIFY the break in the circuit between soldered connection S810 and the trailer interface (TI) module using the Wiring Diagrams. CHECK the operation of the system. CHECK the operation of the system. | | A6: CHECK THE GROUND CONNECTION OF THE TRAILER INTERFACE (TI) MODULE | | | 1 Ignition switch in position 0. | | | 2 Measure the resistance between the trailer interface (TI) module, connector C2000, pin 1, circuit (BN), wiring harness side and ground. | | | Is the resistance less than 2 Ohm? Yes Continue fault finding on the trailer. If the trailer electrical system is OK, RENEW the trailer interface (TI) module. CHECK the operation of the system. No LOCATE and RECTIFY the break in the circuit between the trailer interface (TI) module and soldered connection S811 using the Wiring Diagrams. CHECK the operation of the system. | | A7: CHECK THE POWER SUPPLY TO THE TRAILER SWITCH INTERFACE (SI) MODULE | | | 1 Ignition switch in position 0. | | | 2 Disconnect trailer switch interface (SI) module from connector C2002. | | | 3 Ignition switch in position II. | | | 4 Measure voltage between trailer switch interface (SI) module, connector C2002, pin 1, circuit (RD), wiring harness side and ground. | | | Does the meter display battery voltage? Yes No LOCATE and RECTIFY the break in the circuit between soldered connection S810 and the trailer switch interface (SI) module using the Wiring Diagrams. CHECK the operation of the system. | | A8: CHECK THE GROUND CONNECTION OF THE TRAILER SWITCH INTERFACE (SI) MODULE | | | 1 Ignition switch in position 0. | | | 2 Measure the resistance between the trailer switch interface (SI) module, connector C2002, pin 3, circuit (BN), wiring harness side and ground. | | | Is the resistance less than 2 Ohm? Yes RENEW the trailer switch interface (SI) module. CHECK the operation of the system. No LOCATE and RECTIFY the break in the circuit between trailer switch interface (SI) module and soldered connection S811 using the Wiring Diagrams. CHECK the operation of the system. | | A9: CHECK THE VOLTAGE AT THE TRAILER SOCKET WITH THE STOP LAMPS SWITCHED ON | | | 1 Ignition switch in position 0. | | | 2 Disconnect stop lamp switch from connector C523. | | | 3 Connect a fused jumper wire (10 A)to the stop lamp switch, connector C523, between pin 3, circuit 15-LG23 (GN/WH) and pin 1, circuit 15S-LG23 (GN/WH), wiring harness side. | | | 4 Leave the jumper wire connected for the following three test steps. | | | 5 Ignition switch in position II. | | | 6 Measure the voltage between the trailer socket: - 7-pin socket: connector C2010, pin 6, circuit (VT), and ground.
- 13-pin socket: connector C2012, pin 6, circuit (VT), and ground.
| | | Does the meter display battery voltage? Yes Continue fault finding on the trailer. No | | A10: CHECK THE VOLTAGE AT THE TRAILER INTERFACE (TI) MODULE WITH THE STOP LAMPS SWITCHED ON | | | 1 Ignition switch in position 0. | | | 2 Disconnect trailer interface (TI) module from connector C2000. | | | 3 Ignition switch in position II. | | | 4 Measure the voltage between the trailer interface (TI) module, connector C2000, pin 7, circuit (BK/RD), wiring harness side and ground. | | | Does the meter display battery voltage? Yes No LOCATE and RECTIFY the break in circuit (BK/RD) between connector C2004 (4/5 door) or C2005 (estate) and the trailer interface (TI) module using the Wiring Diagrams. CHECK the operation of the system. | | A11: CHECK THE TRAILER INTERFACE (TI) MODULE | | | 1 Ignition switch in position 0. | | | 2 Use a fused test cable (10 A) to bridge the trailer interface (TI) module, connector C2000, pin 7, circuit (BK/RD) and pin 8, circuit (BK/YE), wiring harness side. | | | 3 Ignition switch in position II. | | | 4 Measure the voltage between the trailer socket: - 7-pin socket: connector C2010, pin 6, circuit (VT), and ground.
- 13-pin socket: connector C2012, pin 6, circuit (VT), and ground.
| | | Does the meter display battery voltage? Yes RENEW the trailer interface (TI) module. CHECK the operation of the system. No | | A12: CHECK THE CIRCUIT BETWEEN THE TRAILER INTERFACE (TI) MODULE AND THE TRAILER SWITCH INTERFACE (SI) MODULE | | | 1 Ignition switch in position 0. | | | 2 Disconnect trailer switch interface (SI) module from connector C2002. | | | 3 Measure the resistance between the trailer interface (TI) module, connector C2000, pin 8, circuit (BK/YE), wiring harness side and the trailer switch interface (SI) module, connector C2002, pin 4, circuit (BK/YE), wiring harness side. | | | Is the resistance less than 2 Ohm? Yes No LOCATE and RECTIFY the break in the circuit between the trailer interface (TI) module and the trailer switch interface module (SI) using the Wiring Diagrams. CHECK the operation of the system. | | A13: CHECK THE CIRCUIT BETWEEN THE TRAILER SWITCH INTERFACE (SI) MODULE AND THE TRAILER SOCKET | | | 1 Measure the resistance between the trailer switch interface (SI) module, connector C2002, pin 2, circuit (VT), wiring harness side and the trailer socket: - 7-pin socket: connector C2010, pin 6, circuit (VT).
- 13-pin socket: connector C2012, pin 6, circuit (VT).
| | | Is the resistance less than 2 Ohm? Yes RENEW the trailer switch interface (SI) module. CHECK the operation of the system. No LOCATE and RECTIFY the break in the circuit between the trailer switch interface (SI) module and the trailer socket using the Wiring Diagrams. CHECK the operation of the system. | | A14: CHECK THE VOLTAGE AT THE TRAILER SOCKET WITH THE REVERSING LAMPS SWITCHED ON | | | 1 Ignition switch in position II. | | | 2 Engage REVERSE GEAR. | | | 3 Measure the voltage between: - 7-pin auxiliary trailer socket C2013, pin 1, circuit (VT/OG) and ground.
- 13-pin trailer socket C2012, pin 8, circuit (VT/OG) and ground.
| | | Does the meter display battery voltage? Yes Continue fault finding on the trailer. No | | A15: CHECK THE VOLTAGE AT THE TRAILER INTERFACE (TI) MODULE WITH THE REVERSING LAMPS SWITCHED ON | | | 1 Ignition switch in position 0. | | | 2 Disconnect trailer interface (TI) module from connector C2000. | | | 3 Ignition switch in position II. | | | 4 Engage REVERSE GEAR. | | | 5 Measure the voltage between the trailer interface (TI) module, connector C2000, pin 9, circuit (BK), wiring harness side and ground. | | | Does the meter display battery voltage? Yes No LOCATE and RECTIFY the break in circuit (BK) between connector C2004 (4/5 door) or C2005 (estate) and the trailer interface (TI) module using the Wiring Diagrams. CHECK the operation of the system. | | A16: CHECK THE TRAILER INTERFACE (TI) MODULE | | | 1 Ignition switch in position 0. | | | 2 Use a fused test cable (7.5 A) to bridge the trailer interface (TI) module, connector C2000, pin 9, circuit (BK) and pin 10, circuit (VT/OG), wiring harness side. | | | 3 Ignition switch in position II. | | | 4 Engage REVERSE GEAR. | | | 5 Measure the voltage between: - 7-pin auxiliary trailer socket C2013, pin 1, circuit (VT/OG) and ground.
- 13-pin trailer socket C2012, pin 8, circuit (VT/OG) and ground.
| | | Does the meter display battery voltage? Yes RENEW the trailer interface (TI) module. CHECK the operation of the system. No LOCATE and RECTIFY the break in circuit between the trailer interface (TI) module and the trailer socket using the Wiring Diagrams. CHECK the operation of the system. | | A17: CHECK THE VOLTAGE AT THE TRAILER SOCKET WITH THE REAR FOG LAMPS SWITCHED ON | | | 1 Ignition switch in position II. | | | 2 Switch on the REAR FOG LAMPS. | | | 3 Measure the voltage between the trailer socket: - 7-pin socket: connector C2010, pin 2, circuit (RD/YE), and ground.
- 13-pin socket: connector C2012, pin 2, circuit (RD/YE), and ground.
| | | Does the meter display battery voltage? Yes Continue fault finding on the trailer. No | | A18: CHECK THE GROUND CONNECTION OF THE REAR FOG LAMP CUT-OFF RELAY | | | 1 Ignition switch in position 0. | | | 2 Disconnect rear fog lamp cut-off relay from socket 2008. | | | 3 Measure the resistance between the rear fog lamp cut-off relay, socket C2008, circuit (BN), wiring harness side and ground. | | | Is the resistance less than 2 Ohm? Yes No LOCATE and RECTIFY the break in the circuit between the rear fog lamp cut-off relay and soldered connection S811 using the Wiring Diagrams. CHECK the operation of the system. | | A19: CHECK THE REAR FOG LAMP CUT-OFF RELAY | | | 1 Use a fused test cable (15 A) to bridge the rear fog lamp cut-off relay, connector C2008, circuit (RD/WH) and circuit (RD/YE), wiring harness side. | | | 2 Ignition switch in position II. | | | 3 Switch on the REAR FOG LAMPS. | | | 4 Measure the voltage between the trailer socket: - 7-pin socket: connector C2010, pin 2, circuit (RD/YE), and ground.
- 13-pin socket: connector C2012, pin 2, circuit (RD/YE), and ground.
| | | Does the meter display battery voltage? Yes RENEW the rear fog lamp cut-off relay CHECK the operation of the system. No LOCATE and RECTIFY the break in the circuit between the rear fog lamp cut-off relay and the trailer socket using the Wiring Diagrams. CHECK the operation of the system. | | PINPOINT TEST B : ONE INDIVIDUAL TRAILER LAMP INOPERATIVE | | TEST CONDITIONS | DETAILS/RESULTS/ACTIONS | | B1: DETERMINE WHICH LAMP IS INOPERATIVE | | | 1 Ignition switch in position II. | | | 2 Check the trailer lamps. | | | Is one of the rear lamps on the trailer inoperative? Yes - Left-hand trailer rear lamp inoperative: GO to B2. - Right-hand trailer rear lamp inoperative: GO to B5. No - Trailer stop lamps inoperative: GO to Pinpoint Test A. - Trailer reversing lamp(s) inoperative: GO to Pinpoint Test A. - Trailer rear fog lamp(s) inoperative: GO to Pinpoint Test A. - Left-hand trailer turn signal lamp inoperative: GO to B8. - Right-hand trailer turn signal lamp inoperative: GO to B10. | | B2: CHECK THE VOLTAGE AT THE TRAILER SOCKET WITH THE SIDE LIGHTS SWITCHED ON | | | 1 SWITCH ON side lights. | | | 2 Measure the voltage between the trailer socket: - 7-pin socket: connector C2010, pin 7, circuit (OG/WH), and ground.
- 13-pin socket: connector C2012, pin 7, circuit (OG/WH), and ground.
| | | Does the meter display battery voltage? Yes Continue fault finding on the trailer. No | | B3: CHECK THE VOLTAGE AT THE TRAILER INTERFACE (TI) MODULE WITH THE SIDE LAMPS SWITCHED ON | | | 1 Ignition switch in position 0. | | | 2 Disconnect trailer interface (TI) module from connector C2000. | | | 3 Ignition switch in position II. | | | 4 Measure the voltage between the trailer interface (TI) module, connector C2000, pin 3, circuit (GY/BK), wiring harness side and ground. | | | Does the meter display battery voltage? Yes No LOCATE and RECTIFY the break in circuit (GY/BK) between connector C2004 (4/5 door) or C2005 (estate) and the trailer interface (TI) module using the Wiring Diagrams. CHECK the operation of the system. | | B4: CHECK THE CIRCUIT BETWEEN THE TRAILER INTERFACE (TI) MODULE AND THE TRAILER SOCKET | | | 1 Ignition switch in position 0. | | | 2 Measure the resistance between the trailer interface (TI) module, connector C2000, pin 4, circuit (OG/WH), wiring harness side and the trailer socket. - 7-pin socket: connector C2010, pin 7, circuit (OG/WH).
- 13-pin socket: connector C2012, pin 7, circuit (OG/WH).
| | | Is the resistance less than 2 Ohm? Yes RENEW the trailer interface (TI) module. CHECK the operation of the system. No LOCATE and RECTIFY the break in circuit between the trailer interface (TI) module and the trailer socket using the Wiring Diagrams. CHECK the operation of the system. | | B5: CHECK THE VOLTAGE AT THE TRAILER SOCKET WITH THE SIDE LIGHTS SWITCHED ON | | | 1 SWITCH ON side lights. | | | 2 Measure the voltage between the trailer socket: - 7-pin socket: connector C2010, pin 5, circuit (OG), and ground.
- 13-pin socket: connector C2012, pin 5, circuit (OG), and ground.
| | | Does the meter display battery voltage? Yes Continue fault finding on the trailer. No | | B6: CHECK THE VOLTAGE AT THE TRAILER INTERFACE (TI) MODULE WITH THE SIDE LAMPS SWITCHED ON | | | 1 Ignition switch in position 0. | | | 2 Disconnect trailer interface (TI) module from connector C2000. | | | 3 Ignition switch in position II. | | | 4 Measure the voltage between the trailer interface (TI) module, connector C2000, pin 5, circuit (GY/RD), wiring harness side and ground. | | | Does the meter display battery voltage? Yes No LOCATE and RECTIFY the break in circuit (GY/RD) between connector C2006 (4/5-door) or C2007 (estate) and the trailer interface (TI) module using the Wiring Diagrams. CHECK the operation of the system. | | B7: CHECK THE CIRCUIT BETWEEN THE TRAILER INTERFACE (TI) MODULE AND THE TRAILER SOCKET | | | 1 Ignition switch in position 0. | | | 2 Measure the resistance between the trailer interface (TI) module, connector C2000, pin 6, circuit (OG), wiring harness side and the trailer socket: - 7-pin socket: connector C2010, pin 5, circuit (OG), and ground.
- 13-pin socket: connector C2012, pin 5, circuit (OG), and ground.
| | | Is the resistance less than 2 Ohm? Yes RENEW the trailer interface (TI) module. CHECK the operation of the system. No LOCATE and RECTIFY the break in circuit between the trailer interface (TI) module and the trailer socket using the Wiring Diagrams. CHECK the operation of the system. | | B8: CHECK THE VOLTAGE AT THE TRAILER SOCKET WITH THE LEFT-HAND TURN SIGNAL SWITCHED ON | | | 1 Ignition switch in position II. | | | 2 Switch on LEFT-HAND TURN SIGNAL. | | | 3 Measure the voltage between the trailer socket: - 7-pin socket: connector C2010, pin 1, circuit (BU), and ground.
- 13-pin socket: connector C2012, pin 1, circuit (BU), and ground.
| | | Does the voltage alternate between 0 V and battery voltage? Yes Continue fault finding on the trailer. No | | B9: CHECK THE CIRCUIT BETWEEN THE TRAILER SWITCH INTERFACE (SI) MODULE AND THE TRAILER SOCKET | | | 1 Ignition switch in position 0. | | | 2 Disconnect trailer switch interface (SI) module from connector C2002. | | | 3 Measure the resistance between the trailer switch interface (SI) module, connector C2002, pin 7, circuit (BU), wiring harness side and the trailer socket: - 7-pin socket: connector C2010, pin 1, circuit (BU).
- 13-pin socket: connector C2012, pin 1, circuit (BU).
| | | Is the resistance less than 2 Ohm? Yes RENEW the trailer switch interface (SI) module. CHECK the operation of the system. No LOCATE and RECTIFY the break in the circuit between the trailer switch interface (SI) module and the trailer socket using the Wiring Diagrams. CHECK the operation of the system. | | B10: CHECK THE VOLTAGE AT THE TRAILER SOCKET WITH THE RIGHT-HAND TURN SIGNAL SWITCHED ON | | | 1 Ignition switch in position II. | | | 2 Switch on RIGHT-HAND TURN SIGNAL. | | | 3 Measure the voltage between the trailer socket: - 7-pin socket: connector C2010, pin 4, circuit (BU/RD), and ground.
- 13-pin socket: connector C2012, pin 4, circuit (BU/RD), and ground.
| | | Does the voltage alternate between 0 V and battery voltage? Yes Continue fault finding on the trailer. No | | B11: CHECK THE CIRCUIT BETWEEN THE TRAILER SWITCH INTERFACE (SI) MODULE AND THE TRAILER SOCKET | | | 1 Ignition switch in position 0. | | | 2 Disconnect trailer switch interface (SI) module from connector C2002. | | | 3 Measure the resistance between the trailer switch interface (SI) module, connector C2002, pin 9, circuit (BU/RD), wiring harness side and the trailer socket: - 7-pin socket: connector C2010, pin 4, circuit (BU/RD).
- 13-pin socket: connector C2012, pin 4, circuit (BU/RD).
| | | Is the resistance less than 2 Ohm? Yes RENEW the trailer switch interface (SI) module. CHECK the operation of the system. No LOCATE and RECTIFY the break in the circuit between the trailer switch interface (SI) module and the trailer socket using the Wiring Diagrams. CHECK the operation of the system. | | PINPOINT TEST C : TRAILER LAMPS ILLUMINATE CONTINUOUSLY | | TEST CONDITIONS | DETAILS/RESULTS/ACTIONS | | C1: CHECK THE FAULT SYMPTOMS | | | 1 Ignition switch in position II. | | | 2 Check the trailer lamps. | | | Does/do the trailer rear fog lamp(s) illuminate continuously? Yes No - Left-hand trailer rear lamp illuminates continuously: GO to C3. - Right-hand trailer rear lamp illuminates continuously: GO to C4. - Trailer stop lamps illuminate continuously: GO to C7. - Trailer reversing lamps illuminate continuously: GO to C11. - Trailer turn signal lamp(s) illuminate(s) continuously: GO to C13. | | C2: CHECK FOR SHORT TO BATTERY VOLTAGE AT THE TRAILER SOCKET (REAR FOG LAMP) | | | 1 Measure the voltage between the trailer socket: - 7-pin socket: connector C2010, pin 2, circuit (RD/YE) and ground.
- 13-pin socket: connector C2012, pin 2, circuit (RD/YE) and ground.
| | | Does the meter display battery voltage? Yes LOCATE and RECTIFY the short to battery voltage in the circuit between the rear fog lamp cut-off relay and the trailer socket using the Wiring Diagrams. CHECK the operation of the system. If necessary RENEW the trailer socket. CHECK the operation of the system. No Continue fault finding on the trailer. | | C3: CHECK FOR SHORT TO BATTERY VOLTAGE ON THE VEHICLE (LEFT-HAND REAR LAMP) | | | 1 Measure the voltage between the trailer socket: - 7-pin socket: connector C2010, pin 7, circuit (OG/WH) and ground.
- 13-pin socket: connector C2012, pin 7, circuit (OG/WH) and ground.
| | | Does the meter display battery voltage? Yes No Continue fault finding on the trailer. | | C4: CHECK FOR A SHORT TO BATTERY VOLTAGE ON THE VEHICLE (RIGHT-HAND REAR LAMP) | | | 1 Measure the voltage between the trailer socket: - 7-pin socket: connector C2010, pin 5, circuit (OG) and ground.
- 13-pin socket: connector C2012, pin 5, circuit (OG) and ground.
| | | Does the meter display battery voltage? Yes No Continue fault finding on the trailer. | | C5: CHECK THE TRAILER INTERFACE (TI) MODULE | | | 1 Ignition switch in position 0. | | | 2 Disconnect fuse F74 (CJB). | | | 3 Ignition switch in position II. | | | 4 Measure the voltage between the trailer socket: - 7-pin socket: connector C2010, pin 7, circuit (OG/WH) and ground.
- 13-pin socket: connector C2012, pin 7, circuit (OG/WH) and ground.
| | | Is battery voltage displayed in one of the measurements? Yes LOCATE and RECTIFY the short to battery voltage in the circuit between the trailer interface (TI) module and the trailer socket using the Wiring Diagrams. CHECK the operation of the system. If necessary RENEW the trailer socket. CHECK the operation of the system. No RENEW the trailer interface (TI) module. CHECK the operation of the system. | | C6: CHECK THE TRAILER INTERFACE (TI) MODULE | | | 1 Ignition switch in position 0. | | | 2 Disconnect fuse F74 (CJB). | | | 3 Ignition switch in position II. | | | 4 Measure the voltage between the trailer socket: - 7-pin socket: connector C2010, pin 5, circuit (OG) and ground.
- 13-pin socket: connector C2012, pin 5, circuit (OG) and ground.
| | | Is battery voltage displayed in one of the measurements? Yes LOCATE and RECTIFY the short to battery voltage in the circuit between the trailer interface (TI) module and the trailer socket using the Wiring Diagrams. CHECK the operation of the system. If necessary RENEW the trailer socket. CHECK the operation of the system. No RENEW the trailer interface (TI) module. CHECK the operation of the system. | | C7: CHECK FOR SHORT TO BATTERY VOLTAGE AT THE TRAILER SOCKET (STOP LAMPS) | | | 1 Measure the voltage between the trailer socket: - 7-pin socket: connector C2010, pin 6, circuit (VT) and ground.
- 13-pin socket: connector C2012, pin 6, circuit (VT) and ground.
| | | Does the meter display battery voltage? Yes No Continue fault finding on the trailer. | | C8: NARROW DOWN THE LOCATION OF THE SHORT TO BATTERY VOLTAGE | | | 1 Ignition switch in position 0. | | | 2 Disconnect fuse F74 (CJB). | | | 3 Ignition switch in position II. | | | 4 Measure the voltage between the trailer socket: - 7-pin socket: connector C2010, pin 6, circuit (VT) and ground.
- 13-pin socket: connector C2012, pin 6, circuit (VT) and ground.
| | | Does the meter display battery voltage? Yes LOCATE and RECTIFY the break in the circuit between the trailer switch interface (SI) module and the trailer socket using the Wiring Diagrams. CHECK the operation of the system. If necessary RENEW the trailer socket. CHECK the operation of the system. No | | C9: CHECK THE TRAILER INTERFACE (TI) MODULE | | | 1 Ignition switch in position 0. | | | 2 Disconnect trailer interface (TI) module from connector C2000. | | | 3 Connect fuse F74 (CJB). | | | 4 Ignition switch in position II. | | | 5 Measure the voltage between the trailer socket: - 7-pin socket: connector C2010, pin 6, circuit (VT) and ground.
- 13-pin socket: connector C2012, pin 6, circuit (VT) and ground.
| | | Does the meter display battery voltage? Yes No RENEW the trailer interface (TI) module. CHECK the operation of the system. | | C10: CHECK THE CIRCUIT BETWEEN THE TRAILER INTERFACE (TI) MODULE AND THE TRAILER SWITCH INTERFACE (SI) MODULE | | | 1 Ignition switch in position 0. | | | 2 Disconnect fuse F74 (CJB). | | | 3 Ignition switch in position II. | | | 4 Measure the voltage between the trailer interface (TI) module, connector C2000, pin 8, circuit (BK/YE), wiring harness side and ground. | | | Does the meter display battery voltage? Yes LOCATE and RECTIFY the short to battery voltage in the circuit between the trailer interface (TI) module and the trailer switch interface module (SI) using the Wiring Diagrams. CHECK the operation of the system. No RENEW the trailer switch interface (SI) module. CHECK the operation of the system. | | C11: CHECK FOR A SHORT TO BATTERY VOLTAGE ON THE VEHICLE (REVERSING LAMP(S)) | | | 1 Measure the voltage between: - 7-pin auxiliary trailer socket: connector C2013, pin 1, circuit (VT/OG) and ground.
- 13-pin trailer socket: connector C2012, pin 8, circuit (VT/OG) and ground.
| | | Does the meter display battery voltage? Yes No Continue fault finding on the trailer. | | C12: CHECK THE TRAILER INTERFACE (TI) MODULE | | | 1 Ignition switch in position 0. | | | 2 Disconnect fuse F74 (CJB). | | | 3 Ignition switch in position II. | | | 4 Measure the voltage between: - 7-pin auxiliary trailer socket: connector C2013, pin 1, circuit (VT/OG) and ground.
- 13-pin trailer socket: connector C2012, pin 8, circuit (VT/OG) and ground.
| | | Does the meter display battery voltage? Yes LOCATE and RECTIFY the short to battery voltage in the circuit between the trailer interface (TI) module and the trailer socket using the Wiring Diagrams. CHECK the operation of the system. If necessary RENEW the trailer socket. CHECK the operation of the system. No RENEW the trailer interface (TI) module. CHECK the operation of the system. | | C13: CHECK FOR A SHORT TO BATTERY VOLTAGE ON THE VEHICLE (LEFT-HAND TURN SIGNAL LAMP) | | | 1 Measure the voltage between the trailer socket: - 7-pin socket: connector C2010, pin 1, circuit (BU) and ground.
- 13-pin socket: connector C2012, pin 1, circuit (BU) and ground.
| | | Does the meter display battery voltage? Yes No | | C14: CHECK FOR A SHORT TO BATTERY VOLTAGE ON THE VEHICLE (RIGHT-HAND TURN SIGNAL LAMP) | | | 1 Measure the voltage between the trailer socket: - 7-pin socket: connector C2010, pin 4, circuit (BU/RD) and ground.
- 13-pin socket: connector C2012, pin 4, circuit (BU/RD) and ground.
| | | Does the meter display battery voltage? Yes No Continue fault finding on the trailer. | | C15: CHECK THE TRAILER SWITCH INTERFACE (SI) MODULE | | | 1 Ignition switch in position 0. | | | 2 Disconnect fuse F74 (CJB). | | | 3 Ignition switch in position II. | | | 4 Measure the voltage between the trailer socket: - 7-pin socket: connector C2010, pin 1, circuit (BU) and ground.
- 13-pin socket: connector C2012, pin 1, circuit (BU) and ground.
| | | Does the meter display battery voltage? Yes LOCATE and RECTIFY the break in the circuit between the trailer switch interface (SI) module and the trailer socket using the Wiring Diagrams. CHECK the operation of the system. If necessary RENEW the trailer socket. CHECK the operation of the system. No RENEW the trailer switch interface (SI) module. CHECK the operation of the system. | | C16: CHECK THE TRAILER SWITCH INTERFACE (SI) MODULE | | | 1 Ignition switch in position 0. | | | 2 Disconnect fuse F74 (CJB). | | | 3 Ignition switch in position II. | | | 4 Measure the voltage between the trailer socket: - 7-pin socket: connector C2010, pin 4, circuit (BU/RD) and ground.
- 13-pin socket: connector C2012, pin 4, circuit (BU/RD) and ground.
| | | Does the meter display battery voltage? Yes LOCATE and RECTIFY the break in the circuit between the trailer switch interface (SI) module and the trailer socket using the Wiring Diagrams. CHECK the operation of the system. If necessary RENEW the trailer socket. CHECK the operation of the system. No RENEW the trailer switch interface (SI) module. CHECK the operation of the system. | |